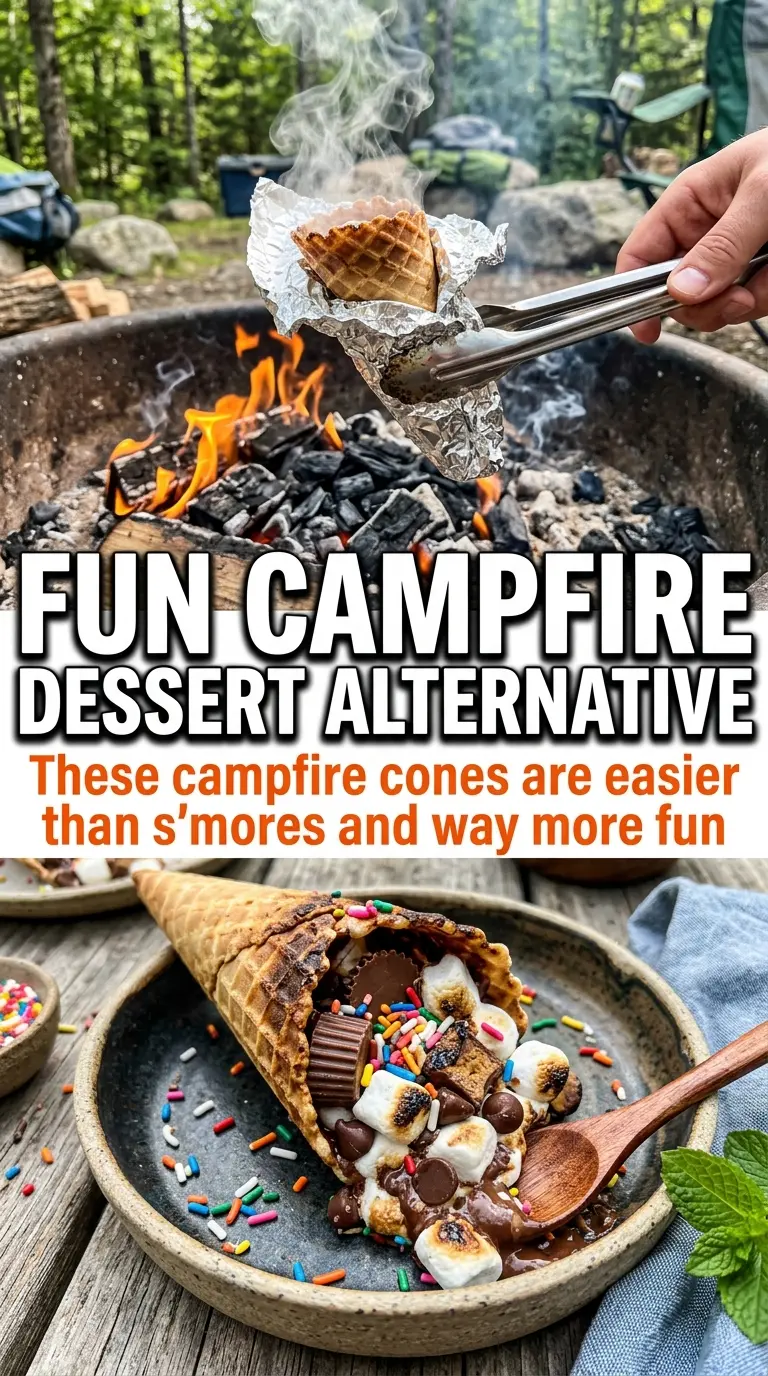
Campfire cones turn a handful of simple ingredients into a gooey, smoky dessert that feels a little bit playful the second you unwrap the foil. The waffle cone softens just enough around the edges, the marshmallows melt into the chocolate, and the fruit adds bright, jammy pockets that keep every bite from tasting one-note. It’s the kind of camp dessert that disappears fast because everyone wants to be the person holding the warm cone and a spoon.
What makes this version work is the layering. Marshmallows on the bottom help cushion the chocolate and fruit so the cone doesn’t collapse as quickly, and the foil keeps the heat trapped long enough to melt everything without burning the shell. I also like using a mix of banana and strawberries here because the fruit gives the filling a little lift after the chocolate and marshmallows go fully molten.
Below, I’ll walk through the parts that matter most: how to fill the cones without overpacking them, how to judge the heat so the cones warm through instead of scorching, and a few easy swaps if you want to change the filling without losing that campfire-dessert feel.
The chocolate melted into the marshmallows perfectly and the cones held up better than I expected. We rotated them on the grate for about 5 minutes and the filling came out gooey without burning the waffle shell.
Save these gooey campfire cones for your next cookout or camping night when you want a chocolate-and-fruit dessert with almost no cleanup.
The Trick to Keeping the Cone Intact While the Filling Melts
The biggest mistake with campfire cones is packing them too tightly and then cooking them over heat that’s too aggressive. A waffle cone will soften as the marshmallows melt, but if the fire is roaring hot, the outside can scorch before the center has time to turn gooey. Medium heat and a full foil wrap are what let the filling melt from the inside out.
Rotation matters more than people expect. Turn the foil packet every minute or so and listen for the faint sizzle that tells you the chocolate is softening without any burnt smell creeping in. If your cones are browning too fast, move them farther from the flames and let the coals do the work.
What Each Layer Is Doing in the Cone
- Waffle ice cream cones — These hold up better than sugar cones and give you that sturdy, crisp shell that can survive a few minutes over the fire. If all you have are regular cones, they’ll work, but they break faster and need gentler handling.
- Mini marshmallows — They melt into the gaps and create the sticky, pillowy base that makes the filling feel like campfire s’mores. Full-size marshmallows need to be cut up first, or they leave uneven pockets and take longer to melt.
- Chocolate chips — Chips stay in place better than chopped chocolate, so they’re easier to layer into a cone without everything sliding to the bottom. Milk chocolate gives the most classic campfire taste, but semi-sweet keeps the dessert from getting overly sweet.
- Bananas and strawberries — The fruit softens into a warm, jammy layer and adds enough acidity to keep the cone from tasting heavy. Use ripe but not mushy bananas so they melt, not disappear.
- Graham cracker pieces — These bring the s’mores element and a little crunch at the edges. Crush them lightly, not into dust, so you still get texture after the cone is heated.
- Aluminum foil — This is what turns the campfire into an oven. Wrap each cone completely and leave no seams open, or the top can dry out before the center is melted.
Building the Packet So Everything Melts at the Same Pace
Layer the Filling with the Softest Ingredients in the Middle
Start with a few marshmallows, then chocolate chips, then fruit, and finish with a little more marshmallow and graham cracker pieces near the top. That order helps the chocolate melt into the marshmallows instead of sitting in a hard layer at the bottom. Don’t overfill the cone past the rim, or the top will spill once the marshmallows expand.
Wrap Tightly Before the Cone Hits the Heat
Wrap each filled cone completely in foil so the heat stays trapped around the filling. A loose packet lets steam escape and leaves you with warm fruit and unmelted chocolate. Press the foil gently around the cone shape, but don’t crush it, because the cone needs a little room for the filling to bubble.
Cook Just Long Enough for the Center to Go Soft
Place the packets on a campfire grate over medium heat and rotate them as they cook. After about 4 to 5 minutes, the foil should feel hot and the cone should smell toasted. If you open one and the chocolate still looks firm, rewrap it and give it another minute instead of blasting it with direct flame.
Let It Rest Before You Peel Back the Foil
Give the cones about 2 minutes to cool before opening them. The filling is molten when it comes off the fire, and the short rest keeps it from running everywhere the second you unwrap it. Serve with a spoon and eat straight from the foil for the easiest cleanup.
Three Ways to Change the Filling Without Losing the Campfire Feel
Dairy-Free Version
Use dairy-free chocolate chips and check the marshmallows for gelatin-free or vegan options if that matters for your table. The texture stays the same, but the flavor leans a little more cocoa-forward because there’s no milk chocolate richness to soften it.
Gluten-Free Swap
Use gluten-free waffle cones and gluten-free graham-style crumbs if you need the full s’mores effect. The filling itself is naturally gluten-free, so this swap keeps the dessert just as gooey without changing the cooking method.
More Classic S’mores Flavor
Skip the fruit and double the graham crackers if you want a more traditional campfire dessert. You’ll get a richer, toastier filling, but it will be a little heavier and less juicy than the fruit-filled version.
Make-It-Your-Way Fruit Mix
Swap in blueberries, raspberries, or diced peaches if that’s what you have on hand. Juicier fruit will soften more quickly, so keep the cones wrapped close to the 4-minute mark to avoid a soggy shell.
Storage and Reheating
- Refrigerator: Best eaten right away. If you have leftovers, refrigerate the filling in the cone for up to 1 day, but the cone will soften as it sits.
- Freezer: I don’t recommend freezing these. The fruit turns watery and the cone loses its texture once thawed.
- Reheating: Rewrap in fresh foil and warm over low campfire heat or in a 300°F oven for a few minutes. The common mistake is reheating too hot, which burns the cone before the filling loosens again.
Answers to the Questions Worth Asking

Campfire Cones
Ingredients
Equipment
Method
- Fill each waffle cone with layers of mini marshmallows, chocolate chips, banana slices, strawberries, and graham cracker pieces.
- Wrap each filled cone completely in aluminum foil, sealing it snugly so it stays closed on the heat.
- Place the wrapped cones on the campfire grate over medium heat for 4-5 minutes, rotating occasionally for even melting.
- Remove the cones from the fire and let them cool for exactly 2 minutes so the filling sets slightly but stays molten.
- Carefully unwrap the foil and serve immediately with a spoon, revealing the melted marshmallows and chocolatey fruit layers.