Crispy sweet and sour pork hits the table best when the coating stays shattery and the sauce clings in a glossy layer instead of turning the crust soggy. That contrast is the whole point here: tender pork inside, light crunch outside, and a bright red-orange sauce with just enough tang to keep every bite moving. When it’s done right, it tastes like the version you order out, only fresher and with bigger pieces of pork.
The trick is building two separate layers of protection on the pork: a quick egg-soy marinade for seasoning, then a dry coating of cornstarch and flour for crispness. Frying in batches at 350°F matters more than people think. If the oil is too cool, the coating drinks it up; if it’s too hot, the outside browns before the center cooks. The sauce also needs a quick boil after the cornstarch goes in so it thickens enough to glaze the pork instead of pooling at the bottom of the pan.
Below, I’ll walk through the part that keeps the pork crisp even after saucing, plus the small adjustments that help if you want it a little sweeter, sharper, or lighter.
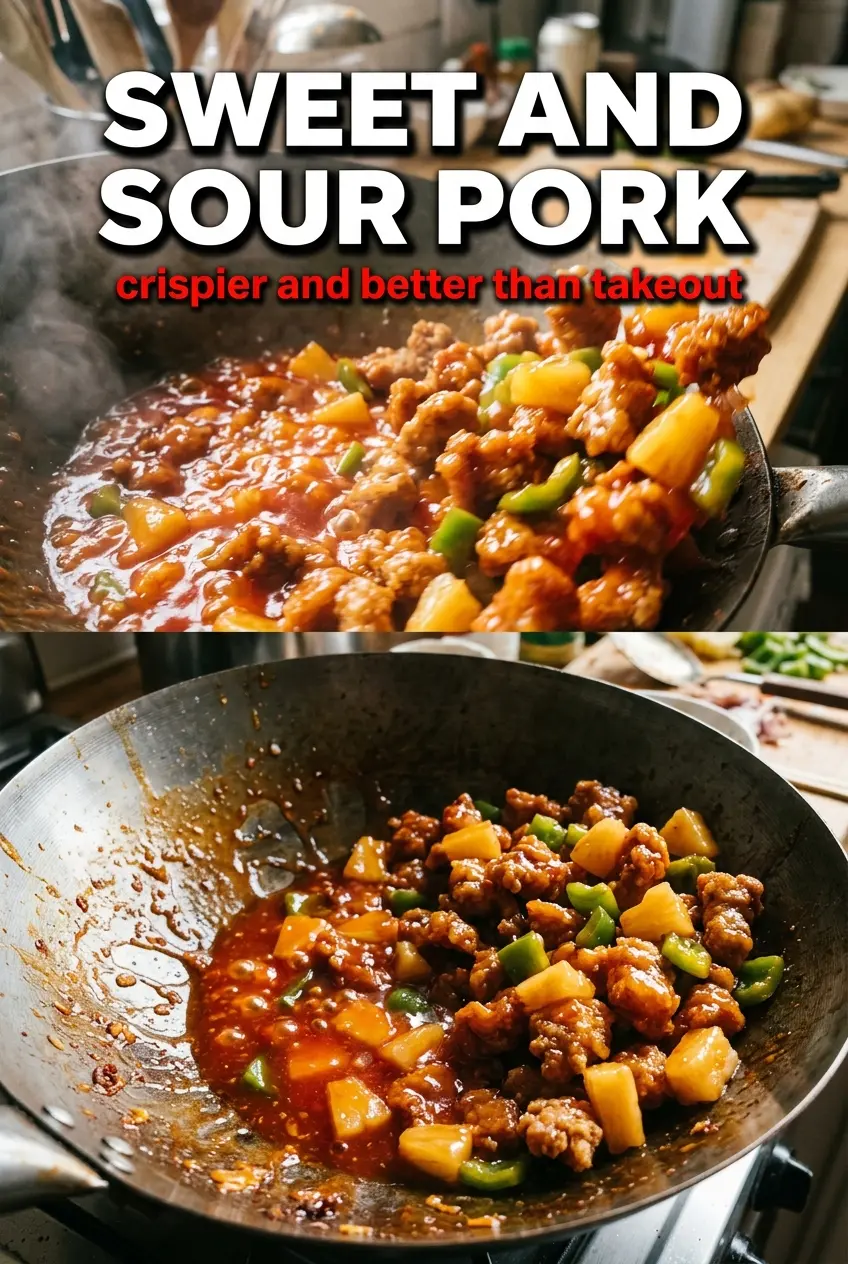
The pork stayed crisp even after I tossed it in the sauce, and the pineapple gave the sauce that sweet-tangy balance I was missing before. My husband kept stealing pieces straight from the pan.
Like this sweet and sour pork? Save it for the nights when you want crispy pork, pineapple, and glossy takeout-style sauce without waiting on delivery.
The Part That Keeps the Pork Crisp After the Sauce Goes On
The biggest mistake with sweet and sour pork is letting the fried coating sit in sauce too long before serving. The crust starts out crisp, but once it soaks, it turns soft fast. That’s why the sauce should be finished first or at least ready in the pan before the pork goes back in. You want the toss to be quick, almost aggressive, so every piece gets coated and plated while the edges still have some crunch left.
The other thing that matters is batch frying. Crowding the pan drops the oil temperature, and that gives you pale, heavy pork instead of a light, crisp shell. Keep the pieces moving only after they’ve had a chance to set. If you poke them too early, the coating can slip right off.
What Each Ingredient Is Doing in This Dish

- Pork shoulder or loin — Shoulder gives you a little more richness, while loin stays leaner and a touch firmer. Both work well cut into 1-inch cubes, but don’t go smaller or the meat overcooks before the coating crisps.
- Egg, soy sauce, and cornstarch marinade — The egg helps the seasoning cling, the soy sauce seasons the pork from the inside, and the cornstarch creates a light tacky layer that helps the dry coating grab. Skipping this step leaves the crust less bonded and more likely to flake off in the fryer.
- Cornstarch and flour coating — Cornstarch brings crispness, flour gives the coating a little structure. All cornstarch makes a thinner, more brittle shell; all flour gets heavier. This blend lands in the middle where sweet and sour pork needs it.
- Ketchup, rice vinegar, sugar, soy sauce, and pineapple juice — Ketchup gives color and body, vinegar brings the sharp edge, sugar smooths it out, soy sauce keeps the sauce from tasting flat, and pineapple juice ties the whole thing to the fruit in the pan. If you need a substitute, apple cider vinegar works in place of rice vinegar, but the sauce will taste a little less clean and bright.
- Pineapple chunks and bell peppers — These aren’t just garnish. They add sweetness, acidity, and a juicy bite that cuts through the fried pork. Use fresh or canned pineapple, but drain canned fruit well so the pan doesn’t turn watery.
Frying, Saucing, and Tossing Without Losing the Crunch
Marinating the Pork
Stir the pork with the egg, soy sauce, and cornstarch until every piece looks lightly slick and coated. Fifteen minutes is enough for the surface to season and tighten up. If the mixture looks dry, the egg wasn’t fully worked in, and the coating won’t stick evenly later.
Building the Coating
Combine the cornstarch and flour, then press each piece of marinated pork into the mixture until it’s fully covered. Lift each piece out and shake off the excess so you don’t get clumpy patches that fry up gummy. The coating should look dry and dusty, not paste-like.
Frying in Batches
Fry the pork at 350°F in small batches for 4 to 5 minutes, until the outside is deep golden and the inside is cooked through. If the oil starts to foam hard or the temperature drops, the batch is too large. Drain the pork on paper towels, but don’t stack it while it’s hot or the trapped steam softens the crust.
Cooking the Sauce and Veggies
Stir-fry the bell peppers and pineapple over high heat for just 2 minutes so the peppers stay crisp and the pineapple keeps its shape. Whisk the sauce ingredients together before they hit the pan, then pour them in and let the mixture come to a boil. The sauce should thicken enough to coat a spoon; if it stays thin, the cornstarch didn’t fully activate.
Bringing It All Together
Add the fried pork only after the sauce has thickened, then toss fast enough to coat without soaking the coating. Serve right away over rice. If you leave it sitting in the pan, the sauce keeps working on the crust and the texture changes fast.
How to Adapt This for Different Tables and Different Pantries
Gluten-Free Sweet and Sour Pork
Swap the flour for a gluten-free all-purpose blend and use a gluten-free soy sauce or tamari. The coating still fries up crisp, though it may brown a little faster, so keep a close eye on the first batch.
Lighter Oven-Baked Version
You can bake the coated pork on a well-oiled sheet pan at high heat, but it won’t have the same shattering crust as frying. It still gives you good flavor and a cleaner finish, just with a drier, more tender coating.
More Tang, Less Sweet
Increase the rice vinegar by 1 tablespoon and reduce the sugar slightly. That pushes the sauce toward a sharper, more balanced finish without changing the texture.
Storage and Reheating
- Refrigerator: Store leftovers in an airtight container for up to 3 days. The pork will lose some crispness once sauced, but the flavor stays strong.
- Freezer: Freeze the fried pork and sauce separately if you want the best result. Sauced leftovers freeze poorly because the coating turns soft after thawing.
- Reheating: Reheat the pork in a hot oven or air fryer until it’s heated through and the edges wake back up, then warm the sauce separately and toss just before serving. Microwaving everything together is the fastest way to end up with limp coating.
Answers to the Questions Worth Asking
Sweet and Sour Pork
Ingredients
Equipment
Method
- In a bowl, marinate the pork with egg, soy sauce, and cornstarch for 15 minutes so the pieces look lightly coated.
- Mix cornstarch and flour, then coat the marinated pork pieces thoroughly until each cube has an even dusting.
- Heat oil in a Dutch oven to 350°F and deep-fry the pork in batches for 4–5 minutes until golden and cooked through.
- Drain the fried pork on paper towels so excess oil is absorbed and the coating stays crisp.
- Whisk ketchup, rice vinegar, sugar, soy sauce, cornstarch, and pineapple juice until smooth and unified in color.
- Stir-fry red bell pepper and green bell pepper with pineapple in 1 tablespoon oil over high heat for 2 minutes, until the peppers brighten and pineapple looks glossy.
- Pour in the sweet and sour sauce and bring it to a boil until thickened, then add the crispy pork and toss until fully coated.
- Serve the sweet and sour pork right away over rice while the exterior stays crunchy.