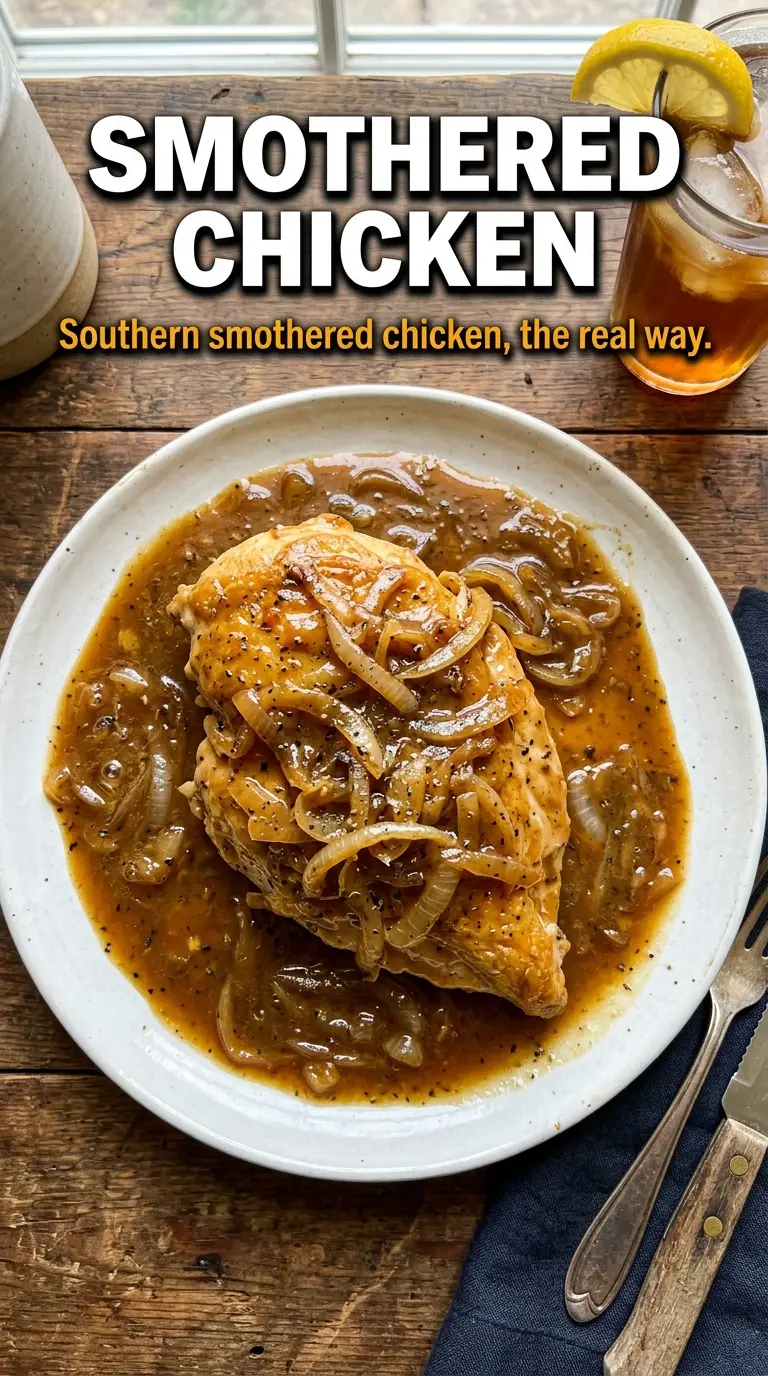
Fork-tender chicken thighs under a deep onion gravy earn their place in the dinner rotation because they taste like the kind of meal that took all afternoon, even though the skillet does most of the work in under an hour. The skin turns crisp and golden first, then gets tucked back into a gravy that’s built from caramelized onions, mushrooms, and the browned bits left in the pan. That’s where the flavor lives.
This version leans on bone-in, skin-on thighs because they stay juicy through the final simmer and give the gravy more body than boneless chicken ever could. The onions need time to soften and darken before the flour goes in. That’s what keeps the sauce from tasting flat or pasty. A splash of Worcestershire and a little cream round it out without turning it heavy.
Below, I’ve broken down the sear, the gravy, and the small details that keep the sauce smooth instead of muddy. If you’ve ever had smothered chicken turn thin, greasy, or bland, the fixes are in here.
The gravy thickened up beautifully and the chicken stayed juicy all the way through. I served it over mashed potatoes and my husband went back for seconds before I even sat down.
Keep this smothered chicken handy for nights when you want crisp-skinned thighs and a slow-cooked-tasting onion mushroom gravy in one skillet.
The Crispiest Skin Comes Before the Gravy, Not After It
The biggest mistake with smothered chicken is rushing straight into the sauce and giving up the sear. If the thighs don’t get a deep golden crust first, the final dish tastes boiled instead of smothered. That first 6 to 7 minutes skin-side down does two jobs at once: it renders fat from the skin and leaves behind browned bits that season the gravy later.
Leave the chicken alone while it sears. If it sticks at first, it isn’t ready to turn. When the skin has enough color, it releases more easily and sounds crisp as it hits the pan again. Once the chicken is out, don’t wipe the skillet clean. Those dark spots at the bottom are the foundation of the sauce.
What Each Ingredient Is Actually Doing in This Gravy
- Bone-in, skin-on chicken thighs — These stay juicy during the simmer and bring enough fat to keep the gravy from tasting lean. Boneless thighs work in a pinch, but they don’t give you the same rich skillet drippings or the same texture at the end.
- Cremini mushrooms — They add a dark, earthy depth that makes the gravy taste like it cooked longer than it did. White mushrooms will work, but creminis hold their texture better and give a fuller flavor.
- Onions — Thin slices cook down into sweetness and body. If the onions are still pale when you add the flour, the gravy will taste sharp instead of rounded, so give them the time they need to really caramelize.
- Heavy cream — This softens the finished sauce without making it thin. Half-and-half can work, but it makes the gravy a little less silky and more likely to separate if the heat runs high.
- Worcestershire sauce — Just a teaspoon sharpens the whole pan and keeps the gravy from tasting heavy. There isn’t a great one-to-one substitute here, but a small splash of soy sauce can add a similar savory edge if that’s what you have.
Building the Onion Gravy Without a Lumpy Finish
Season and Sear the Chicken First
Rub the thighs with the garlic powder, onion powder, paprika, salt, and pepper before they hit the pan. The seasoning sticks better to dry skin, and that dry surface is what helps the skin crisp instead of steam. Put them skin-side down in hot oil and let them sit until the color turns deep gold and the pan smells nutty. If the heat is too high, the skin will burn before the fat renders, so keep the burner at medium-high and watch the color, not the clock alone.
Caramelize the Onions Slowly
Once the chicken is out, the skillet should still hold a little fat and a lot of browned flavor. Add the onions and cook them until they soften, shrink, and turn deep amber at the edges. That step is what gives the gravy its sweetness and its color. If the pan looks dry, a spoonful of the rendered chicken fat is enough; don’t add extra oil unless you need it.
Whisk the Flour Into the Vegetables
Sprinkle the flour directly over the onions and mushrooms and stir for a full minute so it loses the raw taste. The mixture should look pasty but not clumpy. When the broth goes in, add it gradually and whisk as you pour so the flour disperses instead of forming little dumplings. Scrape the bottom of the skillet as you go; that’s where the best flavor is hiding.
Finish With Cream and a Gentle Simmer
Stir in the cream, Worcestershire, and thyme, then nestle the chicken back in skin-side up. The sauce should bubble lazily around the thighs, not boil hard. Too much heat at this point can tighten the chicken and split the cream. Cover the skillet and simmer just until the thighs are cooked through and tender, then finish with parsley so the gravy still looks dark and glossy on the plate.
How to Adapt This Smothered Chicken for Different Nights
For a Dairy-Free Version
Swap the heavy cream for full-fat coconut milk or an unsweetened dairy-free cooking cream. Coconut milk gives the sauce a softer finish and a faint sweetness, while oat-based cream keeps the flavor closer to the original. The gravy won’t be quite as rich, but it will still cling well if you keep the simmer gentle.
For Boneless Chicken Thighs or Breasts
Boneless thighs cut down the cook time and stay fairly juicy, but they won’t deepen the gravy as much as skin-on pieces. Chicken breasts work, though they need a shorter simmer and can dry out fast if you leave them covered too long. Pull them as soon as they hit temperature and let the sauce finish around them.
To Make It Gluten-Free
Use a gluten-free all-purpose flour blend in place of the regular flour. The sauce thickens the same way, but stir it a little longer after the broth goes in so the texture turns smooth instead of grainy. Also check the Worcestershire label, since some brands contain malt vinegar.
Storage and Reheating
- Refrigerator: Store leftovers in an airtight container for up to 4 days. The gravy thickens as it chills, and the chicken stays best when it’s kept covered in sauce.
- Freezer: It freezes well for up to 2 months, though the gravy may look a little looser after thawing. Let it cool completely before packing it up, and thaw overnight in the refrigerator.
- Reheating: Warm it gently on the stovetop over low heat with a splash of broth to loosen the sauce. High heat can break the cream and tighten the chicken, which is the fastest way to ruin the texture.
Answers to the Questions Worth Asking

Smothered Chicken
Ingredients
Equipment
Method
- Season the chicken thighs with garlic powder, onion powder, smoked paprika, salt, and cracked black pepper. Pat lightly so the coating adheres.
- Heat the vegetable oil in a cast iron skillet over medium-high heat and place the chicken skin-side down. Sear 6-7 minutes until deeply golden, then flip and sear 4 minutes and remove to a plate.
- Cook the thinly sliced onion over medium heat 6-7 minutes until deeply caramelized. Add the mushrooms and minced garlic and cook 4-5 minutes, stirring until fragrant.
- Sprinkle the all-purpose flour over the vegetables and stir for 1 minute. Gradually whisk in the chicken broth, scraping up the browned bits from the skillet.
- Stir in the heavy cream, Worcestershire sauce, and dried thyme, then return the chicken skin-side up. Cover and simmer 15 minutes until the chicken is cooked through and the gravy turns rich and dark.
- Garnish with fresh parsley and serve the smothered chicken over mashed potatoes or rice. Spoon gravy from the skillet edges over the top.