Sweet pumpkin, silky coconut milk, and a spoonable curry sauce make this bowl feel rich without turning heavy. The pumpkin holds its shape just enough to give each bite a little texture, while the bell pepper softens into the sauce and the Thai basil adds that sharp, herbal finish that keeps the whole dish bright. It’s the kind of curry that tastes layered and thoughtful, even though it comes together in one pan.
What makes this version work is the order. The onion, garlic, and ginger get a short sauté first so the base tastes round instead of raw, then the curry paste blooms in the hot oil before the coconut milk goes in. That step wakes up the spices and keeps the curry from tasting flat. Pumpkin or butternut squash both work here, but you want cubes cut evenly so they cook at the same pace and stay intact instead of collapsing into the sauce.
Below, I’ve included the small details that matter most: how to keep the curry from turning watery, what to swap if you only have one type of curry paste, and how to adjust the seasoning so the final bowl tastes balanced over rice with a squeeze of lime.
The pumpkin held its shape and the curry paste bloomed beautifully before the coconut milk went in. I used red curry paste and the sauce thickened up just right over rice.
Save this pumpkin Thai curry for nights when you want a silky coconut sauce, tender pumpkin, and a bright lime finish.
The Trick to Keeping Pumpkin Tender, Not Mushy
Pumpkin and butternut squash can go from perfect to broken down fast if the simmer runs too hard. The goal is a gentle bubble, not a rolling boil, because high heat blasts the edges of the cubes before the centers catch up. If the sauce looks furious, lower the heat and give it time; the curry paste and coconut milk need a calm simmer to stay smooth.
The other mistake is cutting the pumpkin pieces too small. Bite-size is right, but tiny cubes disappear into the sauce before you get that soft-but-still-distinct texture. Even cuts matter more than exact size here, because uneven pieces mean some turn chalky while others stay underdone. When the pumpkin yields easily to a fork but still holds its shape, stop cooking and move straight to the finishing seasonings.
What the Coconut Milk, Curry Paste, and Basil Each Bring

- Pumpkin or butternut squash — This is the body of the dish, and you want a variety that softens into creamy edges without dissolving. Butternut squash is the easiest swap because it cooks at the same pace and stays naturally sweet. If you use pumpkin, choose a cooking pumpkin or sugar pumpkin, not a carving pumpkin, which turns stringy and watery.
- Coconut milk — Full-fat coconut milk gives the sauce its lush texture and keeps the curry from tasting thin. Lite coconut milk will work in a pinch, but the sauce won’t cling to the rice the same way. Shake the can before opening so the cream and liquid combine instead of staying separated.
- Thai curry paste — This is where most of the flavor lives, so use one you actually like. Yellow curry paste leans softer and earthier, while red brings more heat and deeper spice. If your paste tastes sharp straight from the jar, cooking it in oil for a full 2 minutes smooths that edge and makes the whole curry taste more integrated.
- Thai basil — Add it at the end so the leaves stay fragrant and don’t go muddy. Regular basil can stand in if that’s what you have, but it won’t give the same peppery anise note. If you can find Thai basil, it’s worth using here because it lifts the coconut sauce right before serving.
Building the Curry Base So It Tastes Layered, Not Flat
Waking Up the Aromatics
Start with coconut oil in a wide pan so the onion has room to soften instead of steam. Cook the onion, garlic, and ginger until the onion turns translucent and the kitchen smells sweet and sharp at the same time. If the garlic starts browning fast, the heat is too high and it will turn bitter in the finished curry.
Letting the Curry Paste Bloom
Stir in the curry paste and keep it moving in the oil for about 2 minutes. The color will deepen and the paste should smell fragrant, not raw or muddy. This step matters because curry paste needs fat and heat to open up; if you dump in liquid too quickly, it stays dull and the sauce tastes one-note.
Simmering the Pumpkin
Add the pumpkin, bell pepper, coconut milk, and broth, then bring everything to a steady simmer. Keep the lid off so a little liquid cooks down and the sauce thickens naturally. If the pumpkin is still hard after 15 minutes, keep going in short bursts and check often; rushing this stage leaves you with firm centers and overcooked peppers.
Finishing with Salt, Sweetness, and Herbs
Stir in the fish sauce or soy sauce and the brown sugar once the pumpkin is tender. Taste before serving, because the balance should land between salty, lightly sweet, and bright enough to want a squeeze of lime. Fold in the Thai basil at the very end so it stays vivid and aromatic instead of fading into the sauce.
How to Adapt This Curry When You Need a Different Version
Make it dairy-free and vegetarian
Use soy sauce instead of fish sauce and keep the rest of the recipe the same. You’ll still get the savory depth you need, and the coconut milk carries the curry beautifully on its own. The result is just as full and balanced, with no extra work.
Swap the pumpkin for butternut squash
Butternut squash is the cleanest substitute if pumpkin isn’t available. It softens at the same pace and gives the curry a slightly sweeter, smoother finish. Cut it into even cubes so it cooks evenly and doesn’t fall apart before the sauce thickens.
Make it spicier without changing the structure
Add extra curry paste in the blooming stage, not at the end. That keeps the heat integrated into the sauce instead of tasting sharp on top. If you want a clean finish, add sliced chili or a pinch of chili flakes just before serving.
Storage and Reheating
- Refrigerator: Store leftovers in an airtight container for up to 4 days. The sauce thickens as it chills, and the pumpkin softens a little more overnight.
- Freezer: It freezes well for up to 2 months, though the pumpkin will be softer after thawing. Cool it completely first and freeze in portions for the easiest reheating.
- Reheating: Warm it gently on the stove over low heat with a splash of broth or water if needed. A hard boil can break the coconut milk and make the sauce look greasy instead of silky.
Answers to the Questions Worth Asking
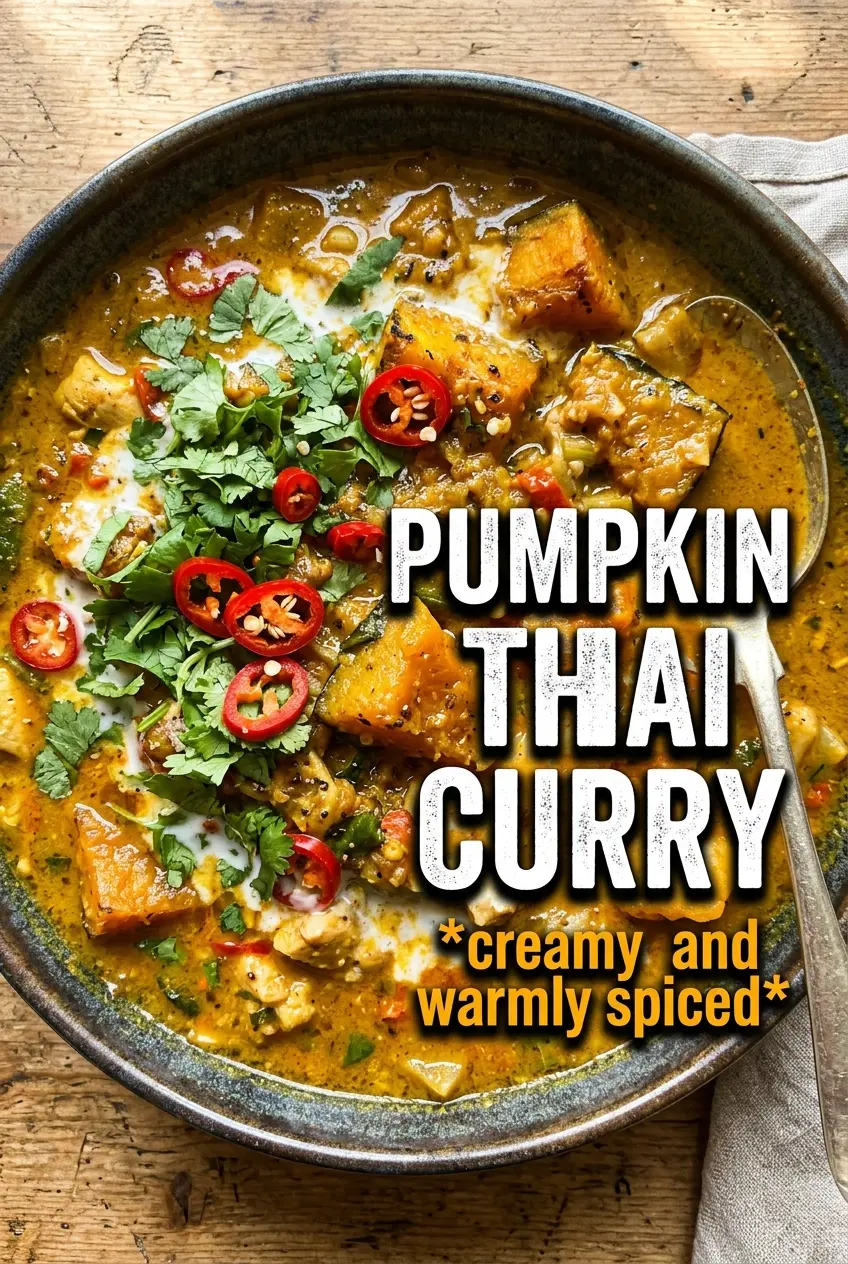
Pumpkin Thai Curry
Ingredients
Equipment
Method
- Heat the coconut oil in a Dutch oven over medium heat. Sauté the onion, garlic, and ginger for 3 minutes, stirring until softened and fragrant.
- Add the Thai curry paste and cook for 2 minutes. Stir constantly until the paste darkens slightly and becomes very fragrant.
- Add the pumpkin, bell pepper, coconut milk, and vegetable broth to the pot. Bring the mixture to a simmer over medium-high heat and keep it gently bubbling.
- Simmer for 15-18 minutes, stirring occasionally, until the pumpkin is just tender. When pierced, the cubes should yield but still hold their shape.
- Stir in the fish sauce and brown sugar. Taste and adjust seasoning until it balances salty, sweet, and spicy.
- Fold in the Thai basil leaves and cook for 30-60 seconds until wilted. Keep the curry at a gentle simmer so the basil stays bright.
- Serve the curry over steamed rice. Top with lime wedges and serve right away for the freshest citrus flavor.