Juicy grilled chicken breast earns its place in the weekly rotation when the outside picks up those clean, dark grill marks and the inside stays tender instead of turning dry and stringy. The difference is in the brine and the rest: they give the lean meat a little forgiveness before it hits the grill, which is exactly what chicken breast needs.
The seasoning here is simple on purpose. Salt and sugar in the brine do the heavy lifting for moisture and flavor, while a light coating of oil helps the spices cling and keeps the surface from welding itself to the grates. Grill it over steady medium-high heat and leave it alone until it releases cleanly; that patience gives you better browning and fewer torn pieces.
Below, I’ll show you the one step that keeps the chicken from drying out, plus the easiest way to adapt the seasoning if you want to change the flavor without losing the juicy texture.
The brine made all the difference. My chicken stayed juicy all the way through, and the grill marks came out perfect without the seasoning burning.
Save this juicy grilled chicken breast for the nights when you want clean grill marks, a tender center, and dinner on the table fast.
The Brine Is What Keeps Lean Chicken from Eating Dry
Chicken breast doesn’t have much fat to protect it, which is why it goes from juicy to chalky fast if you skip the brine or cut the cook time too close. A 30-minute soak in salted water with a little sugar seasons the meat all the way through and helps it hold onto moisture while it cooks. That short brine is enough for boneless breasts without making them taste cured or salty.
Drying the chicken after brining matters just as much as the soak itself. Wet chicken steams on the grill, and steam won’t give you those browned grill marks. Pat it dry until the surface feels tacky, then oil it lightly so the spice rub sticks and the outside can sear instead of burn.
What the Seasoning Is Actually Doing Here
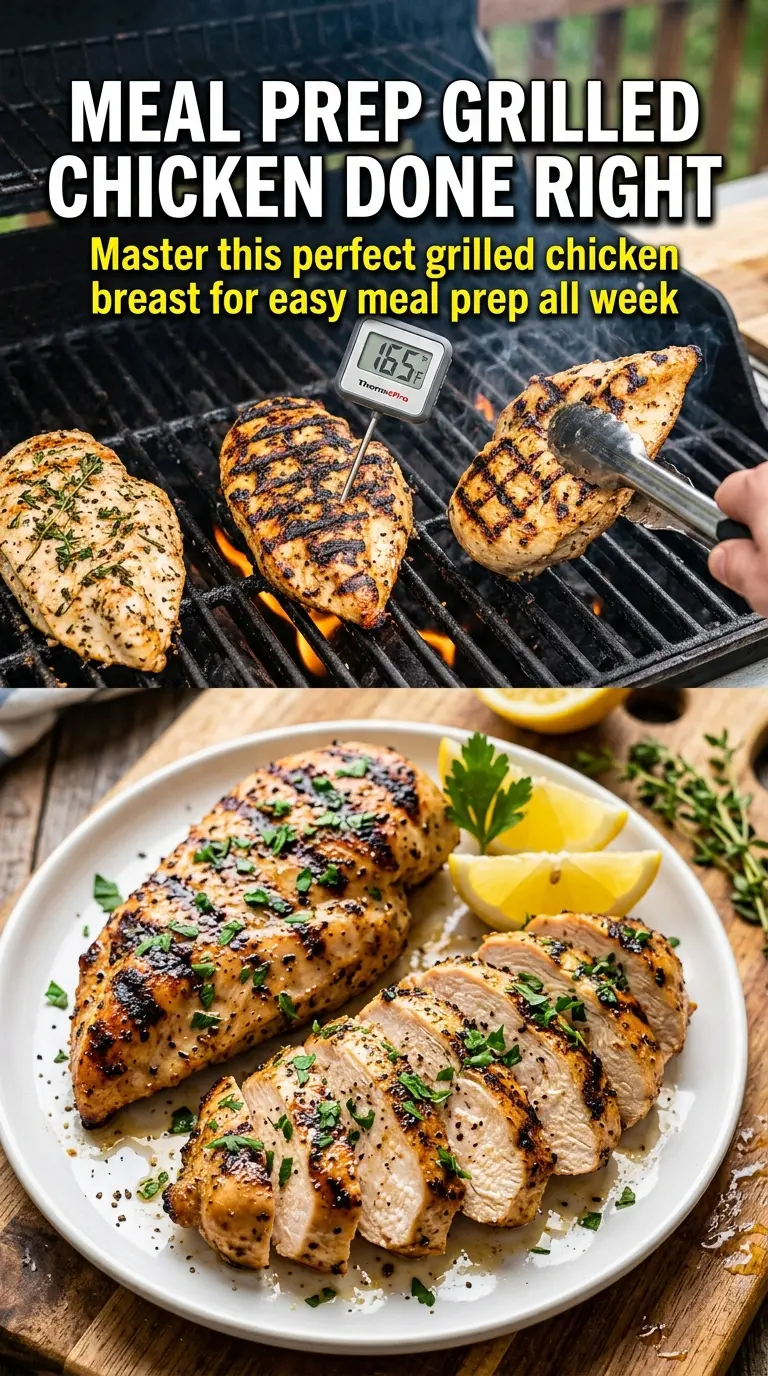
- Chicken breasts — Use breasts that are similar in size so they finish cooking at the same time. If one side is much thicker, pound the thick end lightly so the piece cooks evenly and the thinner end doesn’t dry out before the center is done.
- Salt and sugar — The salt seasons the meat and the sugar helps the surface brown without tasting sweet. Don’t skip the sugar unless you have to; it balances the seasoning and supports better color on the grill.
- Olive oil — This gives the spices something to cling to and helps prevent sticking. A neutral oil works too, but olive oil adds a little more flavor on the surface.
- Garlic powder, paprika, black pepper, onion powder — These are the right kind of seasonings for the grill because they’re dry and won’t scorch as easily as fresh garlic. Paprika brings color, black pepper adds bite, and onion powder rounds everything out.
The Grill Window You Can’t Rush
Getting the Grates Hot and Clean
Preheat the grill to medium-high, around 400°F, and brush or oil the grates before the chicken goes on. If the grill isn’t hot enough, the chicken will stick and pale out instead of searing. If it’s screaming hot, the spices can scorch before the center cooks through, especially on thinner pieces.
Letting the First Side Develop
Lay the chicken down and leave it alone for 6 to 7 minutes. Don’t tug at it every minute; when the meat is ready, it releases on its own. If it sticks hard, give it another minute instead of forcing it, because ripping it early tears the crust and leaves half the flavor behind on the grates.
Finishing to Temperature, Not Guesswork
Flip once and grill the second side until the thickest part reaches 165°F. This is the number that keeps chicken safe without pushing it into dryness. Pull it off the grill as soon as it hits temp; carryover heat will finish the job while it rests.
The Rest That Keeps the Juices Inside
Let the chicken rest for 5 minutes before slicing. That pause gives the juices time to settle back into the meat instead of spilling onto the cutting board. Slice across the grain for the best texture, and if the center looks a touch glossy, that’s a good sign it stayed moist.
How to Change the Flavor Without Losing the Juiciness
Dairy-Free, Naturally
This recipe is already dairy-free, so there’s nothing to replace. Keep the brine and spice rub the same, and the result stays just as juicy and flexible for bowls, salads, or sandwiches.
Swap the Paprika for a Smokier Finish
Use smoked paprika instead of regular paprika if you want a deeper grilled flavor even when you’re cooking on a gas grill. It gives the chicken a little more backbone without changing the texture.
Make It Lower Sodium
Cut the salt in the brine to 3 tablespoons if you need to reduce sodium, but don’t eliminate the brine entirely. A shorter, lighter brine still improves the texture, though the flavor will be a little less seasoned all the way through.
Turn It Into Chicken for Meal Prep
Cook the breasts to 165°F, rest them fully, then slice or cube them before refrigerating. The brine keeps the chicken from drying out after a few days in the fridge, which makes it better than plain grilled chicken for lunches.
Storage and Reheating
- Refrigerator: Store in an airtight container for up to 4 days. Slice only what you need so the rest stays juicier.
- Freezer: Freezes well for up to 2 months. Wrap tightly and thaw overnight in the refrigerator before reheating.
- Reheating: Reheat gently in a covered skillet with a splash of water or broth over low heat, or warm in a 300°F oven until just hot. High heat dries grilled chicken out fast, so don’t blast it in the microwave unless you’re okay with a tougher texture.
Answers to the Questions Worth Asking

Perfect Grilled Chicken Breast
Ingredients
Equipment
Method
- Dissolve the salt and sugar in the water to form a brine, then submerge the chicken breasts for 30 minutes.
- Remove the chicken from the brine and pat completely dry so the surface can brown properly on the grill.
- Brush the chicken with olive oil to help the seasoning stick and promote grill marks.
- Mix garlic powder, paprika, black pepper, and onion powder, then season the chicken generously on all sides.
- Preheat the grill to medium-high heat (about 400°F) and oil the grates to prevent sticking.
- Grill the chicken for 6-7 minutes per side without moving until the internal temperature reaches 165°F, showing browned grill marks and an even cook.
- Remove from the grill and let rest for 5 minutes before slicing and serving so the juices settle and the interior stays juicy.