Golden, sticky balsamic chicken thighs earn their place in the dinner rotation fast. The skin turns deeply crisp in the skillet, the tomatoes burst into the sauce, and the whole pan finishes with a glossy glaze that clings to every bite instead of pooling at the bottom of the pan. It looks like more effort than it is, which is always a good sign when a weeknight dinner lands this well.
What makes this version work is the order. The chicken gets a hard sear first so the skin has a chance to render and crisp before any liquid goes in. Then the balsamic, honey, and broth reduce around the chicken instead of boiling it from the start. That keeps the glaze concentrated and gives the sauce enough body to coat the thighs and tomatoes without turning thin or sharp.
Below, I’ll walk through the part that matters most: how to get the skin crisp, how to keep the balsamic from tasting harsh, and what to do if you want to make the dish ahead or swap in boneless chicken.
The skin stayed crispy even after the sauce went in, and the balsamic reduced into a glaze that coated everything instead of turning watery. I served it with rice and there wasn't a spoonful left.
Like this one-pan balsamic chicken? Save it for the nights when you want crisp chicken thighs, blistered tomatoes, and a glossy skillet glaze without dirtying extra pans.
The part that keeps the glaze from turning thin and sharp
The biggest mistake with balsamic chicken is adding the vinegar and walking away too soon. Balsamic needs heat and time to lose its bite and turn syrupy, and that happens best after the chicken has already been seared and removed. If you start with the liquid too early, the skin steams instead of crisping and the sauce never gets the same deep, reduced finish.
Another thing that matters here is the skillet. A cast iron pan holds heat well enough to blister the tomatoes and keep the sauce bubbling in steady contact with the chicken. Stainless can work, but you’ll need to watch the reduction more closely and scrape the pan well so the browned bits melt into the glaze instead of sticking behind.
What each ingredient is actually doing in the pan
- Bone-in, skin-on chicken thighs — These stay juicy while the skin crisps, which is the whole point of the dish. Boneless thighs will cook faster, but you’ll lose some of that rendered richness and you’ll need to shorten the simmer so the meat doesn’t dry out.
- Balsamic vinegar — This is the backbone of the glaze. Good balsamic tastes rounded and tangy; cheaper vinegar still works here because honey and broth soften it, but a harsh bottle will make the sauce taste flat if you don’t reduce it enough.
- Honey — It smooths the vinegar and helps the glaze cling. You can swap in maple syrup in a pinch, but the finish will taste a little deeper and less bright.
- Cherry tomatoes — They burst into the pan sauce and give you little sweet pockets that cut through the acidity. If your tomatoes are on the bland side, let them blister longer before adding the liquid so they pick up more color and flavor.
- Butter — Stirred in at the end, it rounds out the glaze and gives it that shiny finish. Add it off the heat or at a very low simmer so the sauce stays smooth.
Getting the skin crisp before the sauce goes in
Seasoning and drying the thighs
Pat the chicken thighs dry before you season them. Moisture on the skin is the enemy of crisping, and wet chicken will sit there steaming in the pan instead of browning. Season both sides generously with salt, pepper, garlic powder, and Italian seasoning, then let the thighs sit while the skillet heats so the seasoning starts to cling.
Rendering the skin
Lay the thighs skin-side down in hot oil and leave them alone for the full 7 to 8 minutes. If you try to move them too soon, the skin tears and sticks, and that tells you the pan wasn’t ready. You’re looking for a deep golden crust that releases on its own when it’s ready; if it resists, give it another minute.
Building the glaze in the same pan
Once the chicken comes out, add the garlic and tomatoes and let them take on a little color before the liquid goes in. Then pour in the balsamic, honey, and broth and scrape the browned bits from the bottom of the pan. Those bits are what give the sauce its depth, and if you skip the scraping, the glaze tastes one-note no matter how long you reduce it.
Finishing to the right consistency
Put the chicken back in skin-side up and let the sauce bubble around it until it thickens enough to coat the spoon. The chicken is done at 165°F, but the real cue is the sauce: it should look dark, glossy, and just thick enough to cling to the tomatoes and the sides of the pan. Stir in the butter at the end, then scatter basil over the top so the herb stays bright instead of wilted.
How to adapt this skillet chicken without losing what makes it good
Use boneless chicken thighs for a faster dinner
Boneless thighs cook more quickly and still stay tender, which makes this a good weeknight swap. Sear them for less time and shorten the final simmer so they don’t overcook before the glaze thickens. You’ll lose a little of the rich, rendered flavor from the skin, but the sauce still carries the dish.
Make it dairy-free
Skip the butter and finish with a small drizzle of olive oil instead. The sauce won’t have the same silky gloss, but it will still be balanced and shiny enough to coat the chicken. This version is already naturally dairy-free until the final step, so the swap is easy.
Add onions or shallots for a sweeter base
If you want a softer, sweeter sauce, cook a sliced shallot or a few thin onion wedges after the chicken comes out and before the garlic goes in. They’ll pick up the fond and melt into the glaze, giving the pan a little more body. Just don’t crowd the skillet, or they’ll steam instead of caramelize.
Storage and Reheating
- Refrigerator: Store leftovers in an airtight container for up to 4 days. The skin softens in the fridge, but the flavor deepens overnight.
- Freezer: It freezes well if you cool it completely first and store the chicken with plenty of sauce. The tomatoes will break down a little after thawing, but the dish still works.
- Reheating: Warm it covered in a skillet over low heat with a splash of broth to loosen the glaze. High heat will tighten the chicken and can make the balsamic taste sharp again before the center is hot.
Answers to the questions worth asking
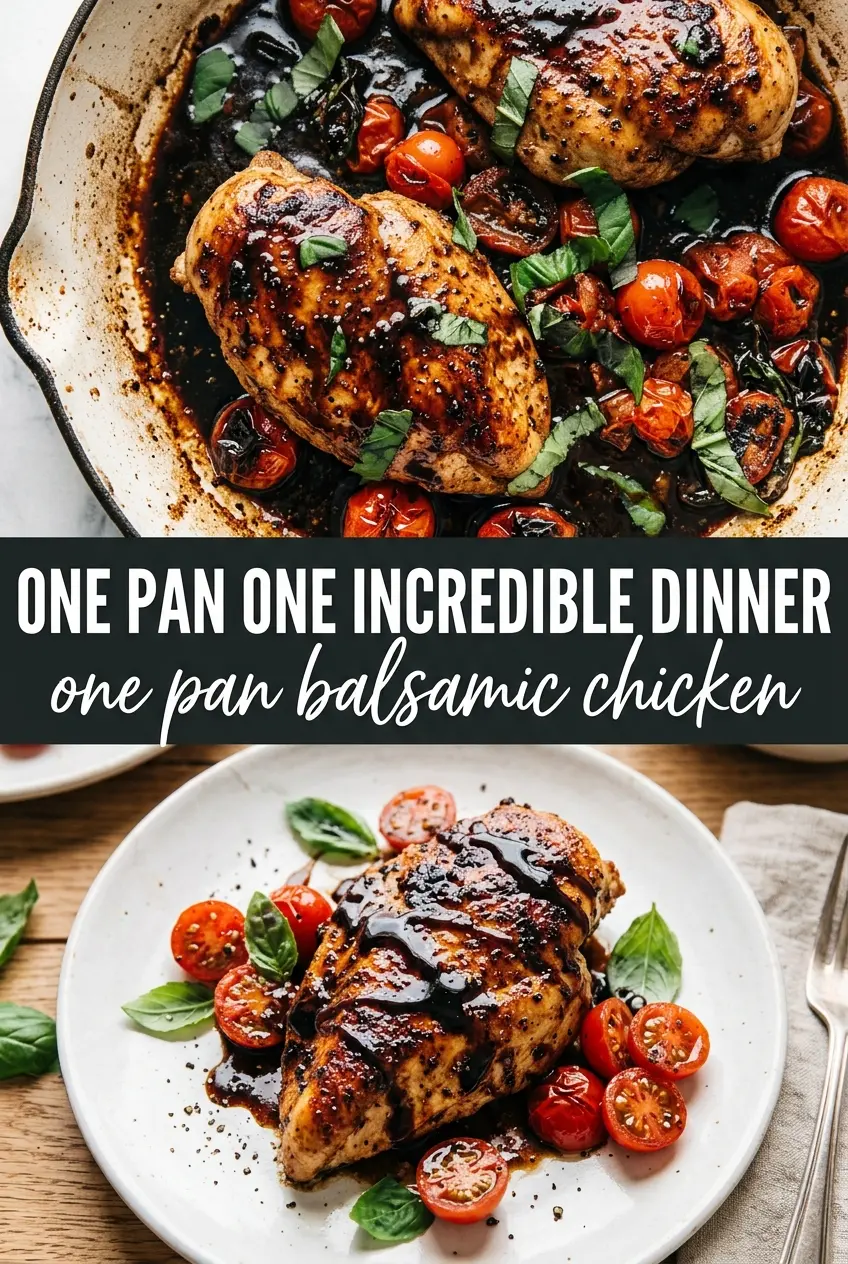
One Pan Balsamic Chicken
Ingredients
Equipment
Method
- Season the chicken thighs generously on both sides with salt, pepper, garlic powder, and Italian seasoning. Pat the seasoning in so it adheres before searing.
- Heat the olive oil in a large cast iron skillet over medium-high heat and sear the chicken skin-side down for 7-8 minutes until the skin is deeply golden and crispy. Look for a dark, crisp skin and clear release from the pan.
- Flip the chicken and sear for 3 more minutes. Continue until the second side is browned.
- Add the whole garlic cloves and cherry tomatoes, then cook for 2 minutes until the tomatoes begin to blister. Stir gently so garlic warms without burning.
- Pour in the balsamic vinegar, honey, and chicken broth, stir, and bring to a boil while scraping up browned bits from the skillet. Boil until the mixture is actively bubbling.
- Return the chicken skin-side up and cook over medium heat for 12-15 minutes until the chicken reaches 165°F and the balsamic sauce reduces to a thick glaze. Watch for syrupy coating that clings to the thighs.
- Stir in the butter until melted, then scatter fresh basil over the top and serve straight from the skillet. The sauce should look dark, glossy, and lightly thickened.