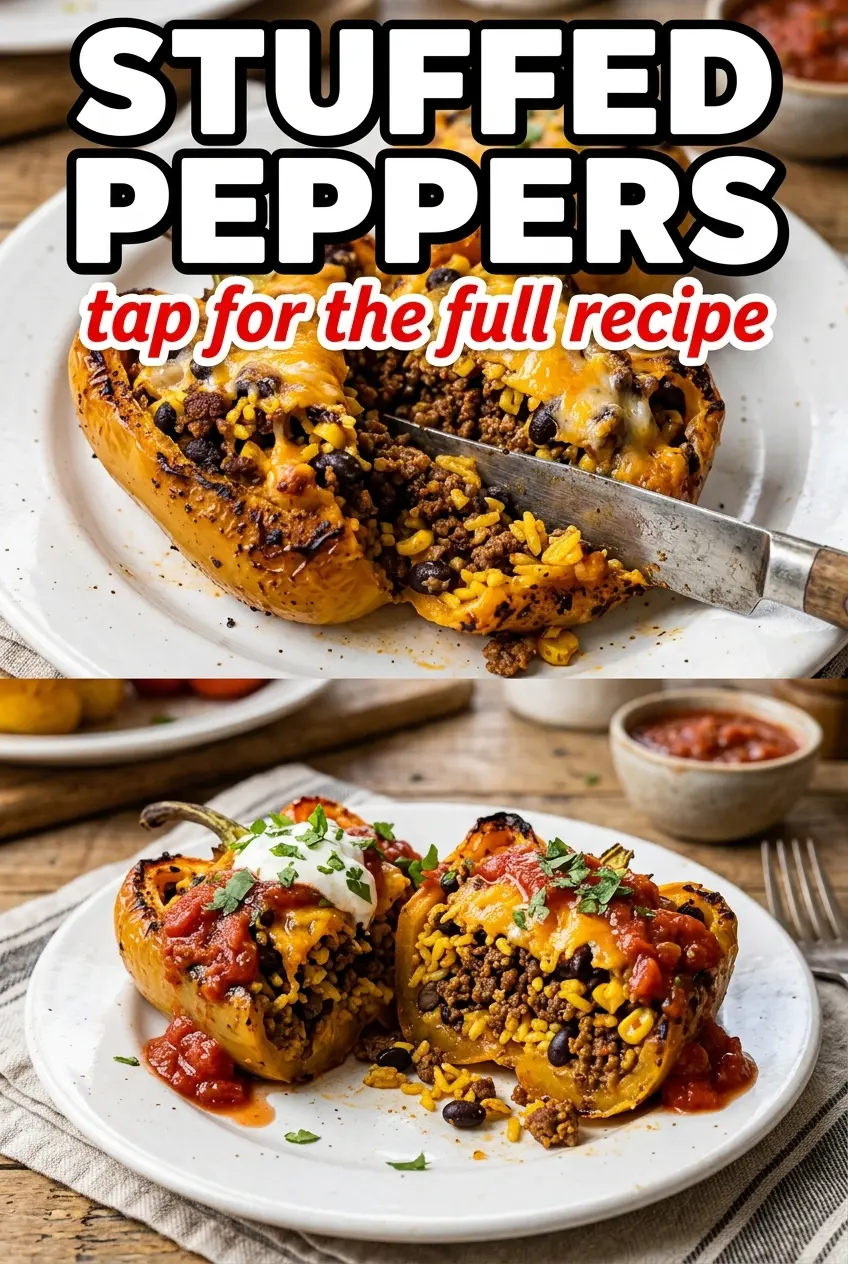
Roasted peppers turn soft and smoky in the oven, then get packed with a savory filling that holds together instead of spilling out the second you cut into it. The best part is the contrast: blistered pepper edges, a hearty meat-and-rice center, and a blanket of melted cheese that sets just enough to slice cleanly. It’s the kind of dinner that looks like it took far more effort than it did.
This version works because the peppers are charred first, not just baked raw. That quick blast of heat loosens the skins and gives the finished dish a deeper pepper flavor, while the filling gets cooked before it ever goes into the peppers, so the bake time is just long enough to melt the cheese and bring everything together. The rice and beans keep the mixture from feeling heavy, and the salsa adds moisture and seasoning at the same time.
Below, I’ve included the little details that make stuffed peppers easier to handle — from peeling the peppers without tearing them to keeping the filling from turning watery in the oven.
The peppers held their shape beautifully and the filling stayed hearty instead of soggy. I loved how the salsa and cumin gave it that warm Mexican flavor, and the melted cheese on top made it feel like a complete meal.
Save these Mexican Stuffed Peppers for a smoky, cheesy dinner with a filling that stays hearty and never falls apart.
The Trick to Stuffed Peppers That Don’t Collapse
The biggest mistake with stuffed peppers is treating the pepper and the filling like they need the same amount of cooking time. They don’t. The filling should already taste finished before it goes into the oven, because the bake at the end is about melting cheese and warming everything through, not cooking raw beef from scratch.
Roasting the peppers first matters even more than most recipes admit. Raw peppers can stay a little too firm and can leak moisture into the filling as they bake, which leaves you with a watery pan instead of neat stuffed peppers. A quick char, followed by steaming in a bag, loosens the skins so they peel easily and gives the peppers a soft bite without turning them to mush.
The slit you cut down the side should be just big enough to remove the seeds and open the pepper for stuffing. Cut too much and the filling pours out. Cut too little and you fight the pepper instead of filling it.
What Each Ingredient Is Actually Doing in This Dish
- Poblano or bell peppers — Poblanos give you a gentle smoky heat, while bell peppers keep the dish mild and sweeter. Either one works, but the key is choosing peppers with sturdy walls so they hold the filling after roasting.
- Ground beef — This brings the savory backbone. Ground turkey can work, but it needs a little extra seasoning and maybe a splash of oil because it’s leaner and can taste flat without it.
- Rice, black beans, and corn — These stretch the filling and give it the right texture. Rice keeps everything from feeling loose, beans add body, and corn gives you little pops of sweetness that balance the salsa.
- Salsa roja — This is the easiest way to season the filling and add moisture at the same time. Use a salsa you actually like to eat plain, since its flavor gets concentrated as the peppers bake.
- Oaxaca or mozzarella — Oaxaca melts with that stretchy, stringy finish, while mozzarella is the easiest backup if that’s what you have. Pre-shredded cheese works, but freshly shredded melts more smoothly and doesn’t clump as much.
Building the Filling Before the Bake
Blistering and Steaming the Peppers
Cook the peppers over a gas flame or under the broiler until the skin is blackened in spots all over, about 5 minutes. You want blistered skin, not a fully collapsed pepper. After that, tuck them into a plastic bag for 10 minutes so the steam loosens the charred skin. If you skip the steam, the skin clings stubbornly and tears the pepper when you try to peel it.
Cooking the Filling Until It’s Thick
Brown the beef with the onion until the meat loses its raw color and the onion softens. Garlic goes in at the end for just a minute so it stays fragrant instead of bitter. Stir in the rice, beans, corn, half the cheese, salsa, tomato, cumin, salt, and pepper, then let it simmer until the mixture looks thick and spoonable. If it still looks wet in the pan, it will leak out in the oven.
Stuffing Without Splitting the Peppers
Open each peeled pepper gently along the slit and spoon the filling in from the top, letting it settle naturally instead of packing it tight. A tightly packed pepper can burst as the cheese melts and the filling expands a little. Set them upright in a baking dish so they support one another and don’t tip over while they bake.
Finishing With Cheese and Color
Top the peppers with the remaining cheese and bake at 350°F until the cheese is melted and the filling is hot all the way through, about 20 minutes. You’re looking for bubbling edges and cheese that has lost its dry, shredded look. Finish with cilantro right before serving so it stays bright and fresh against the warm filling.
Three Ways to Make These Mexican Stuffed Peppers Work for Your Table
Make Them Dairy-Free
Leave out the cheese in the filling and on top, then finish the baked peppers with extra cilantro and a spoonful of salsa. You lose the melted top layer, but the peppers still taste complete because the filling already has plenty of body from the beef, rice, beans, and corn.
Swap in Ground Turkey
Ground turkey gives you a lighter filling, but it needs the onion, garlic, cumin, and salsa to do more work. Add a small drizzle of oil while browning if the turkey looks dry, since lean meat can turn crumbly before the peppers even hit the oven.
Make It Vegetarian
Skip the beef and double the black beans, or use a mix of beans and finely chopped mushrooms for a meatier texture. You’ll want to cook the mushroom mixture until the moisture evaporates, or the filling can turn loose and puddle inside the peppers.
Use Bell Peppers Instead of Poblanos
Bell peppers make the dish milder and a little sweeter, which works well if you’re serving kids or anyone who doesn’t want heat. They’re also usually easier to stuff because the openings are wider, though they can soften faster if they’re very large and thin-walled.
Storage and Reheating
- Refrigerator: Store in an airtight container for up to 4 days. The peppers soften a bit more after chilling, but the flavor deepens.
- Freezer: These freeze well. Wrap each stuffed pepper tightly and freeze for up to 2 months, then thaw in the fridge before reheating so the centers warm evenly.
- Reheating: Reheat covered in a 350°F oven until hot through, about 20 minutes, or microwave in short bursts. The common mistake is blasting them on high heat until the cheese turns greasy and the pepper splits open.
Answers to the Questions Worth Asking
Mexican Stuffed Peppers
Ingredients
Equipment
Method
- Roast the poblano or bell peppers directly over a gas flame or under the broiler until charred all over, about 5 minutes, then transfer to a plastic bag.
- Steam the peppers in the plastic bag for 10 minutes, then peel off the charred skin so the flesh is tender and free of blackened bits.
- Make a careful slit down the side of each pepper and gently remove the seeds while keeping the pepper intact for stuffing.
- Brown the ground beef with the diced onion in a large skillet over medium-high heat, stirring until the beef is cooked through.
- Add the minced garlic and cook for 1 minute, stirring until fragrant and lightly softened.
- Stir in the cooked rice, black beans, corn, 1/2 cup of the shredded Oaxaca or mozzarella cheese, salsa roja, diced tomato, cumin, salt, and pepper, then simmer for 5 minutes until the mixture is cohesive.
- Stuff each roasted pepper with the meat mixture and place them in a baking dish, standing them so they hold their shape.
- Top each stuffed pepper with the remaining cheese, then bake at 350°F for 20 minutes until the cheese is melted and lightly bubbling.
- Garnish with the chopped fresh cilantro before serving for a fresh, green finish.