Golden chicken breasts with a glossy garlic butter sauce earn a permanent spot in the weeknight rotation because they deliver a lot of payoff for very little effort. The chicken stays juicy, the sauce tastes rich without feeling heavy, and the whole pan comes together fast enough that you can have dinner on the table before anyone starts asking what’s for dinner again.
The trick is keeping the sear hot enough to build color before the garlic goes in. Garlic burns fast, and once it turns bitter, there’s no fixing the sauce. I cook the chicken first, pull it out, then use the same skillet for the butter, garlic, broth, and thyme so all those browned bits end up right back in the pan where they belong.
Below, I’ve included the timing cues that matter most, the one substitution I’d actually trust, and the small finishing move that keeps the sauce tasting bright instead of flat.
The sauce thickened up beautifully and the garlic stayed mellow instead of bitter. I spooned it over mashed potatoes and my husband asked if I could make it again the next night.
Save this garlic butter chicken for the nights when you want a skillet dinner with a crisp sear, silky sauce, and almost no cleanup.
The Sear Comes First, or the Sauce Never Tastes the Same
What separates garlic butter chicken from a flat, greasy skillet dinner is the crust you build on the chicken before anything else touches the pan. That browned surface isn’t just for looks; it gives the broth and butter something to pick up when you scrape the pan, and that’s where the sauce gets its depth. If the chicken goes in before the skillet is hot enough, it steams, the color stays pale, and the whole dish tastes thinner.
Use medium-high heat and give the chicken a chance to release on its own. If it sticks, it needs another minute. The pan will tell you when it’s ready. Once the chicken comes out, don’t pour off the fat and don’t wipe the skillet. Those browned bits are the backbone of the sauce.
What the Butter, Garlic, and Broth Each Bring to the Pan
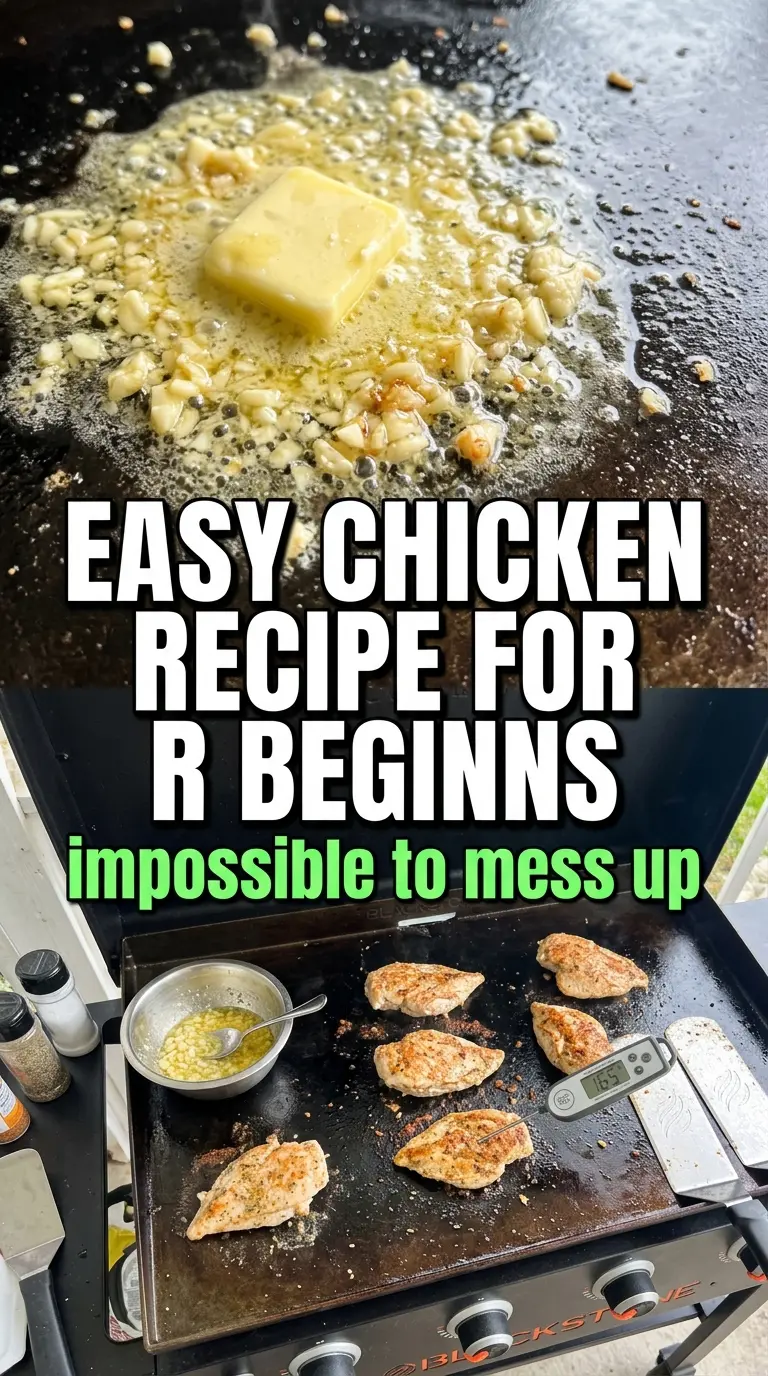
- Chicken breasts — Boneless breasts cook fast and stay elegant in this sauce, but they need even thickness to finish at the same time. If one side is much thicker, pound it lightly before cooking so the thin end doesn’t dry out while you wait for the center to hit 165°F.
- Butter — This is the sauce, so use real butter here. It carries the garlic and gives the pan sauce its glossy finish; margarine won’t give the same body or flavor. If you want to stretch it a little, you can cut in an extra splash of broth, but don’t replace the butter entirely.
- Garlic — Fresh minced garlic matters. Jarred garlic can work in a pinch, but it’s usually sharper and a little duller once cooked. Keep the heat at medium when it hits the pan and stir constantly so it softens and turns fragrant instead of bitter.
- Chicken broth — This loosens the browned bits and turns the butter into an actual sauce instead of just melted fat. Use a broth you’d drink on its own if you can, since there isn’t much else in the pan to hide behind.
- Lemon juice and parsley — Add both at the end. Lemon brightens the butter so the sauce doesn’t taste heavy, and parsley gives it a fresh finish. If you add them too early, the lemon can fade and the herbs lose their clean taste.
Turning the Skillet Drippings Into a Real Sauce
Seasoning and Searing the Chicken
Pat the chicken dry before it hits the pan, then season it generously with salt and pepper. Moist chicken surface is the enemy of browning, and thin seasoning leaves the meat tasting bland under the sauce. Sear it in olive oil over medium-high heat until the first side turns deep golden and the chicken lifts cleanly from the skillet. If the outside is dark before the center is cooked, the heat was too high; lower it a touch next time and give the pan a minute to settle between batches if needed.
Softening the Garlic Without Burning It
Once the chicken is out, drop the heat to medium before adding the butter and garlic. The garlic should sizzle gently and smell sweet within a minute or two. If it goes brown, pull the skillet off the burner for a few seconds right away, because burnt garlic will take over the whole dish. You want soft, fragrant pieces suspended in the butter, not crisp bits at the bottom of the pan.
Building the Pan Sauce
Pour in the broth and scrape the pan hard enough to loosen every brown streak. That’s where the flavor lives. Let the sauce simmer for a couple of minutes so it reduces slightly and stops tasting watery. If it looks broken or oily, it usually needs a little more simmer time, not more butter.
Finishing the Chicken
Return the chicken to the pan and spoon the sauce over the top until everything looks glossy. Add the lemon juice a little at a time and taste as you go, because a heavy hand can make the sauce sharp instead of bright. Finish with parsley right before serving so it keeps its color and the chicken still feels freshly cooked when it reaches the table.
How to Adapt This Without Losing What Makes It Work
Use chicken thighs for a richer, juicier version
Boneless thighs bring more moisture and a deeper chicken flavor, and they’re a little more forgiving if you’re nervous about overcooking. They may take a couple extra minutes to reach temperature, but the sauce works the same way. Expect a slightly richer pan from the extra fat.
Make it dairy-free with olive oil and a little extra broth
You can skip the butter and use more olive oil, then finish with a small splash of broth to loosen the pan. The sauce won’t have the same velvety finish, but it will still carry the garlic and herbs well. A tiny squeeze of lemon matters even more here because it helps replace the richness butter normally brings.
Add mushrooms or spinach for a one-pan dinner
Sauté sliced mushrooms after the chicken comes out and before the garlic goes in, or stir in spinach at the very end until it wilts. Mushrooms make the sauce earthier, while spinach adds color and a lighter finish. Just don’t overcrowd the skillet or you’ll lose the browning that makes the sauce taste good.
Make it gluten-free without changing a thing
This recipe is naturally gluten-free as written, as long as your broth is certified gluten-free. The sauce gets its body from reduction and butter, not flour, so you don’t need any thickeners. That means the texture stays silky instead of pasty.
Storage and Reheating
- Refrigerator: Store leftovers in an airtight container for up to 3 days. The sauce will thicken as it chills.
- Freezer: You can freeze it, but the butter sauce may separate a bit after thawing. Freeze in a sealed container for up to 2 months and expect a slightly looser texture.
- Reheating: Warm gently in a skillet over low heat with a splash of broth. High heat can make the chicken dry and can push the butter sauce into an oily split.
Questions I Get Asked About This Recipe

Garlic Butter Chicken
Ingredients
Equipment
Method
- Season the chicken breasts generously with salt and pepper.
- Heat the olive oil in a large skillet over medium-high heat and sear chicken for 6-7 minutes per side until golden and cooked through to 165°F.
- Remove the chicken and set aside, then reduce the heat to medium.
- Add the butter and garlic to the skillet and cook for 1-2 minutes until fragrant.
- Add the chicken broth and dried thyme, scraping up any browned bits, then simmer for 2-3 minutes.
- Return the chicken to the pan, spoon the sauce over top, add lemon juice and parsley, and serve immediately.