Deep, glossy Dutch oven beef stew is the kind of dinner that earns repeat requests because the gravy clings to the beef, the potatoes hold their shape, and the carrots turn sweet without going mushy. The oven does the heavy lifting here, but the real payoff comes from the layered browning and the slow, covered braise that turns a tough cut into spoon-tender pieces with a rich, savory broth.
The flour on the beef does two jobs: it helps the meat brown, and it gives the stew just enough body without turning it pasty. Tomato paste, red wine, Worcestershire, and herbs build a base that tastes round instead of flat, while adding the potatoes and carrots later keeps them from disintegrating during the long cook. That timing matters more than most people think.
Below, I’ve laid out the small details that make this stew taste like it simmered all day for a reason, plus a few swaps and storage notes that help on busy weeks.
The beef came out fork-tender and the broth thickened up beautifully after that last hour with the potatoes and carrots. I’ve made a lot of stews that tasted thin, but this one had that rich, gravy-like finish my husband kept going back for.
Save this Dutch oven beef stew for the nights when you want fork-tender beef, glossy gravy, and a one-pot dinner that tastes like it cooked all afternoon.
The Browning Step That Gives This Stew Its Depth
The biggest difference between a stew that tastes flat and one that tastes like it simmered for hours is the beef browning. If the cubes crowd the pan, they steam and turn gray instead of developing the dark crust that turns into flavor once the wine and broth go in. Work in batches and leave space between the pieces; that extra few minutes pays off in every spoonful.
The flour coating does more than thicken. It helps the meat take on a deeper color and gives the broth a silky, lightly coated texture after the braise. If your pan looks dry after browning, that’s fine; the onion and tomato paste will pick up the browned bits and loosen them at the right time.
What the Beef, Wine, and Herbs Are Each Doing Here

- Beef chuck — This is the cut that breaks down into tender, beefy pieces during a long braise. Don’t swap in lean stew meat trimmed too aggressively; it can go dry before the sauce has time to deepen.
- Dry red wine — The wine lifts the browned bits from the pot and gives the broth a darker, richer edge. Use something you’d drink, but it doesn’t need to be expensive. If you skip it, add extra broth plus a small splash of red wine vinegar at the end to replace some of the brightness.
- Tomato paste — It adds concentration, color, and a subtle savory backbone. Cook it for the full minute with the garlic so it loses that raw taste and starts to caramelize at the edges.
- Fresh rosemary, thyme, and bay leaves — These herbs bring the stew into classic braise territory without making it taste like soup. Fresh is best here because dried herbs can go dusty in a long cook; if you need to substitute, use half the amount of dried and tie them in a little piece of cheesecloth if you have one.
- Baby potatoes and carrots — Adding them later keeps their shape. If you drop them in at the start, they’ll soften too much and soak up all the broth before the beef is done.
Building the Stew So the Broth Stays Rich, Not Thin
Brown the beef in a real layer
Heat the oil until it shimmers, then brown the floured beef in batches without moving it around too much. You want deep brown spots on the outside, not a gray surface. If the pot cools down and the meat starts to release liquid, stop and let the batch finish later; rushed browning gives you less flavor and more cloudy broth.
Cook the onion and tomato paste until they sweeten
The onion should soften and pick up some color before the garlic and tomato paste go in. After that, keep the garlic and paste in the pot for just a minute so the paste darkens slightly and smells savory instead of raw. If the garlic starts to brown hard, the heat is too high and the finished stew can taste bitter.
Scrape the pot before the braise
When the wine goes in, use a wooden spoon to scrape every browned bit from the bottom. Those stuck-on pieces are the backbone of the sauce. Let the wine bubble for a couple of minutes so the sharp edge cooks off; if you skip that step, the stew can taste harsh instead of rounded.
Finish low and slow in the oven
Cover the pot and bake until the beef is starting to give up at the edges. Add the potatoes and carrots only for the last hour so they stay intact and the broth can thicken around them. When it’s done, the beef should break apart with a fork, the potatoes should be tender through the center, and the broth should look glossy instead of watery.
How to Adapt This Stew for Different Kitchens and Different Schedules
Gluten-Free Version
Swap the all-purpose flour for a gluten-free flour blend that works one-for-one, or skip the flour and dust the beef lightly with cornstarch instead. You’ll still get browning, but the broth will be a touch less velvety, so let it reduce uncovered for a few minutes at the end if you want a thicker finish.
No Wine, Still Deep Flavor
Use an extra cup of beef broth plus 1 to 2 teaspoons of red wine vinegar or balsamic vinegar at the end. You’ll lose some of the wine’s roundness, but the stew will still taste balanced if you give the broth enough time to simmer after the swap.
Make It a Little Heartier
Add a cup of frozen peas or pearl onions during the last 10 minutes if you want more vegetable sweetness and color. Peas keep the stew from feeling too heavy, while pearl onions bring a softer, sweeter note that plays well with the beef.
Make-Ahead and Leftovers
This stew tastes even better the next day because the broth settles and the flavors meld. If you want to get ahead, make it completely, chill it, and reheat gently before serving; the potatoes will soften a little more, but the flavor deepens in a way that works in your favor.
Storage and Reheating
- Refrigerator: Store in an airtight container for up to 4 days. The broth will thicken as it chills, and the potatoes will soften a bit more.
- Freezer: Freezes well for up to 3 months. Cool completely first, then freeze in portions; the potatoes may turn a little softer after thawing, but the stew still holds up well.
- Reheating: Warm gently on the stovetop over low heat, adding a splash of broth if it looks too thick. Don’t boil it hard, or the beef can tighten up and the potatoes can break apart.
Answers to the Questions Worth Asking
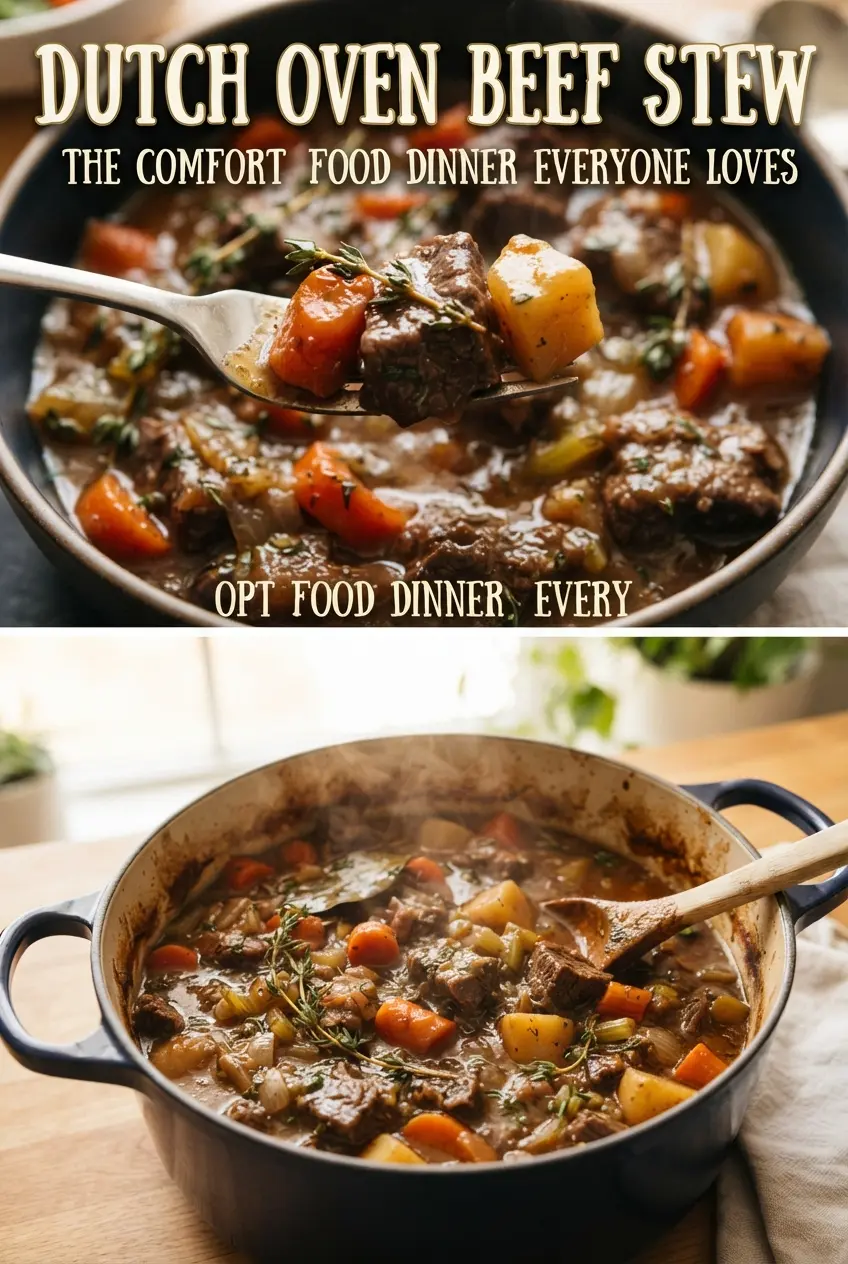
Dutch Oven Beef Stew
Ingredients
Equipment
Method
- Preheat the oven to 325°F. Season the beef with salt and black pepper, toss with the flour, and brown in batches in the Dutch oven, until deeply colored.
- Cook the diced onion in the Dutch oven for 5 minutes, stirring as it softens and turns translucent. Add the minced garlic and tomato paste for 1 minute, until fragrant.
- Pour in the red wine and scrape the bottom of the Dutch oven to release browned bits. Simmer for 2 minutes, until slightly reduced and glossy.
- Add the beef broth, Worcestershire sauce, rosemary, thyme, and bay leaves, then return the browned beef to the pot. Cover and bake for 2 hours at 325°F, until the beef is starting to become tender.
- Stir in the halved baby potatoes and the carrot pieces, making sure they’re submerged in the liquid. Cover and bake for 1 hour more at 325°F until everything is tender, visibly thickened, and sauce clings to a spoon.
- Remove the herb stems and bay leaves before serving. Serve hot, with a thick, glossy stew texture over the beef and vegetables.