Golden-seared chicken breast with a molten mushroom, garlic butter, and cheese filling is the kind of dinner that gets people to pause at the table before the first bite. The outside turns deeply browned and savory, while the center stays rich and steamy instead of leaking out into the pan. When the chicken is sliced open, the filling should look glossy and tucked in, not watery or greasy.
What makes this version work is patience at the mushroom stage. The mushrooms need enough time in the butter to give up their moisture and cook down into something concentrated before the cheese goes in. If that step gets rushed, the filling turns loose and the chicken breast can’t hold it as cleanly. A good sear before the oven also matters. It sets the surface, builds flavor, and helps the chicken finish with a better texture than baking alone ever will.
Below, I’ve laid out the part that matters most: how to keep the filling thick, how to cut the pocket without slicing through the chicken, and what to watch for so the cheese stays inside where it belongs. There’s also a few useful swaps if you want to adjust the filling without losing that garlicky, mushroomy finish.
The mushrooms cooked down until they were thick, not watery, and the chicken stayed juicy all the way through. I followed the sear-and-bake timing exactly and the cheese stayed inside instead of running all over the pan.
Save this cheesy garlic butter mushroom stuffed chicken for the night you want a crisp, golden crust and a gooey mushroom-cheese center without a pile of dishes.
The Mushroom Filling Has to Cook Down Before It Can Stay Put
The biggest mistake with stuffed chicken is treating the filling like a shortcut. Mushrooms hold a lot of water, and if you mix in the cheese before that moisture cooks off, the filling turns loose and can leak straight out of the pocket. Cooking the mushrooms in butter over medium-high heat until the pan looks dry is what gives you that thick, spoonable center.
There’s another reason that step matters: the butter and mushroom bits carry the garlic and thyme deeper into the filling, so every bite tastes seasoned instead of just cheesy. Once the mushrooms are reduced, pull the pan off the heat briefly before stirring in the cheese. That keeps the mozzarella from turning stringy too early and gives you a filling that holds together when you stuff the chicken.
What Each Ingredient Is Actually Doing in the Pan
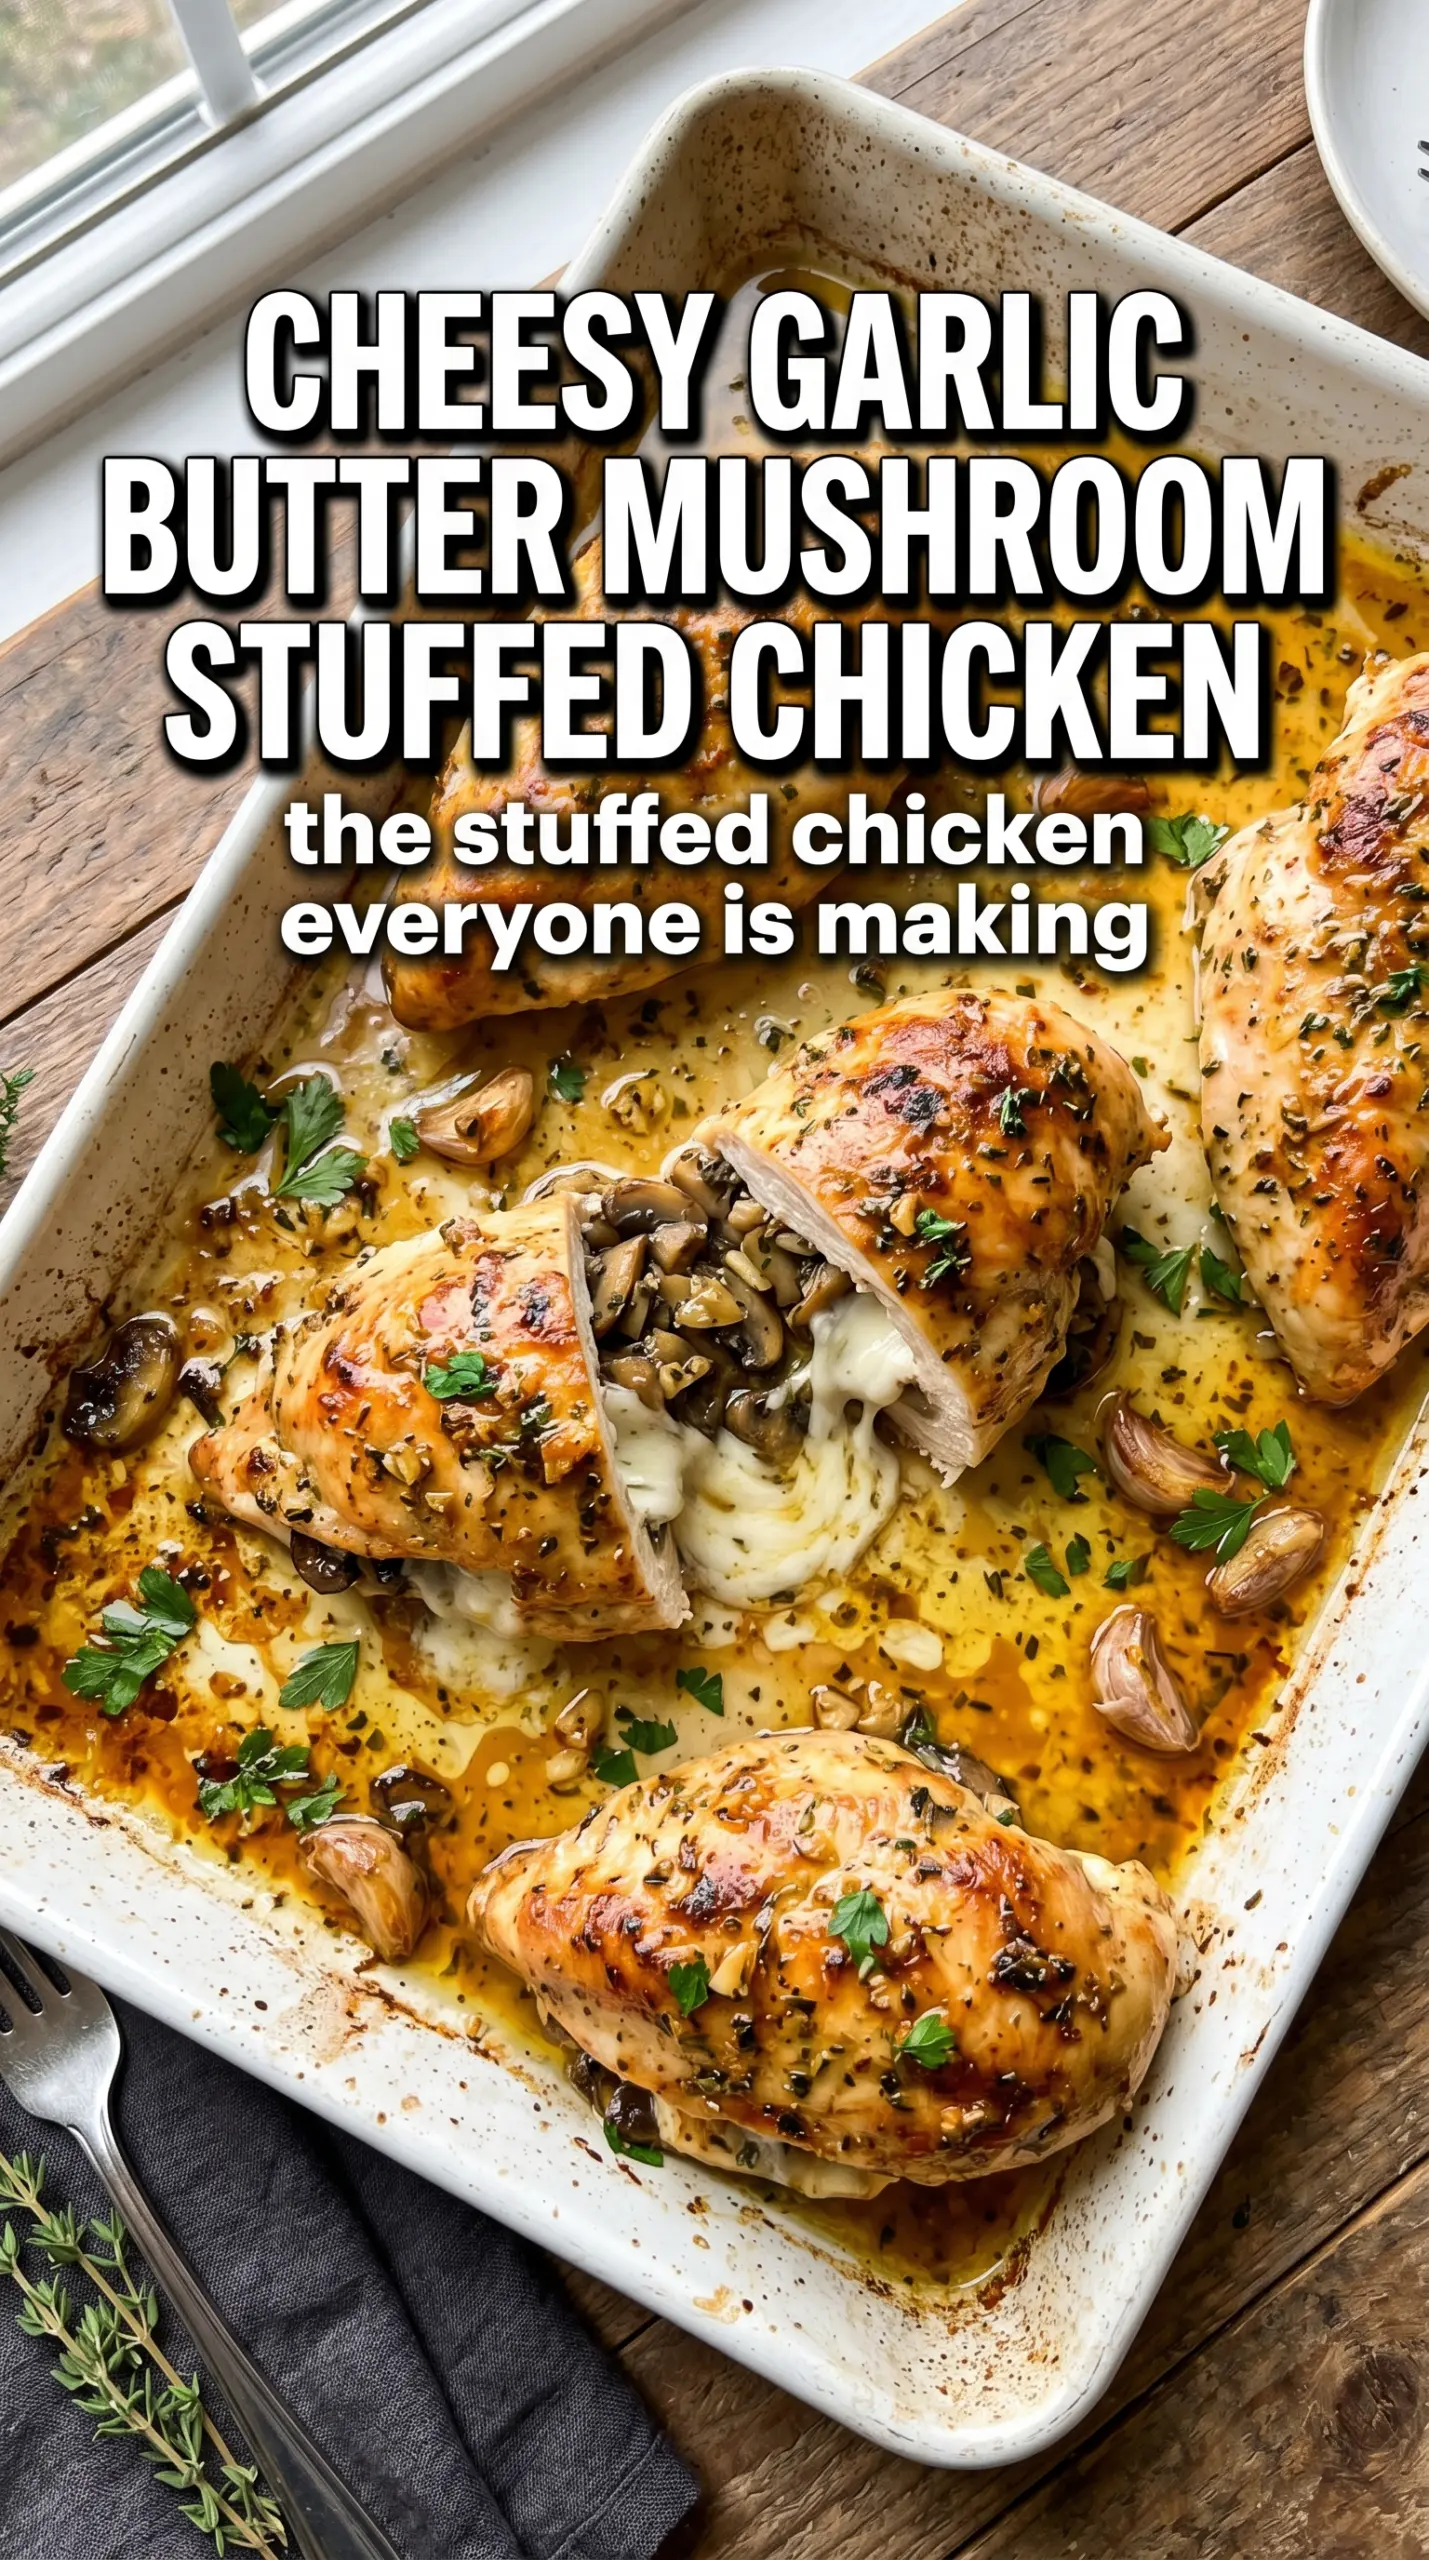
- Cremini mushrooms — These have enough body and earthiness to stand up to the chicken. White button mushrooms work in a pinch, but they cook down a little softer and taste milder. Chop them finely so the filling packs neatly into the pocket instead of falling out in big pieces.
- Mozzarella and Parmesan — Mozzarella gives you that stretchy, molten pull, while Parmesan sharpens the mushroom filling and helps it taste seasoned all the way through. Pre-shredded mozzarella will melt, but block-grated cheese melts smoother and tends to stay creamier.
- Butter and garlic — Butter carries the garlic flavor and gives the mushrooms a richer finish than oil alone. Fresh garlic matters here because it gets cooked into the filling; jarred garlic can taste flat once baked.
- Chicken breasts — Look for evenly sized breasts so they finish at the same time. If one side is much thicker, pound just the thickest part lightly before cutting the pocket. That helps the chicken cook evenly without splitting open.
- Smoked paprika — This doesn’t make the dish smoky in a heavy way. It just gives the seared crust a deeper, more savory edge that matches the mushrooms.
Building the Pocket, the Sear, and the Bake
Cooking the Mushrooms Until They Go Dry
Start by melting the butter in a skillet and adding the finely diced mushrooms. Let them cook over medium-high heat until they release their liquid and that liquid evaporates, which usually takes 5 to 6 minutes. You’re looking for the mushrooms to shrink down and start taking on a deeper brown color around the edges. Add the garlic and thyme only after the pan looks nearly dry, or the garlic can burn before the mushrooms finish cooking.
Stuffing Without Tearing the Chicken
Cut a deep pocket into the thickest side of each chicken breast, keeping the knife parallel to the cutting board so you don’t slice all the way through. Season the inside and outside well, because the filling alone won’t season the whole breast. Pack the mushroom-cheese mixture in firmly, but don’t overfill. If the pocket is bursting before it hits the skillet, the filling will melt out during searing.
Getting the Golden Crust First
Use an oven-safe skillet and sear the stuffed chicken in olive oil over medium-high heat for 3 to 4 minutes per side. You’re not cooking it through at this stage; you’re building color and giving the outside a chance to set. If the chicken sticks badly, it usually needs another minute before turning. A proper sear releases more cleanly once the crust forms.
Finishing in the Oven Without Drying It Out
Move the skillet to a 400°F oven and bake until the internal temperature reaches 165°F, usually 18 to 22 minutes depending on thickness. Pull it as soon as it hits temperature; waiting for the cheese to look firmer is how chicken dries out. Let it rest for 5 minutes before removing the toothpicks and slicing. That rest keeps the filling from running out the second the knife goes in.
How to Adapt It When You Need a Different Finish
Dairy-Free Version
Use a dairy-free butter and a meltable plant-based mozzarella-style cheese. The filling will still be rich, but it won’t have quite the same stretch or salty finish as Parmesan. Add a small pinch more salt and a little extra thyme to keep the filling tasting full.
Gluten-Free and Naturally Low-Carb
This recipe is already gluten-free and low-carb as written, as long as your cheese and seasonings are certified gluten-free if that matters for your kitchen. The texture stays the same, which is rare for a stuffed chicken dinner, so there’s nothing to work around here.
Swap the Mushrooms for Spinach
If you want a different filling, wilt chopped spinach and squeeze it dry before mixing it with the cheese. The flavor gets lighter and less earthy, but the pocket still stays packed. Don’t skip the squeeze step or the filling will turn watery in the oven.
Storage and Reheating
- Refrigerator: Store leftovers in an airtight container for up to 3 days. The chicken stays juicy, though the cheese center firms up as it chills.
- Freezer: Freeze after baking if needed, wrapped well and sealed in a freezer container for up to 2 months. The filling won’t stay quite as creamy after thawing, but it reheats better than most stuffed chicken dishes.
- Reheating: Reheat covered in a 325°F oven until warmed through, or in a skillet with a splash of water and a lid. High microwave heat can make the chicken rubbery before the center is hot, so go low and slow.
Answers to the Questions Worth Asking

Cheesy Garlic Butter Mushroom Stuffed Chicken
Ingredients
Equipment
Method
- Melt the butter in a skillet over medium-high heat, then add the diced cremini mushrooms and cook 5-6 minutes until all moisture evaporates, stirring occasionally and looking for dry, sautéed mushrooms.
- Add the minced garlic and fresh thyme leaves and cook for 1 minute until fragrant, then remove from heat and let the mixture cool slightly so the cheese won’t seize.
- Stir in the shredded mozzarella and grated Parmesan until fully combined and melty, then set the filling aside.
- Cut a deep pocket into each chicken breast, keeping the bottom intact, then season inside and out generously with salt, pepper, garlic powder, and smoked paprika.
- Spoon the mushroom cheese mixture into each pocket and secure the opening with toothpicks so the filling stays inside during cooking.
- Heat olive oil in the oven-safe skillet over medium-high heat and sear the stuffed chicken 3-4 minutes per side until deeply golden with caramelized edges.
- Bake at 400°F for 18-22 minutes until the internal temperature reaches 165°F, watching for juices to run clear.
- Remove from the oven, take out the toothpicks, drizzle with extra garlic butter, and rest 5 minutes before slicing so the filling stays molten but doesn’t spill.