Crispy baked shells, juicy seasoned chicken, and cold fresh toppings make baked chicken tacos a meal that earns repeat status fast. The contrast is the whole point: the tortillas turn sturdy and crackly in the oven, while the chicken stays savory and tender enough to pile high without drying out. Once everything is assembled, each bite gives you crunch, heat, and a little brightness from lime.
What makes this version work is keeping the chicken and shells separate until the very end. The chicken gets cooked in a skillet first, which gives you better browning and more control over doneness than baking it from raw. The tortillas are brushed or sprayed lightly with oil before they go into the oven, so they crisp instead of turning leathery. That small bit of fat is what helps them hold their shape and taste like an actual taco shell, not a toasted tortilla.
Below, you’ll find the little details that keep the shells from splitting, the chicken from tasting flat, and the whole tray from feeling fussy. Once you get the method down, these are easy to scale for a busy night or a casual taco spread.
The tortillas got crisp in the oven without cracking apart, and the chicken stayed juicy after shredding. I loved that the shells held up under salsa and sour cream instead of going soggy right away.
Crispy baked chicken tacos with juicy filling and crunchy shells are the kind of dinner worth keeping close for taco night.
The Trick to Crispy Shells Without Frying Them
The biggest mistake with baked taco shells is loading them with oil and expecting them to crisp up like fried shells. That usually gives you limp tortillas with greasy spots and brittle edges. A light coating is enough here because the oven needs just enough fat on the surface to dry the tortilla while it heats.
Shaping matters too. Corn tortillas need structure while they bake, or they flatten out before they set. Set them across oven-safe bars, flip them over a rack, or rest them against each other on the sheet so they hold that taco shape until the edges stiffen. If they look a little pale when you pull them out, give them another minute or two — they should feel dry and rigid, not soft in the center.
What the Chicken, Tortillas, and Toppings Are Each Doing
The chicken breast gives you a clean, mild base that takes on taco seasoning well without fighting the toppings. It shreds neatly if you cook it just to temperature and let it rest for a few minutes before pulling it apart. If you overcook it, the filling turns stringy and dry, which is hard to rescue once it’s in the shell.
- Corn tortillas — These are the right choice for the baked shell because they crisp up with a sturdier bite than flour tortillas. Use fresh tortillas if you can; older ones crack before they shape properly.
- Olive oil — This helps the chicken brown in the skillet and keeps the seasoning from tasting dusty. Any neutral oil works if that’s what you have.
- Taco seasoning — This is doing the heavy lifting on flavor, but the best result comes from seasoning the chicken before it hits the pan, not after. If your blend is salt-free, season the chicken itself or the filling will taste flat.
- Vegetable oil spray — Don’t skip this on the tortillas. It gives you the thin, even coating that turns them crisp instead of dry and stiff.
- Lettuce, tomatoes, cheese, cilantro, sour cream, salsa, lime — These toppings balance the rich chicken and crunchy shell with coolness, acidity, and moisture. Add the wetter toppings last so the shells stay crisp as long as possible.
Building the Filling and Shells in the Right Order
Seasoning the Chicken First
Pat the chicken dry, then coat it with taco seasoning, salt, and pepper so the spice hits the meat directly. When it goes into the skillet, the surface should sizzle right away; that sound tells you the pan is hot enough to brown instead of steam. Cook until the thickest part reaches 165°F, and don’t rush the process by turning the heat too high, or the outside will brown before the inside is done.
Shredding While It’s Still Warm
Let the chicken rest for a few minutes, then shred it with two forks while it’s still warm enough to pull apart cleanly. Warm chicken absorbs the seasoning juices better than cold chicken, so the filling tastes more cohesive. If the meat seems dry, spoon a little of the pan drippings over it before filling the shells.
Shaping and Baking the Taco Shells
Spray the tortillas lightly and form them into taco shapes on a baking sheet. Bake at 375°F until they turn crisp and hold their shape, usually 8 to 10 minutes. If they bend when you lift one, it needs another minute; if it darkens too fast, your oven is running hot and the tortillas are too close to the heat source.
Filling and Finishing
Spoon the shredded chicken into the shells first, then add lettuce, tomatoes, cheese, and whatever else you like. Keep the wetter toppings toward the top so they don’t soak straight through the shell before you eat. A squeeze of lime right at the end wakes up the seasoning and keeps the tacos from tasting heavy.
How to Adapt These Tacos for Different Nights
Make Them Gluten-Free
Corn tortillas are already gluten-free, so this version works well as long as your taco seasoning is certified gluten-free. Check the seasoning packet if you’re using a store-bought blend, since some include flour or anti-caking ingredients that contain gluten.
Use Chicken Thighs for a Richer Filling
Boneless thighs stay a little juicier and have a deeper chicken flavor, which works nicely with taco seasoning. They usually need a few extra minutes in the skillet, but the payoff is a softer, richer filling that holds up well in the crispy shell.
Make It Dairy-Free
Skip the cheese and sour cream, then lean on salsa, avocado, extra lime, and cilantro for the finish. You lose a little richness, but the tacos stay bright and satisfying if you build enough contrast with the toppings.
Storage and Reheating
- Refrigerator: Store the chicken separately for up to 4 days. The baked shells soften once assembled, so keep toppings and shells apart if you want leftovers that still taste fresh.
- Freezer: The cooked chicken freezes well for up to 2 months. Freeze it in a flat layer or portioned containers; the assembled tacos and baked shells don’t freeze well because the texture gets soggy and fragile.
- Reheating: Reheat the chicken in a skillet over low heat with a splash of water or in the microwave in short bursts. Warm the shells in the oven for a few minutes to bring back some crispness, then assemble right before serving so they don’t collapse.
Questions I Get Asked About This Recipe
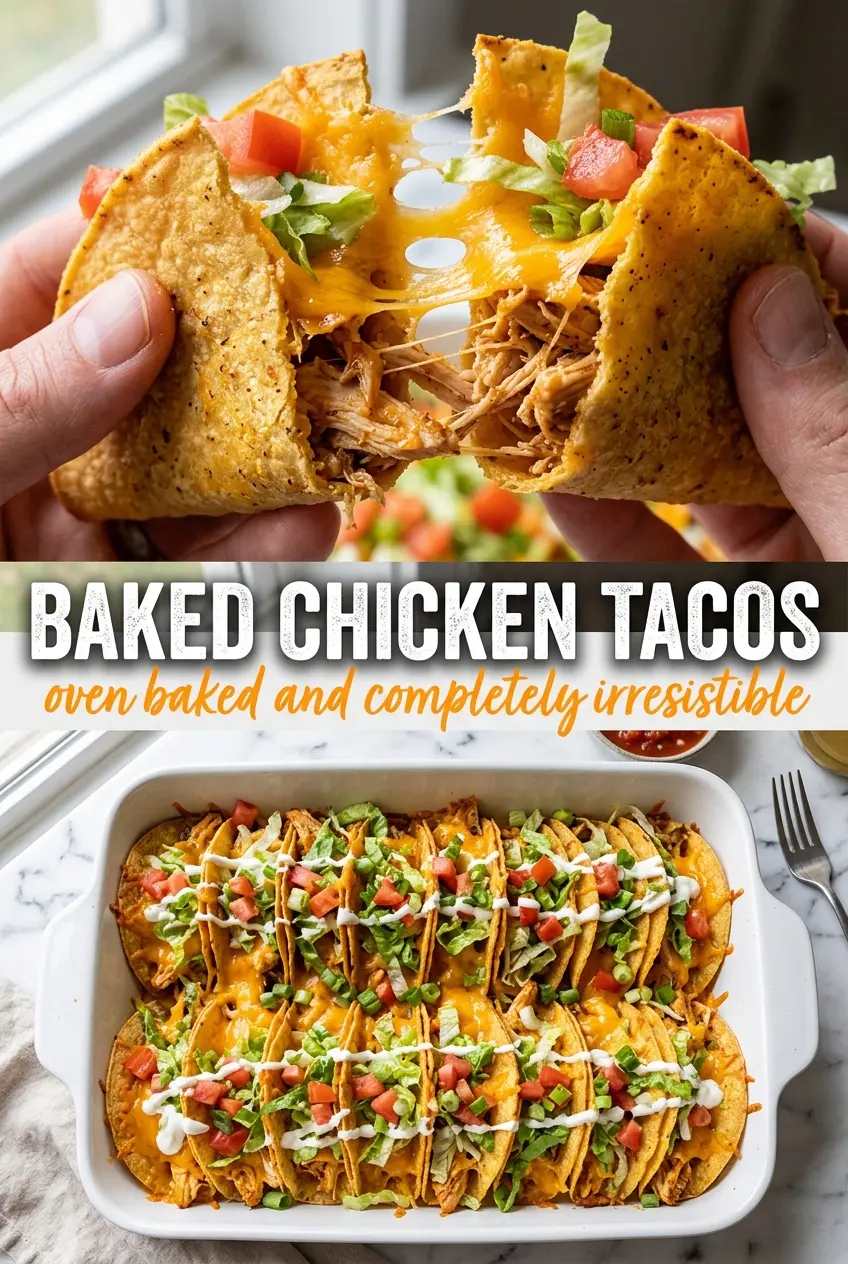
Baked Chicken Tacos
Ingredients
Equipment
Method
- Season the chicken breasts with salt, pepper, and taco seasoning. Heat olive oil in a cast iron skillet over medium-high heat and add the chicken.
- Cook until the internal temperature reaches 165°F, about 6-8 minutes per side, with a steady sizzle. The chicken should be fully cooked with no pink in the center.
- Transfer the chicken to a plate and shred it. Keep shredding until you have bite-size pieces for filling the tacos.
- Preheat the oven to 375°F. Spray a sheet pan with vegetable oil cooking spray and arrange corn tortillas into taco shells.
- Bake for 8-10 minutes at 375°F until crispy, watching for golden, firm edges. Remove when the shells hold their shape and sound slightly firm when tapped.
- Fill each crispy tortilla shell with the shredded chicken. Add lettuce, tomatoes, shredded cheese, and cilantro on top.
- Serve immediately with salsa, sour cream, and lime wedges. Finish with lime juice as desired for brightness.