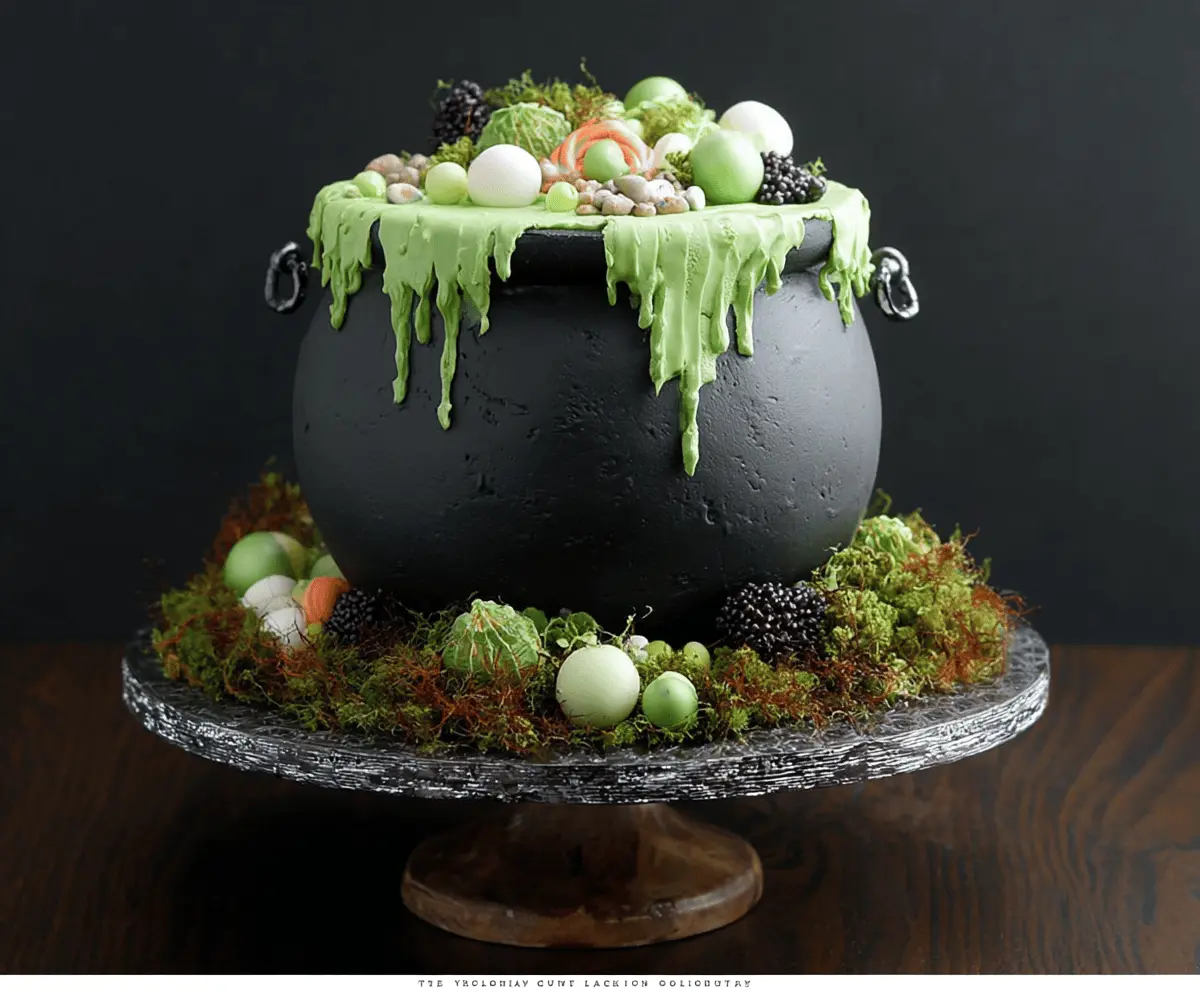
This Witch Cauldron Cake is a fun and spooky treat perfect for Halloween! It’s round, chocolatey, and covered with a glossy black frosting that looks just like a witch’s cauldron.
You can even add gummy worms or spooky candies on top to make it extra festive! I love how kids enjoy helping decorate it—wreaking delicious havoc in the kitchen! 🎃
Key Ingredients & Substitutions
All-Purpose Flour: This is the base for the cake. You can use gluten-free all-purpose flour if you have dietary restrictions.
Cocoa Powder: This gives the cake its rich chocolate flavor. You could use dark cocoa powder for a deeper taste or even carob powder for a caffeine-free option.
Unsalted Butter: It provides moisture and richness. If you’re dairy-free, consider using coconut oil or a vegan butter substitute.
Buttermilk: It helps achieve a moist cake texture. If you don’t have it, mix 1 tablespoon of vinegar or lemon juice with 1 cup of milk and let it sit for 5 minutes.
Black Gel Food Coloring: Important for achieving that cauldron look! You can use a mix of cocoa powder and a small amount of regular food coloring if gel isn’t available, but it won’t be as vibrant.
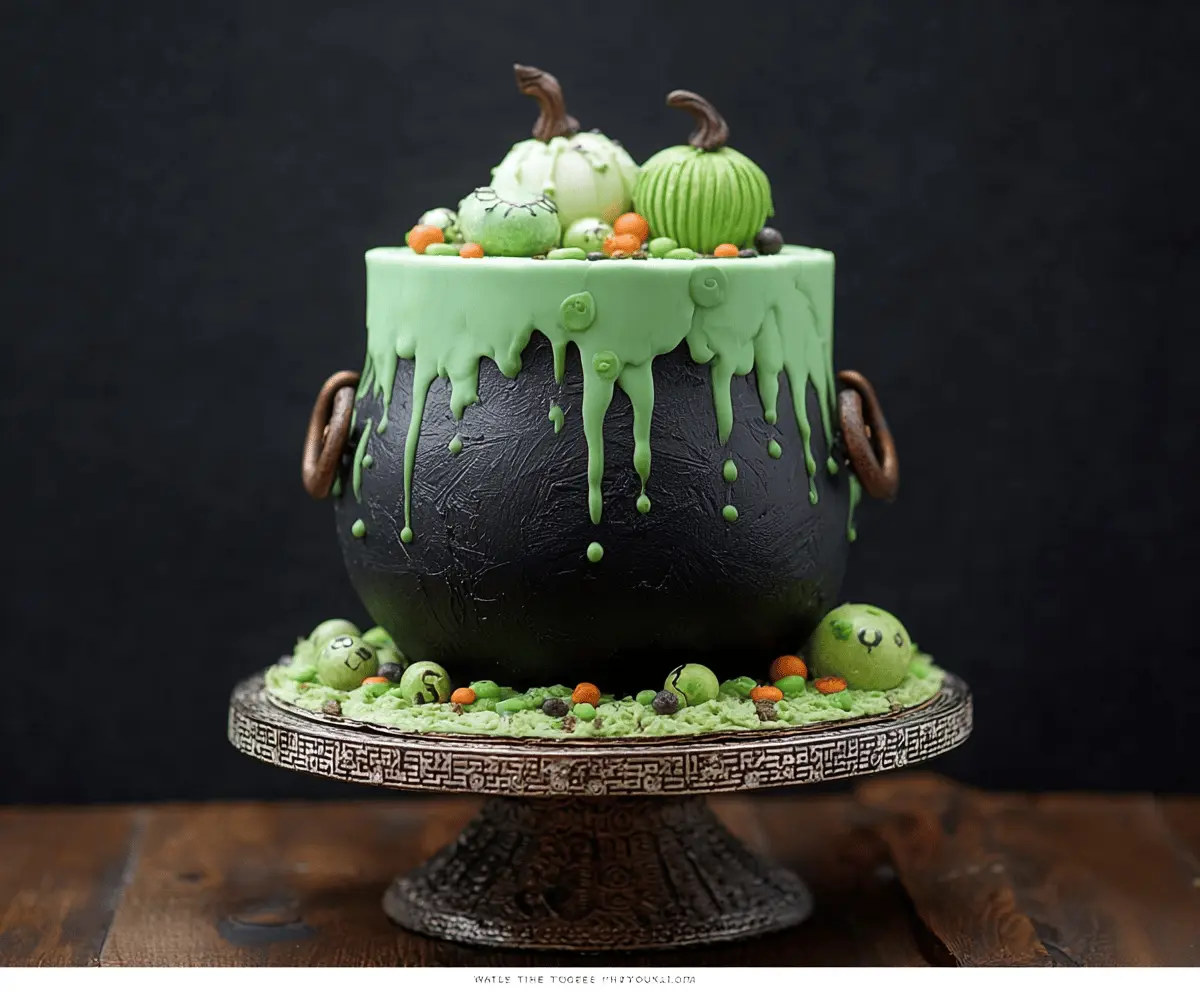
How Do You Create the Perfect Green Drip Effect?
The green “potion” drip is a fun and crucial part of this cake. To get it just right, melt the white chocolate or candy melts properly. Here’s how:
- Melt in 30-second intervals, stirring well each time to prevent overheating.
- Add a drop of green gel food coloring until you get the desired shade.
- Let it cool for about 5 minutes. It should still be pourable but thicker than melted chocolate.
- Test the drip on a piece of parchment paper before applying it to your cake!
This helps you avoid any drips that are too runny or don’t drip at all. Trust me, taking a moment to test can ensure a perfect finish on your cauldron cake!
How to Make a Witch Cauldron Cake
Ingredients You’ll Need:
For the Cake:
- 3 cups all-purpose flour
- 2 ½ tsp baking powder
- 1 tsp baking soda
- ½ tsp salt
- 1 cup cocoa powder (for a chocolate base)
- 1 ½ cups granulated sugar
- 1 cup unsalted butter, softened
- 4 large eggs
- 1 ½ cups buttermilk
- 2 tsp vanilla extract
For the Black Cauldron Frosting:
- 1 cup unsalted butter, softened
- 4 cups powdered sugar
- ¼ cup cocoa powder (adjust for darkness)
- 2-4 tbsp milk or heavy cream
- Black gel food coloring
For the Green “Potion” Drip:
- 1 cup white chocolate or candy melts
- Green gel food coloring
For Decoration:
- Pretzels (for cauldron handles)
- Green fondant or modeling chocolate (to make pumpkins and spooky round accents)
- Edible marker or black icing for face details
- Assorted small candies (orange, black, green)
- Crumpled green cake or green coconut flakes (for grass effect on cake board)
- Optional: pipe green buttercream or fondant “slime” drips on cauldron
How Much Time Will You Need?
This delightful cake requires about 1 hour for preparation and baking, plus a little extra time for cooling and decorating (around 1-2 hours). Plan for about 3 hours total to get everything ready and chilling, making it perfect for a Halloween gathering or celebration!
Step-by-Step Instructions:
1. Bake the Cake Layers:
Preheat your oven to 350°F (175°C) and grease your round cake pans (two 8-inch or one 10-inch and a half-sphere mold). In a large mixing bowl, sift together the flour, cocoa powder, baking powder, baking soda, and salt. In another bowl, cream together the softened unsalted butter and granulated sugar until light and fluffy. Add in the eggs one at a time, beating well after each, followed by the vanilla extract. Gradually mix in the dry ingredients alternating with buttermilk, mixing until the batter is smooth. Divide the batter between the pans and bake for 25-35 minutes. Let them cool completely once done.
2. Prepare the Black Frosting:
Using a mixer, beat the softened butter until creamy. Gradually add the powdered sugar and cocoa powder while mixing. Combine with milk or cream to reach your desired frosting consistency. Finally, mix in black gel food coloring until the frosting reaches a rich, deep black shade.
3. Make the Green Drip:
Melt the white chocolate or candy melts in a microwave-safe bowl in 30-second bursts, stirring as you go. Once melted, add green gel food coloring until you get a vibrant slime color. Let it cool slightly so it thickens before using—this helps create the perfect drip effect!
4. Assemble the Cauldron Cake:
Level your cooled cake layers if needed. Stack them, applying a crumb coat of black frosting around the layers and on top. Optional: carve the edges slightly to shape them like a cauldron. Chill the cake to set the crumb coat, then apply a thick final layer of black frosting on the cake’s exterior. Use a bit of frosting to glue pretzels on the sides as handles.
5. Add Green Drip and Decorations:
Drizzle the cooled green chocolate around the edges to mimic potion run-off. Shape green fondant into pumpkins, adding details with tools or an edible marker for faces. Place decorative candies and fondant pumpkins atop the cake. Finally, spread crumbled green cake or coconut flakes around the base on your cake board to enhance the spooky, grassy look.
6. Final Touches:
Let all your decorations set, then refrigerate the cake until you’re ready to serve. It’s best served at room temperature to enjoy the full flavors of your Witch Cauldron Cake!
This Witch Cauldron Cake is sure to bring joy and a dash of spookiness to your Halloween festivities, leaving your guests enchanted!
Can I Use a Different Type of Flour?
Yes, you can use gluten-free all-purpose flour as a substitute for regular flour if you have dietary restrictions. Just ensure you choose a blend that’s suitable for baking!
How Do I Store Leftover Cake?
Store any leftover cake in an airtight container at room temperature for up to 3 days. If you want to keep it longer, you can refrigerate it, but let it come to room temperature before serving for the best texture.
What If I Don’t Have Buttermilk?
No problem! You can create a quick substitute by mixing 1 tablespoon of vinegar or lemon juice with 1 cup of regular milk. Let it sit for about 5 minutes to thicken before using it in the recipe.
How Do I Make the Green Drip Less Runny?
If the green chocolate drip is too runny, let it cool slightly longer before applying it to the cake. You want it to be pourable but thick enough to hold its shape when dripping. Testing a small amount on parchment paper can help you find the right consistency!