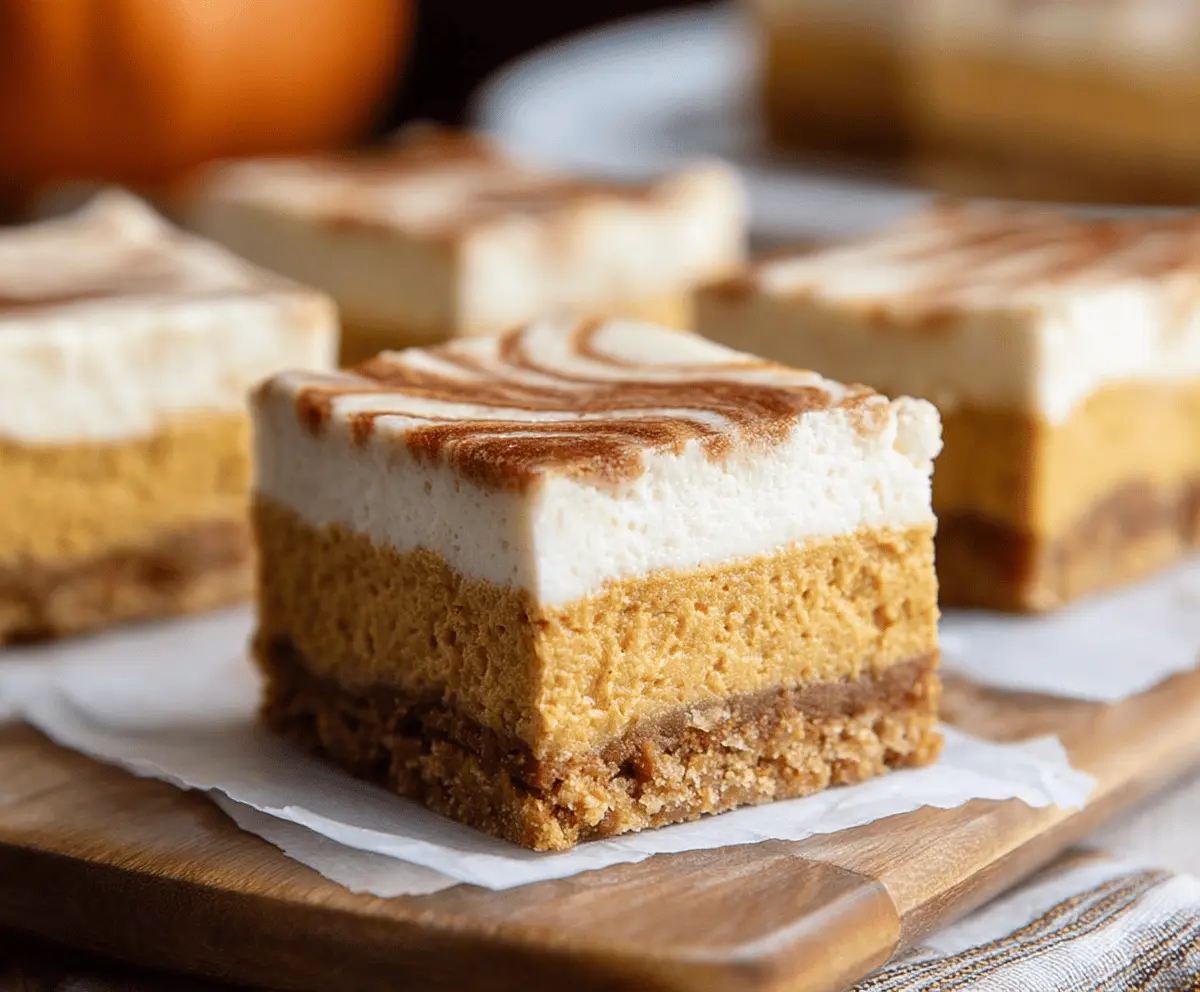
These Pumpkin Pie Cheesecake Bars are a lovely combo of creamy cheesecake and spiced pumpkin pie filling. They have a tasty graham cracker crust that keeps things crunchy!
Perfect for fall get-togethers, these bars are like a hug in dessert form. I mean, who can resist that sweet pumpkin goodness? Sharing is caring, but good luck keeping some for yourself! 😄
Key Ingredients & Substitutions
Graham Crackers: These are the base for your crust. If you don’t have graham crackers, try digestive biscuits or vanilla wafers. For gluten-free options, use gluten-free graham crackers or nuts blended into crumbs.
Cream Cheese: This is essential for that rich cheesecake texture. If you’re looking for a lighter version, consider using Neufchâtel cheese, which has less fat. Vegan cream cheese is another great alternative for a dairy-free option.
Pumpkin Puree: Canned pumpkin puree is the easiest choice. If you can’t find it, you can make your own by roasting and pureeing fresh pumpkin. Just ensure it’s well-drained to avoid excess moisture in the bars.
Heavy Whipping Cream: This gives your topping that light, fluffy texture. If you want a lighter version, you can use whipped topping or a dairy-free alternative like coconut cream. Just make sure it’s well-chilled for the best results.
How Do I Perfectly Bake the Pumpkin Layer?
Baking the pumpkin cheesecake layer requires some attention to ensure it turns out just right. Here are my tips:
- Ensure that all your ingredients are at room temperature; this helps everything blend smoothly.
- Don’t overmix the batter once you add the eggs. Just blend until combined to prevent cracks in the cheesecake.
- Check for doneness by gently shaking the pan—the center should jiggle slightly but not be liquid. This ensures a perfect creamy texture.
- Cooling is key! Let it cool to room temperature before placing it in the fridge; this helps it set properly without sweating.
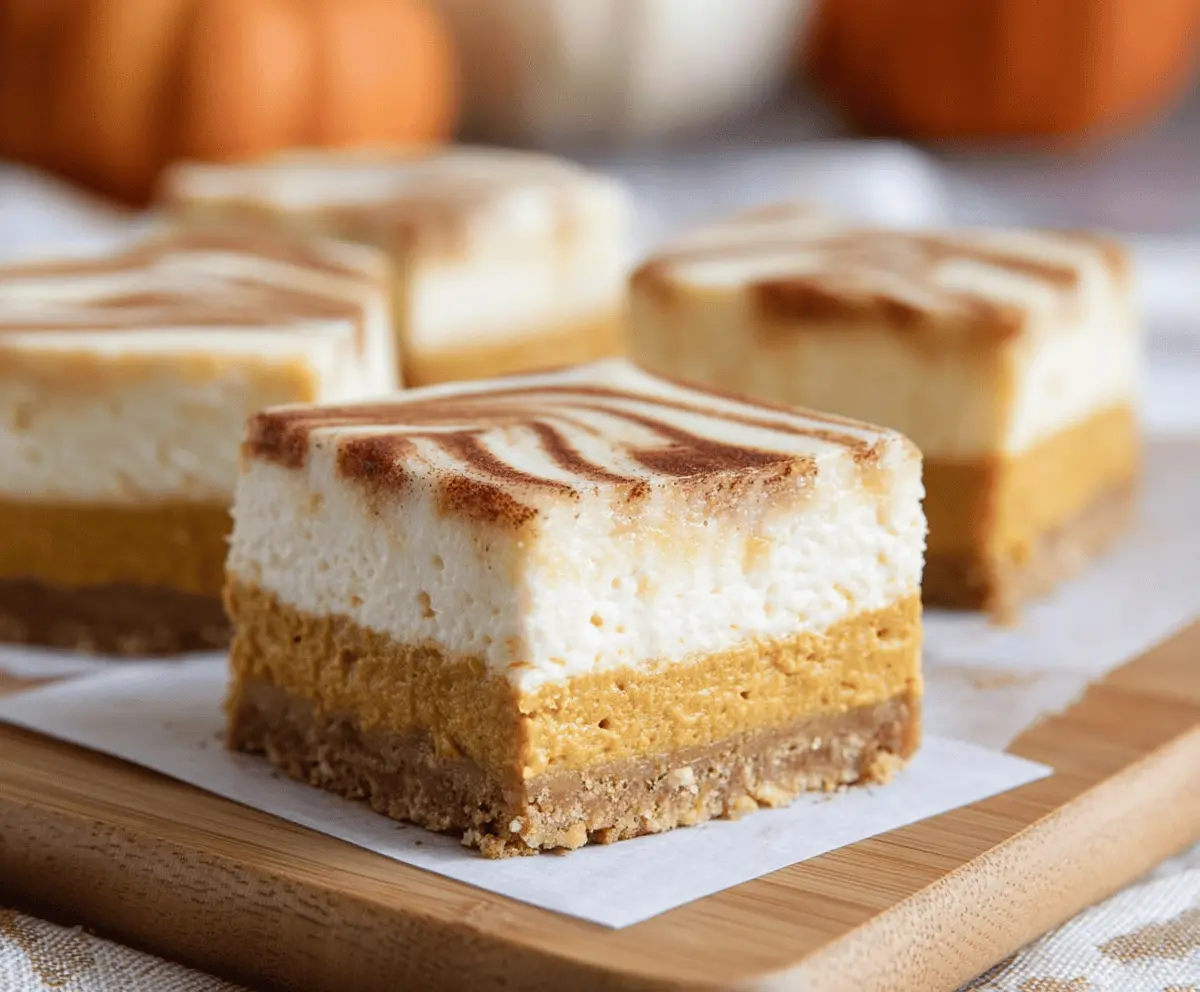
Delicious Pumpkin Pie Cheesecake Bars
Ingredients You’ll Need:
For the Crust:
- 2 cups graham cracker crumbs
- 1/2 cup unsalted butter, melted
- 1/4 cup granulated sugar
For the Pumpkin Cheesecake Layer:
- 16 oz (450g) cream cheese, softened
- 1 cup canned pumpkin puree
- 3/4 cup granulated sugar
- 2 large eggs
- 1 teaspoon vanilla extract
- 1 teaspoon pumpkin pie spice (or a mix of cinnamon, nutmeg, ginger, and cloves)
- 1/4 teaspoon salt
For the Cheesecake Topping:
- 8 oz (225g) cream cheese, softened
- 1/2 cup powdered sugar
- 1 teaspoon vanilla extract
- 1 cup heavy whipping cream
For Garnish:
- Ground cinnamon or pumpkin pie spice for dusting
How Much Time Will You Need?
This whole recipe takes about 25 minutes of active preparation time, plus 2-3 hours for chilling. You’ll need time to bake the cheesecakes and allow them to set properly in the refrigerator. So, grab your favorite drink and let those delicious layers come together!
Step-by-Step Instructions:
1. Preheat and Prep the Pan:
Start by preheating your oven to 350°F (175°C). Line a 9×9-inch square baking pan with parchment paper, allowing some overhang on the sides. This makes it easier to lift the cheesecake bars out later!
2. Make the Crust:
In a medium bowl, mix together the graham cracker crumbs, melted butter, and granulated sugar until everything is well combined. You want it to feel like damp sand.
3. Bake the Crust:
Press the crumb mixture firmly into the bottom of the prepared pan using your fingers or the bottom of a glass to make it nice and even. Bake in the oven for 8-10 minutes, until it’s set and lightly golden. Once baked, let it cool while you prepare the filling.
4. Prepare the Pumpkin Cheesecake Layer:
In a large mixing bowl, use an electric mixer to beat the softened cream cheese until it’s smooth and creamy. Add in the pumpkin puree, granulated sugar, eggs, vanilla extract, pumpkin pie spice, and salt. Mix until everything is well blended and smooth.
5. Layer the Pumpkin Cheesecake Batter:
Carefully pour the pumpkin cheesecake batter over your cooled crust. Use a spatula to spread it out evenly.
6. Bake the Cheesecake Layer:
Pop it into the oven and bake for 35-40 minutes. The edges should be set, but the center can still be slightly jiggly. Allow it to cool completely at room temperature, then chill it in the fridge for at least 2 hours, or until it has fully set.
7. Make the Cheesecake Topping:
While waiting for the bars to chill, prepare the topping. Beat together the cream cheese, powdered sugar, and vanilla extract until it’s smooth and creamy. In a separate bowl, whip the heavy whipping cream until stiff peaks form.
8. Combine the Toppings:
Gently fold the whipped cream into the cream cheese mixture until everything is well combined and smooth. This will give your topping that nice, fluffy texture!
9. Assemble the Dessert:
Spread the cheesecake topping evenly over the chilled pumpkin cheesecake layer. Dust the top lightly with ground cinnamon or pumpkin pie spice for a pretty finish. If you like, use a toothpick to create a decorative swirl pattern—it’s all about those little touches!
10. Chill and Serve:
Return the bars to the refrigerator for another hour to set the topping. Once they’re fully chilled, carefully lift them out of the pan using the parchment paper overhang and cut into squares to serve.
11. Enjoy!
Now it’s time to savor your delicious, creamy Pumpkin Pie Cheesecake Bars! They’re perfect for gatherings or as a cozy dessert. Happy eating!
Can I Use Regular Cream Cheese Instead of Low-Fat or Vegan Options?
Absolutely! Regular cream cheese is what gives these bars their rich and creamy texture. If you want a lighter version, you can opt for low-fat cream cheese or a vegan alternative, but keep in mind it may slightly alter the flavor and texture.
How Do I Store Leftovers?
Store any leftovers in an airtight container in the refrigerator. They should last for about 3-4 days. If you want to enjoy them later, you can also freeze them, but be sure to wrap them well to prevent freezer burn.
Can I Make These Bars Ahead of Time?
Yes, these bars are perfect to make ahead! You can prepare them a day or two in advance. Just store them in the refrigerator until you’re ready to serve. They may even taste better as the flavors meld together!
What Can I Use Instead of Graham Crackers for the Crust?
If you’re looking for alternatives, you can use digestive biscuits, vanilla wafers, or even crushed nuts for a gluten-free option. Just ensure that whatever you use is finely ground to hold the crust together nicely.