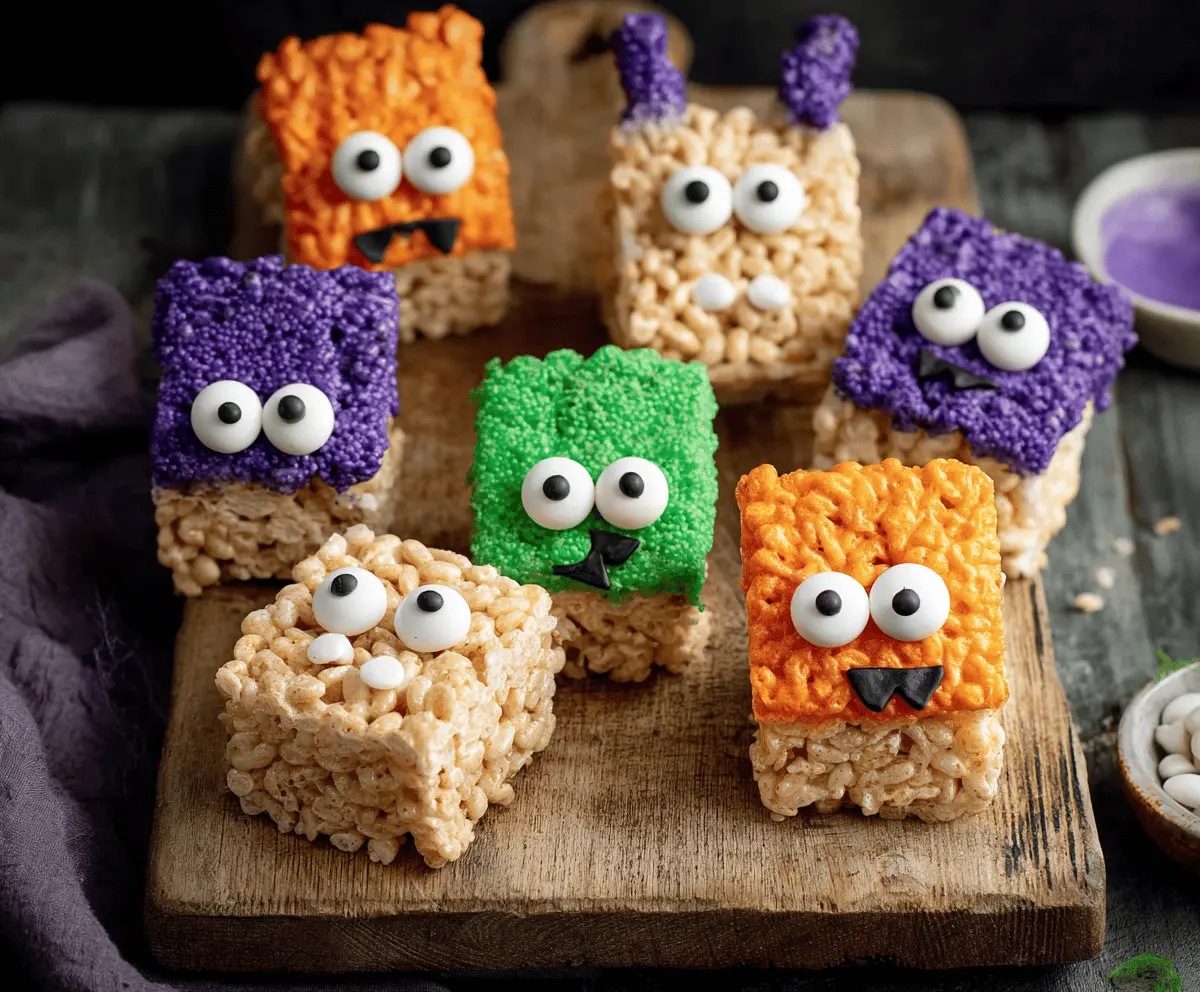
These Monster Rice Krispie Treats are fun and colorful! Made with crispy rice cereal and gooey marshmallows, they are shaped like cute monsters. Perfect for kids and kids at heart!
Who could resist those silly monster faces? I always end up laughing while making them, and they’re great for parties or just a sweet treat at home. My kids love to help decorate them!
Key Ingredients & Substitutions
Rice Krispies Cereal: Essential for that classic crunch! If you can’t find Rice Krispies, you can use any puffed rice cereal. Just check that it’s sweetened if you want a similar taste.
Mini Marshmallows: These are key for the gooey texture. In a pinch, you could use regular marshmallows; just cut them into smaller pieces for easier melting.
Candy Melts: These come in many colors. If you prefer natural food items, use white chocolate chips mixed with food coloring instead. You could also temper chocolate if you want a richer flavor.
Candy Eyeballs: These add fun and personality! If you can’t find them, you can use mini chocolate chips, M&M’s, or just leave the monster faces plain.
Butter: Unsalted butter is great for perfect flavor balance, but you can use coconut oil or margarine as a substitute if needed.
How Do You Achieve the Best Texture for Rice Krispie Treats?
The key to perfect Rice Krispie treats is in the marshmallow mixture. Start by melting your butter on low heat—this keeps it from burning. Then, add the mini marshmallows and stir until melted. Stirring continuously is crucial for a smooth mix without lumps.
- Make sure your mixture is well blended before adding the Rice Krispies.
- Use a buttered spatula or wax paper to press the mixture firmly into the pan. This helps keep your treats from being too crumbly.
- Let them cool slightly before cutting, but not too long, or they become hard to slice.
Enjoy making these fun Monster Rice Krispie Treats with your friends or family; they’re sure to bring smiles all around!
Monster Rice Krispie Treats
Ingredients You’ll Need:
For The Treats:
- 6 cups Rice Krispies cereal
- 4 cups mini marshmallows
- 3 tablespoons unsalted butter
For The Decorations:
- Purple, orange, and green colored candy melts (or white chocolate chips with food coloring)
- Candy eyeballs in various sizes
- Additional mini candy decorations for noses (optional, such as black mini candies or smaller candy eyeballs)
For Preparing The Pan:
- Non-stick cooking spray or butter for greasing the pan
How Much Time Will You Need?
This fun recipe will take about 15 minutes to prepare and about 30 minutes for cooling and setting. Overall, you should be ready to enjoy these adorable treats in around 45 minutes!
Step-by-Step Instructions:
1. Preparing The Pan:
Start by greasing a 9×13 inch pan with non-stick cooking spray or butter. This will help your treats come out easily later. Set the pan aside!
2. Melting The Butter:
In a large pot, add the unsalted butter and melt it over low heat. Keep an eye on it to make sure it doesn’t burn.
3. Mixing The Marshmallows:
Once the butter is melted, add the mini marshmallows to the pot. Stir continuously until the marshmallows are completely melted and smooth. This should take only a few minutes. Remove the pot from heat when done!
4. Coating The Cereal:
Now it’s time to add the Rice Krispies cereal! Quickly pour the cereal into the pot with the melted marshmallow mixture and stir until every bit of the cereal is coated evenly.
5. Pressing Into The Pan:
Using a buttered spatula or a piece of wax paper, press the mixture firmly and evenly into your greased pan. Be sure to press down hard enough so it sticks together well, but not so hard that it crushes the cereal. Let it cool for a few minutes.
6. Cutting The Treats:
Once the mixture is set but still slightly warm, cut it into small squares or rectangles—about 2 inches in size works great!
7. Melting The Candy:
Next, you’ll need to melt the colored candy melts. Use separate bowls for each color (purple, orange, green) and follow the package instructions to melt them. Stir until they are smooth.
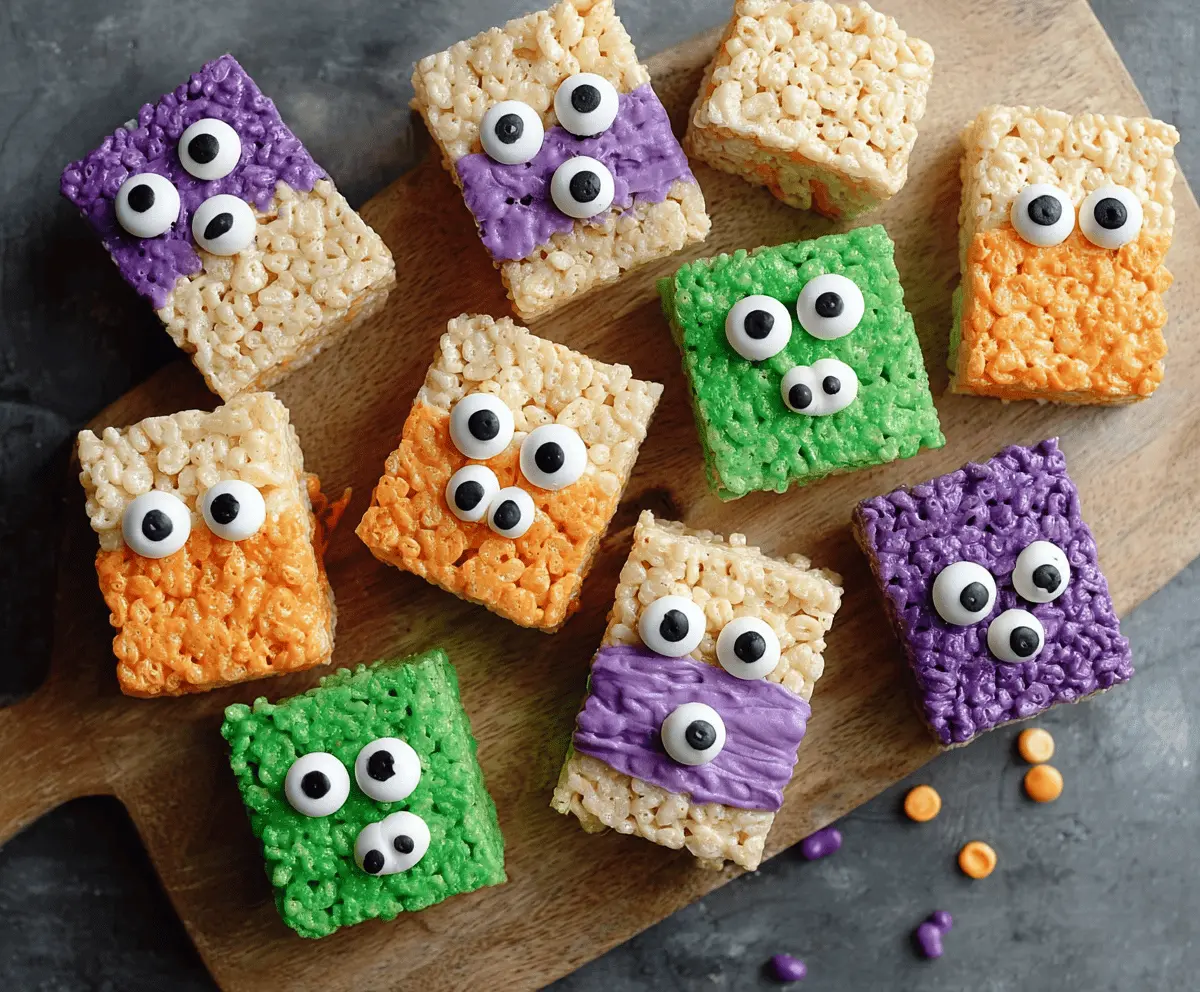
8. Decorating The Treats:
Take a spoon or a small spatula and spread the melted candy across parts of each Rice Krispie square to give them a fun, monster look! You can do stripes, bands, or swirls—be creative!
9. Adding The Eyes:
Before the candy melts harden, carefully press candy eyeballs onto each treat to create silly monster eyes. If you want, add smaller candies to create noses or mouths!
10. Setting The Treats:
Let all the candy melts set at room temperature or pop them in the fridge until everything is firm and ready to enjoy!
11. Serve & Enjoy:
Your Monster Rice Krispie Treats are now ready to be served! These colorful and fun treats are perfect for parties, Halloween, or any time you want a sweet surprise!
Enjoy making and sharing these delightful Monster Rice Krispie Treats with friends and family!
Can I Use Different Cereals?
Absolutely! If Rice Krispies aren’t available, you can substitute them with any other puffed rice cereal. Just ensure it’s something crunchy to maintain the treat’s texture.
How Should I Store Leftovers?
Store any leftover Monster Rice Krispie Treats in an airtight container at room temperature for up to 3 days. If you want them to last longer, you can refrigerate them, but they may become a bit harder.
Can I Make These Treats Ahead of Time?
Yes! You can prepare the Rice Krispie base in advance and decorate them the day you plan to serve. To keep them fresh, wrap the treats tightly in plastic wrap or store them in an airtight container.
What If I Don’t Have Candy Melts?
If you can’t find candy melts, you can use white chocolate chips mixed with food coloring as a substitute. Just melt them gently, stir until smooth, and follow the same decorating steps!