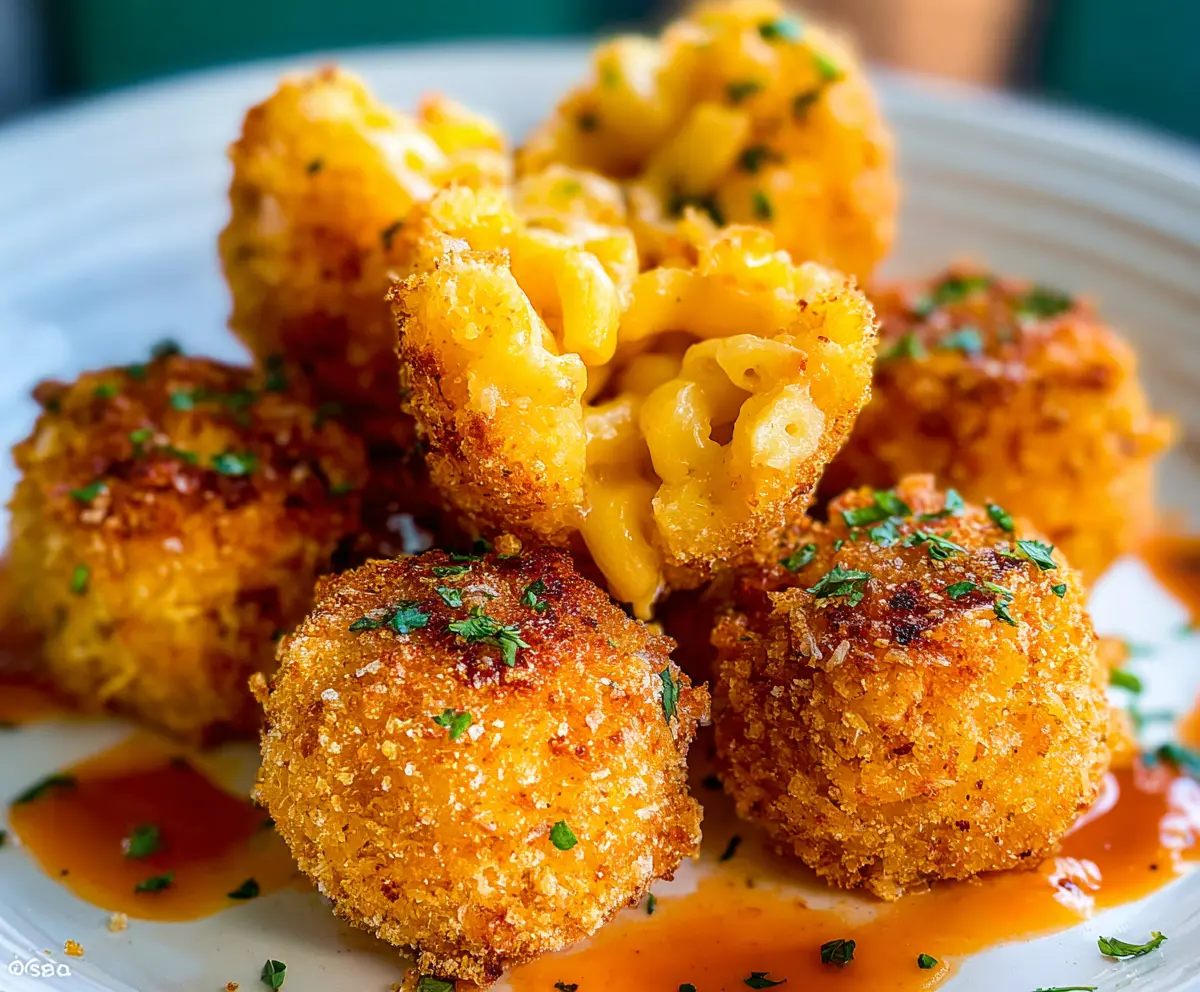
These Mac and Cheese Bites are little nuggets of joy! Bite-sized pasta mixed with creamy cheese, then baked to golden perfection—it’s cheesy goodness in every pop!
Honestly, who can resist a cheesy bite? They’re perfect for parties or just a fun snack after a long day. I love serving them with some ketchup or ranch for dipping! Yum!
Key Ingredients & Substitutions
Elbow Macaroni: This is the classic pasta choice for mac and cheese. If you want to switch it up, you can use cavatappi or shells, which hold cheese sauce well. Gluten-free pasta works too if needed!
Cheddar Cheese: Sharp cheddar gives that rich flavor. If you prefer milder cheese, go for Monterey Jack or Gruyère. Mixing cheeses like mozzarella can also add creaminess.
Parmesan Cheese: This adds a nice nuttiness. You can replace it with Pecorino Romano or skip it for a lighter option, though it won’t have quite the same depth of flavor.
Milk: Whole milk is creamy, but 2% or non-dairy alternatives like almond or oat milk can work too. Just be cautious with non-dairy milks as they might change the flavor slightly.
Panko Breadcrumbs: These create a crispy texture. Regular breadcrumbs can be used instead, but they won’t be as crunchy. You can even crush tortilla chips for a twist!
How Do I Make Sure My Bites Are Crispy?
You want that crunchy outer layer, right? Here’s how to achieve it:
- Ensure your oil is hot enough (350°F or 175°C) before frying. This helps the bites cook quickly without absorbing too much oil.
- Coating them properly is key: dredge in flour, dip in egg, then cover in panko. Double coating provides that extra crunch!
- Don’t overcrowd the frying pan. This can lower the oil temperature and lead to soggy bites. Fry in batches instead.
Let them drain on paper towels to remove any excess oil after frying, then enjoy your crispy Mac and Cheese Bites!

Mac And Cheese Bites
Ingredients You’ll Need:
For the Mac and Cheese:
- 2 cups elbow macaroni pasta
- 2 cups sharp cheddar cheese, shredded
- 1/2 cup Parmesan cheese, grated
- 1 cup whole milk
- 3 tbsp unsalted butter
- 2 tbsp all-purpose flour
- 1/2 tsp garlic powder
- 1/2 tsp onion powder
- Salt and black pepper to taste
For Coating and Frying:
- 2 eggs
- 1 1/2 cups panko breadcrumbs
- 1/2 cup all-purpose flour (for dredging)
- Cooking oil for frying (vegetable or canola oil)
For Garnish:
- Fresh parsley, chopped
- Your choice of dipping sauce (optional, e.g., hot sauce, ranch)
How Much Time Will You Need?
This recipe will take you about 30 minutes of prep time and an additional 20 minutes for cooking. Total time including cooling and frying is about 1 hour. This makes a delicious and fun treat!
Step-by-Step Instructions:
1. Cook the Pasta:
Start by bringing a large pot of salted water to a boil. Cook the elbow macaroni according to the package instructions until al dente, which usually takes about 6-8 minutes. Drain the pasta and set it aside to cool.
2. Make the Cheese Sauce:
In a medium saucepan over medium heat, melt the butter. Once melted, whisk in the 2 tablespoons of flour and cook for 1-2 minutes, stirring continuously to form a roux (don’t let it brown!). Gradually whisk in the milk, stirring until the mixture thickens, about 3-5 minutes. Remove from heat, add the cheddar and Parmesan cheeses, and stir until they’re melted and smooth. Then, season with garlic powder, onion powder, salt, and pepper to taste.
3. Combine Pasta and Cheese Sauce:
Mix the cooked macaroni into the cheese sauce, ensuring everything is well coated. Let the mixture cool down slightly. For easier shaping, you can refrigerate it for about 30 minutes.
4. Form the Bites:
Once the mixture has cooled, take about 1 to 1.5 tablespoons of the mac and cheese and roll it into small balls using your hands or a small scooping tool.
5. Set Up Coating Stations:
Prepare three shallow bowls: Place the 1/2 cup of flour in one, the beaten eggs in another, and the panko breadcrumbs in the last one.
6. Coat the Bites:
Take each mac and cheese ball, roll it in the flour first, then dip it into the beaten eggs, and finally, coat it well in the panko breadcrumbs. For extra crunch, you can dip them in egg and breadcrumbs again for a double coating!
7. Fry the Bites:
Heat the cooking oil in a deep skillet or fryer to 350°F (175°C). Carefully place the mac and cheese bites in the oil, frying in batches to avoid overcrowding. Fry them until they are golden brown and crispy on all sides—this should take about 2-3 minutes. Use a slotted spoon to remove them and drain on a paper towel-lined plate to get rid of excess oil.
8. Serve and Enjoy:
Arrange the mac and cheese bites on a serving plate. You can drizzle them with your favorite dipping sauce and sprinkle some chopped fresh parsley on top for garnish. Serve warm, and enjoy these delicious cheesy bites!
These Mac and Cheese Bites are sure to be a hit at any gathering—perfect for snacking or as an appetizer. Enjoy the cheesy goodness!
Can I Use Different Types of Cheese?
Absolutely! While sharp cheddar is a classic choice, you can mix in other cheeses like mozzarella for extra creaminess or Gruyère for a nuttier flavor. Just keep the total amount of cheese similar.
How Do I Store Leftovers?
Store any leftovers in an airtight container in the fridge for up to 3 days. To reheat, place them in the oven at 350°F (175°C) for about 10-15 minutes, or until warmed through, to maintain their crispiness.
Can I Make These Mac and Cheese Bites Ahead of Time?
Yes! You can prepare the mac and cheese mixture, form the bites, and refrigerate them for a day before frying. Just make sure they’re cold so they hold their shape while frying!
What Can I Use Instead of Frying?
If you prefer a healthier option, try baking the bites instead! Preheat your oven to 400°F (200°C), place the bites on a greased baking sheet, and bake for 15-20 minutes, or until crispy and golden, flipping halfway through.