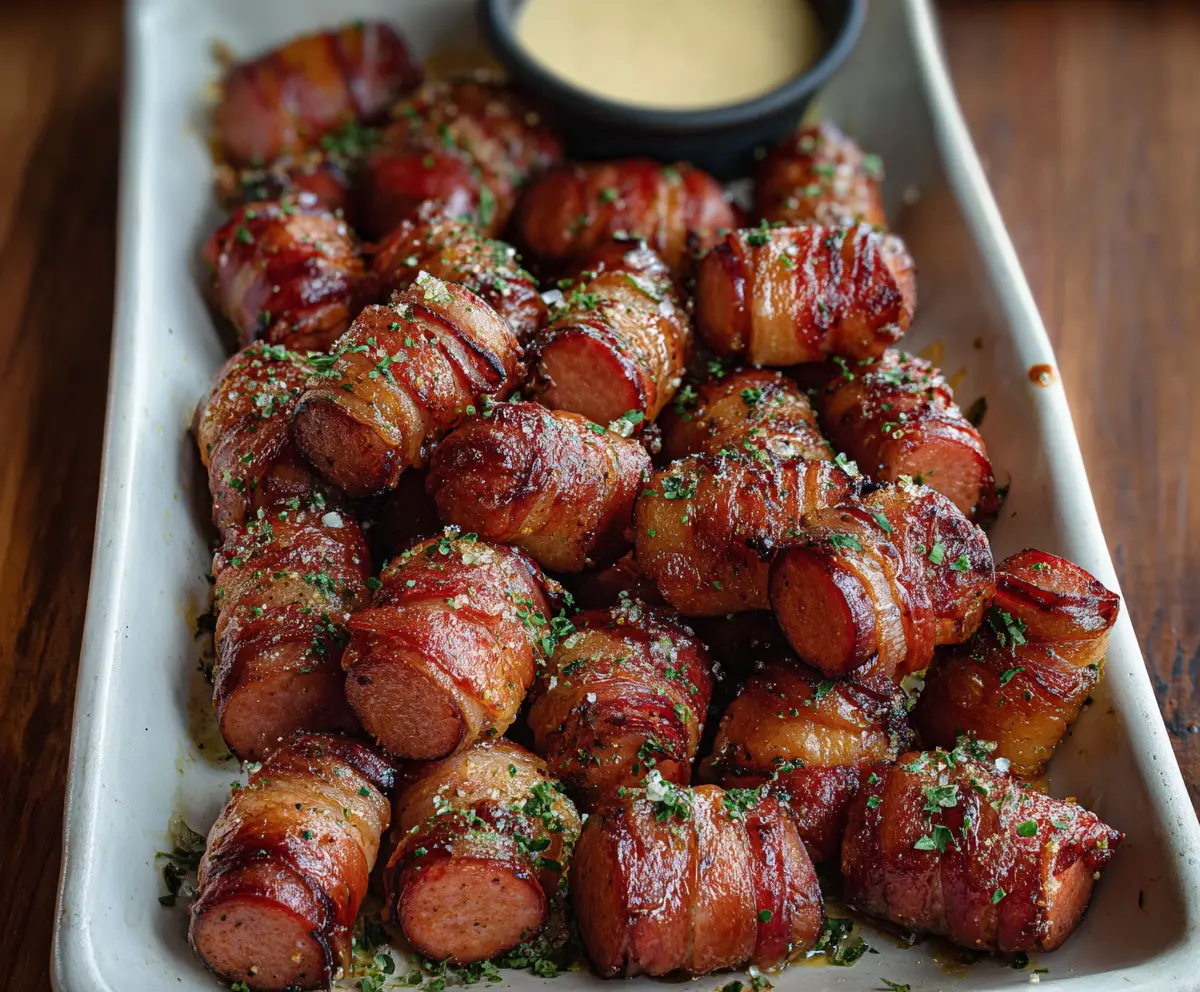
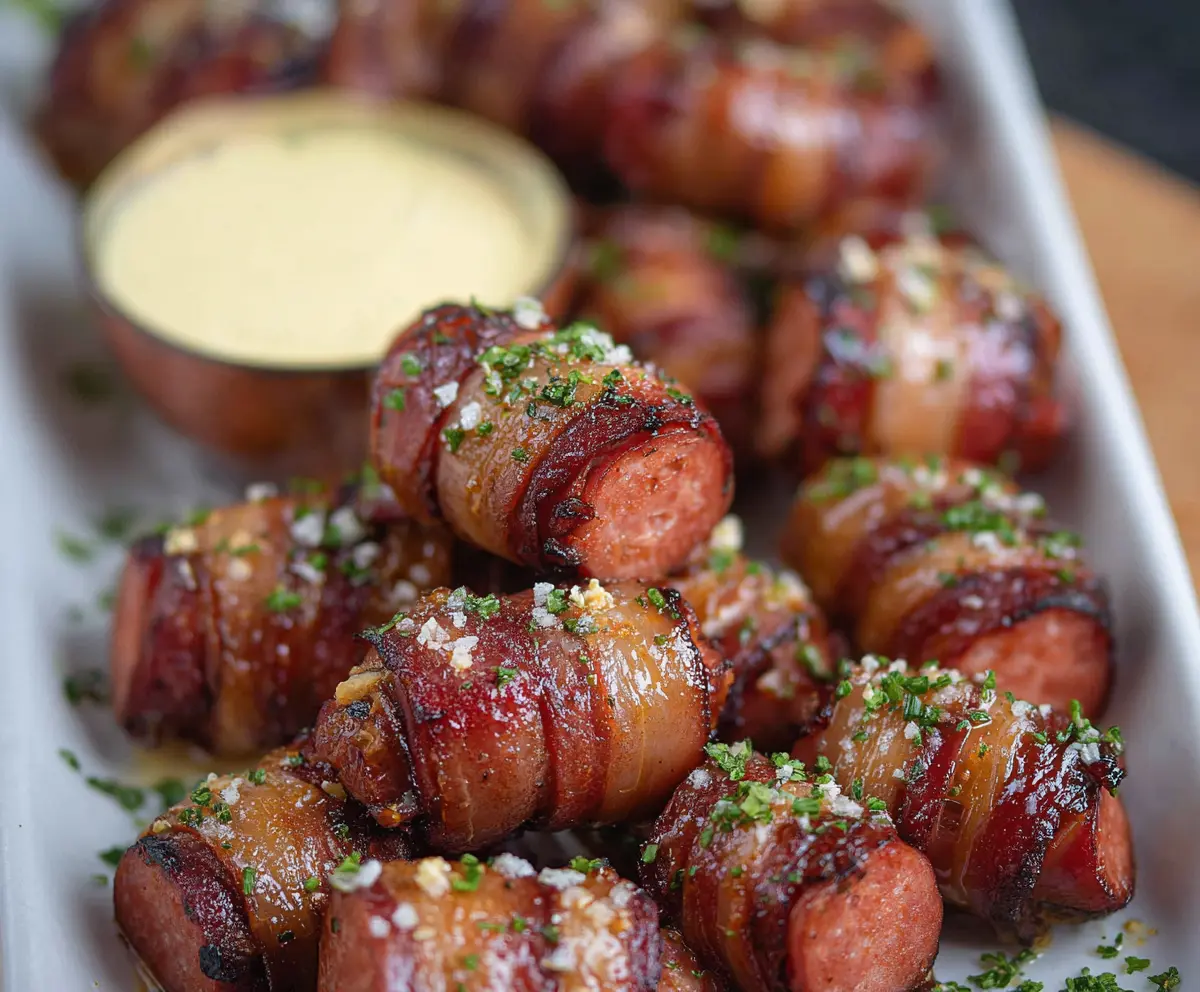
Hasselback Kielbasa Bites are crispy, tasty treats that are super fun to make! With slices cut into the sausage, they get all crunchy and hold yummy toppings like cheese and spices.
These little bites are perfect for parties or a game night! I love how easy they are to whip up, and they always disappear fast. Trust me, everyone will want to grab a few! 🎉
Key Ingredients & Substitutions
Kielbasa: This sausage is the star of the dish, offering a smoky flavor. If you can’t find kielbasa, feel free to substitute any other smoked sausage or even turkey sausage for a leaner option.
Bacon: The crispy bacon adds both flavor and texture. For a healthier twist, you can use turkey bacon or even prosciutto, which will crisp up nicely around the kielbasa.
Garlic Powder and Smoked Paprika: These spices elevate the taste. If you’re out of smoked paprika, regular paprika or even chili powder can work. Fresh minced garlic is a great substitute for garlic powder if you prefer a punchier flavor.
Brown Sugar: This is optional but adds a hint of sweetness and helps the bacon caramelize. If you’re avoiding sugar, coconut sugar or a sweetener like maple syrup can be a good alternative.
How Do You Achieve Perfectly Crispy Kielbasa Bites?
Getting those kiełbasa bites crispy is all about technique. Here’s how to make it happen:
- First, preheat your oven to 400°F (200°C). This ensures they cook evenly from the start.
- Slice the kielbasa into 1.5- to 2-inch pieces and make Hasselback cuts. These cuts should be deep but not through the bottom. This technique allows heat and flavor to penetrate.
- Wrap each piece tightly with bacon and place cut side up on your baking sheet. This position helps the bacon crisp up better.
- Don’t skip brushing with olive oil! It helps the spices stick and enhances the browning process.
- Keep an eye on the bites during the last 5 minutes of baking to prevent burning, as oven times can vary.
By following these simple tips, you’ll end up with crispy, flavorful Hasselback Kielbasa Bites that everyone will love!
Hasselback Kielbasa Bites
Ingredients You’ll Need:
For the Bites:
- 2 large kielbasa sausages
- 12-16 slices of bacon (enough to wrap the kielbasa pieces)
For the Seasoning:
- 1 tablespoon olive oil (optional, for brushing)
- 1 teaspoon garlic powder
- 1 teaspoon smoked paprika
- 1 teaspoon brown sugar (optional for slight sweetness)
- Salt and black pepper, to taste
For Garnishing:
- Fresh parsley, finely chopped (for garnish)
- Coarse sea salt or flaky salt (for finishing)
- Dipping sauce of choice (such as honey mustard or spicy mayo)
How Much Time Will You Need?
This delightful recipe will take about 10 minutes of prep time and 25-30 minutes to bake. In total, you’re looking at around 40 minutes before you can enjoy these crispy treats!
Step-by-Step Instructions:
1. Preparing the Oven and Baking Sheet:
First, preheat your oven to 400°F (200°C). While it’s heating up, line a baking sheet with foil or parchment paper. This will help make cleanup a breeze later on!
2. Cutting the Kielbasa:
Next, take your kielbasa sausages and slice them into pieces about 1.5 to 2 inches long. These pieces need to be thick enough to hold their shape when you cook them.
3. Making the Hasselback Cuts:
Using a sharp knife, make thin horizontal cuts along each kielbasa piece, but be careful not to cut all the way through—leave the bottom intact. Aim to make about 5-7 thin cuts per piece. This will allow the bacon to wrap around and help the flavors seep in.
4. Wrapping with Bacon:
Now, wrap each kielbasa piece with a slice of bacon. You can secure the ends by tucking them under the sausage or using a toothpick if you need to keep things in place. This is what gives that irresistible crispy texture!
5. Arranging on the Baking Sheet:
Place all your bacon-wrapped pieces on the lined baking sheet, with the cut side facing up so the slices can open up a bit during baking.
6. Mixing the Seasoning:
In a small bowl, combine garlic powder, smoked paprika, brown sugar (if you want a touch of sweetness), salt, and pepper. Mix this together well.
7. Seasoning the Bites:
Lightly brush the kielbasa bites with olive oil, then sprinkle the spice mixture evenly over each piece. This will give them fantastic flavor as they cook!
8. Baking:
Pop the baking sheet in the oven and bake for 25-30 minutes. You want the bacon to be crispy and caramelized, and the kielbasa heated through. Check on them around the 25-minute mark!
9. Finishing Touches:
Once cooked, take them out of the oven. Sprinkle with flaky sea salt and the chopped fresh parsley for a pop of color and extra flavor.
10. Serve and Enjoy:
Let them cool slightly then serve with your favorite dipping sauce. Enjoy your crispy, flavorful Hasselback Kielbasa Bites, perfect for any gathering!
Can I Use Turkey Kielbasa Instead?
Absolutely! Turkey kielbasa is a great leaner option and will still work perfectly with the bacon wrap and spices. Just be sure to adjust cooking times as turkey sausage can be less fatty.
How Do I Ensure the Bacon Gets Crispy?
To achieve crispy bacon, make sure to cut the kielbasa into thick enough pieces and wrap the bacon tightly. Baking them cut side up allows for better heat distribution, and brushing with olive oil helps with the caramelization. Keep an eye on them during the last few minutes of baking to prevent burning!
Can I Prepare These in Advance?
You can definitely prepare the kielbasa bites in advance! Assemble and wrap them, then store them in the fridge for a few hours or overnight. Just extend the baking time slightly since they’ll be cold when they go into the oven.
How Should I Store Leftovers?
If you have leftovers, store them in an airtight container in the fridge for up to 3 days. To reheat, pop them in the oven at 350°F (175°C) for about 10-15 minutes to get them crispy again! Microwaving is also an option, but you may lose some of the crispiness.