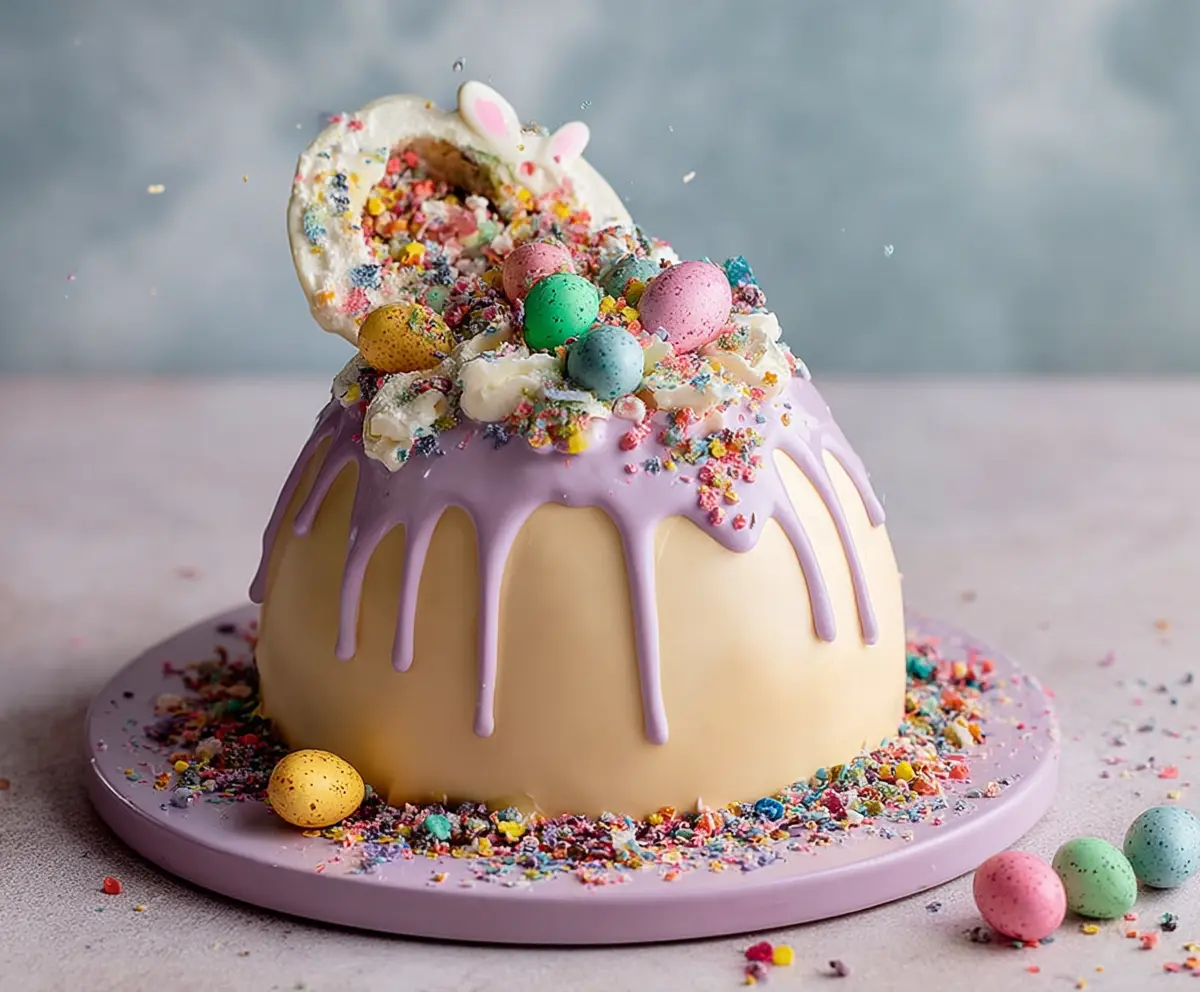
This Epic Easter Egg Smash Cake is a fun and festive treat! It’s a delicious chocolate cake filled with creamy goodness and topped with colorful candies that are perfect for the holiday.
Nothing beats the excitement of smashing that cake open to reveal the goodies inside! I love serving it at family gatherings—everyone gets a kick out of the surprise and it tastes amazing!
Key Ingredients & Substitutions
All-Purpose Flour: This flour is versatile and great for cake. You can substitute with cake flour for an even lighter cake, or use gluten-free flour blends if you’re avoiding gluten.
Unsalted Butter: Using unsalted allows you to control the salt in your recipe. If you’re in a pinch, you can substitute with margarine or coconut oil, but the flavor will change slightly.
Granulated Sugar: This sugar is essential for sweetness and texture. You could try using brown sugar for a deeper flavor. If you’re cutting sugar, consider an equal amount of a sugar substitute.
Whole Milk: Whole milk gives moisture to the cake. For a lighter version, you can substitute with 1% milk or non-dairy alternatives like almond or oat milk.
White Chocolate: If you can’t find melts, regular white chocolate bars work too—just chop them up. For a less sweet option, try using dark or semi-sweet chocolate.
How Do You Achieve a Smooth Buttercream Consistency?
Getting the buttercream just right can be tricky. Start with room temperature butter and beat it until smooth before adding powdered sugar. This helps avoid lumps. If it’s too thick, add heavy cream or milk a tablespoon at a time until you reach your desired spreadability.
- Use a stand mixer or hand mixer for best results.
- Once mixed, scrape the sides of the bowl to ensure everything is evenly combined.
- Tint your buttercream just before using it for the drip effect; thinning slightly helps with a smoother drip.
What’s the Key to Melting White Chocolate Smoothly?
Melting white chocolate can be challenging since it burns easily. Use a microwave in short bursts, stirring in between, or a double boiler on the stove. Stir constantly as it melts for even smoothing.
- Start with 30 seconds in the microwave, then 15 seconds intervals until fully melted.
- Allow it to cool slightly before pouring over the cake to avoid melting the frosting.
Enjoy creating this fun and festive cake! It’s perfect for celebrations and kids will love the surprise inside.
How to Make an Epic Easter Egg Smash Cake
Ingredients You’ll Need:
For the Cake:
- 2 ½ cups all-purpose flour
- 2 ½ tsp baking powder
- ½ tsp salt
- 1 cup unsalted butter, softened
- 1 ¾ cups granulated sugar
- 4 large eggs
- 1 tbsp vanilla extract
- 1 cup whole milk
For the Buttercream Frosting:
- 1 cup unsalted butter, softened
- 4 cups powdered sugar
- 1 tsp vanilla extract
- 3-4 tbsp heavy cream or milk
- Food coloring (purple/lavender for drip, white for base decoration)
For the White Chocolate Shell:
- 1 lb white chocolate melts or couverture chocolate
For Decorations and Smash Elements:
- Mini speckled candy eggs in pastel colors (pink, yellow, blue, green)
- Crushed colorful candy pieces (like freeze-dried fruit bits, rock candy, or crushed candy-coated chocolate)
- White meringue or marshmallow shaped like a bunny tail or ears
- Whipped cream rosettes (optional)
How Much Time Will You Need?
This delightful cake takes about 1 hour to prepare, plus 30-35 minutes for baking, and a bit more time for cooling and assembling. Overall, set aside about 2 to 3 hours for everything, especially if you want to chill in the fridge before serving. Perfect for a fun Easter gathering!
Step-by-Step Instructions:
1. Bake the Cake Layers:
First, preheat your oven to 350°F (177°C) and grease and flour two 8-inch round cake pans. In a medium bowl, whisk together the flour, baking powder, and salt. Now, in a large bowl, cream the softened butter and granulated sugar until it’s light and fluffy. This usually takes about 3-5 minutes. Add the eggs one at a time, mixing well after each addition, and stir in the vanilla extract.
Next, gradually add the dry mixture to the butter mixture, alternating with the milk. Start and end with the dry ingredients. Mix until everything is well combined, but don’t overdo it! Divide the batter evenly between the two cake pans, smoothing the tops for even baking. Bake in the preheated oven for 30-35 minutes or until a toothpick comes out clean when inserted into the center. Once baked, let the cakes cool completely on wire racks.
2. Prepare the Buttercream Frosting:
While your cakes cool, let’s make the buttercream! In a large bowl, beat the softened butter until it’s creamy. Gradually add the powdered sugar, mixing until it’s fully combined. Then, mix in the vanilla extract and just enough cream to reach a smooth, spreadable consistency. Set aside a small amount of this buttercream to tint purple or lavender for later use. You can use food coloring for this—just add a little at a time until you get your desired shade.
3. Assemble the Cake:
Once the cakes are cool, check if the tops are level. If not, you can level them with a knife. Place one layer on your cake board or serving plate, then spread a nice even layer of buttercream on top. Place the second cake layer on top of that. Now, cover the entire cake with the uncolored buttercream, smoothing it out as best as you can. It should look nice and neat! After that, chill the cake in the refrigerator for about 30 minutes to help the frosting set.
4. Create the White Chocolate Shell:
Now comes the fun part! Melt the white chocolate in a microwave or a double boiler until smooth. Let it cool just slightly while keeping it liquid. To form the shell, carefully pour and spread the melted white chocolate onto a balloon, a large bowl, or a dome-shaped mold lined with plastic wrap. It should be about half a centimeter thick. Chill this in the fridge until it’s firm, about 10-15 minutes. Once set, gently unmold the white chocolate shell and carefully place it upside down over your chilled cake, ensuring it’s fully covered.
5. Make the Purple Drip:
Take the reserved purple buttercream and thin it with a bit more cream if it’s too thick. You want it fluid enough to drip beautifully! Using a small spoon or piping bag, drip the purple buttercream over the edges of the white chocolate shell, allowing it to cascade down the sides. Once you’re happy with the drip effect, chill briefly again to let it set.
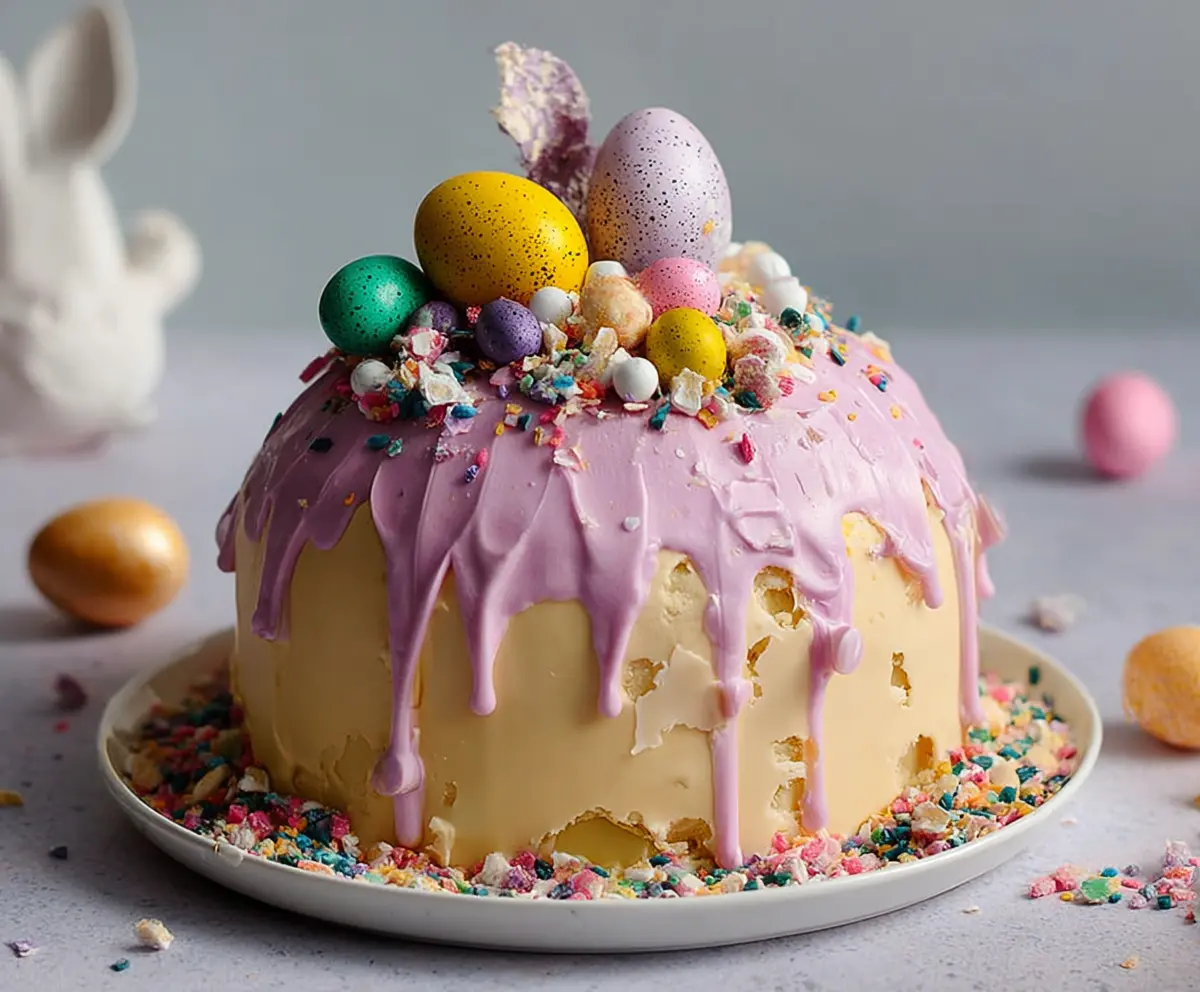
6. Decorate the Cake Top:
It’s time to make your cake look festive! Pipe whipped cream rosettes or dollops around the drip area on top of the cake. Then, joyfully arrange the mini speckled candy eggs all around and sprinkle the crushed colorful candies for extra sparkle. Optionally, place white meringue or marshmallows shaped like bunny ears or tails on the top for that Easter touch!
7. Final Touch and Serving:
Once you’re happy with your masterpiece, place the finished cake on a serving plate. To serve your Epic Easter Egg Smash Cake, take a small hammer or spoon and gently smash the white chocolate shell so the delightful candy eggs and colorful sprinkles spill out, revealing the gorgeous layers underneath. Slice up the cake and enjoy a slice of this sweet, colorful creation with your friends and family!
Get ready to have fun and enjoy this beautiful, festive, and playful Epic Easter Egg Smash Cake! Perfect for celebrating the holiday in style!
Can I Use a Different Type of Chocolate for the Shell?
Absolutely! While white chocolate creates a sweet, festive look, you can use milk or dark chocolate for a different flavor profile. Just ensure they are melted and cooled slightly before pouring over the cake.
How Do I Store Leftover Cake?
Store any leftovers in an airtight container in the refrigerator for up to 3 days. You can bring it to room temperature before serving or enjoy it chilled!
Can I Make the Cake Layers Ahead of Time?
Yes, you can bake the cake layers in advance. Once they are cooled, wrap them tightly in plastic wrap and store them in the fridge for up to 2 days or freeze for up to 3 months. Just make sure to thaw them completely before frosting!
What If I Can’t Find Mini Speckled Candy Eggs?
No problem! You can use any small, colorful candies like chocolate-covered almonds, jelly beans, or even homemade fondant decorations. Get creative with your toppings to match the festive feel!