This Easy Homemade Cherry Mash Candy is a fun and tasty treat! It combines sweet cherries, creamy peanut butter, and crunchy nuts, all covered in rich chocolate.
Making candy can feel like magic! I love how simple it is to whip these up, and they really make everyone smile with that perfect cherry flavor. Who can resist a chocolate-covered delight?
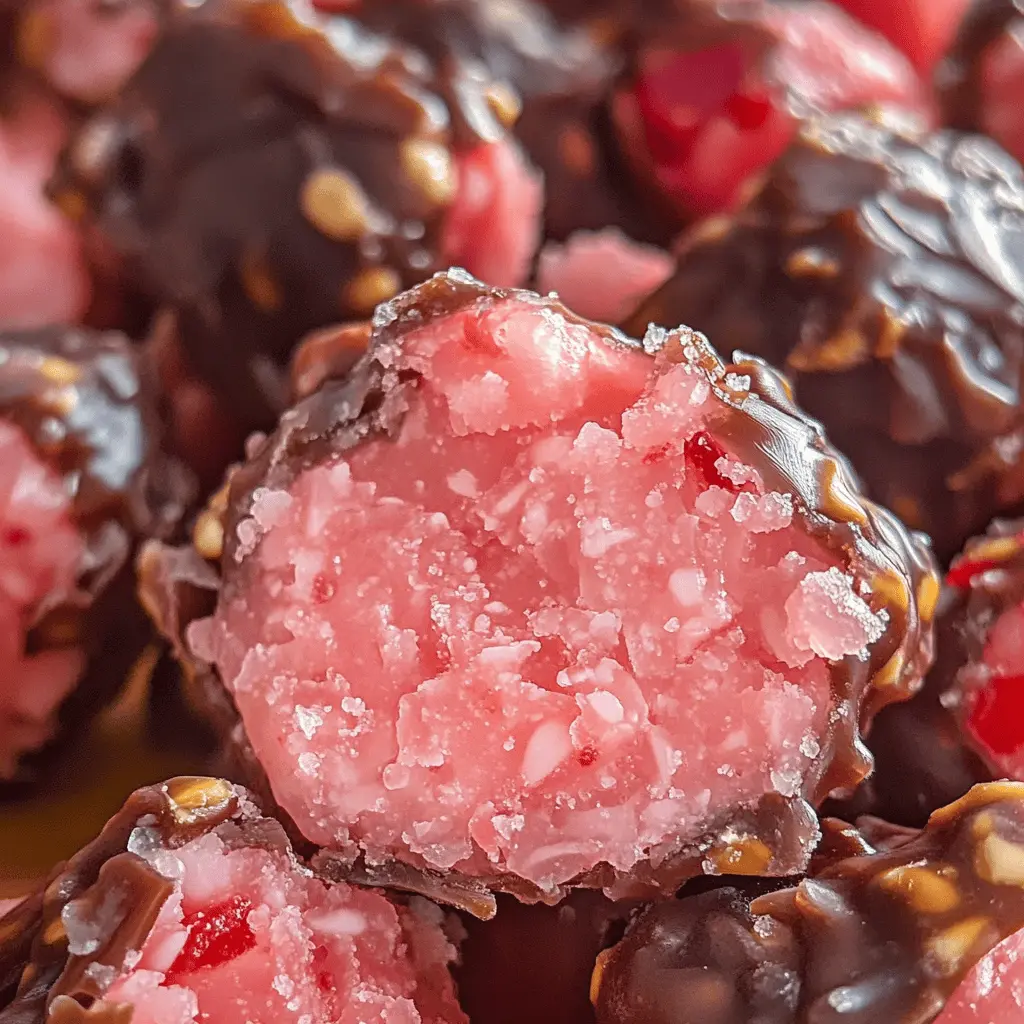
Key Ingredients & Substitutions
Mini Marshmallows: These give the candy a fluffy texture. If you’re out of marshmallows, you can use marshmallow fluff as an alternative, though the ratio may differ.
Cherry-Flavored Cream Cheese: This is the key to that cherry taste! If you want a healthier option, you can use plain cream cheese mixed with a bit of cherry syrup from the maraschino cherries.
Maraschino Cherries: These add a juicy burst of flavor. If you prefer a fresher taste, try using fresh cherries, but remember to pit and chop them finely.
Milk Chocolate Chips: Dark chocolate can be a great substitute if you enjoy a richer taste, or opt for white chocolate for a sweeter flavor.
Chopped Nuts: Peanuts are classic, but feel free to use almonds or walnuts if that’s what you have on hand. For a nut-free option, try some crushed graham crackers for texture.
How Do You Melt Chocolate Successfully Without Burning It?
Melted chocolate is crucial for coating your candies, but it can be tricky since it can burn easily. Here’s how to do it right:
- Use a microwave-safe bowl, and chop your chocolate chips or bars for even melting.
- Heat in 30-second bursts, stirring well between each time. This keeps the heat even and prevents burning.
- If it’s not fully melted after a minute, continue the intervals until smooth. Be patient!
Alternatively, you can create a double boiler by placing a heatproof bowl over a pot of simmering water. Stir constantly until fully melted. This method helps control the temperature!
Easy Homemade Cherry Mash Candy
Ingredients You’ll Need:
- 2 cups mini marshmallows
- 1/4 cup milk
- 1 1/4 cups cherry-flavored cream cheese, softened (or cream cheese mixed with maraschino cherry juice)
- 1 cup maraschino cherries, finely chopped
- 1 teaspoon vanilla extract
- 3 cups milk chocolate chips or melting chocolate
- 1 cup chopped nuts (such as peanuts or pecans)
How Much Time Will You Need?
This recipe takes about 15 minutes of active preparation time, plus an additional 1.5 to 2 hours for chilling. So, overall, you can expect to spend about 2 to 2.5 hours from start to finish, including setting time in the fridge!
Step-by-Step Instructions:
1. Melt the Marshmallows:
In a microwave-safe bowl, combine the mini marshmallows and milk. Microwave in 30-second intervals, stirring each time until the marshmallows become melted and smooth. This should take about 1-2 minutes in total.
2. Make the Filling:
Next, stir in the softened cherry cream cheese, finely chopped maraschino cherries, and vanilla extract into the melted marshmallow mixture. Mix well until everything is fully combined and the mixture looks creamy and pink.
3. Chill the Mixture:
Cover the bowl with plastic wrap or a lid and refrigerate the mixture for about 1 to 2 hours, or until it’s firm enough to shape into balls.
4. Shape the Candy Balls:
Once the mixture has chilled, remove it from the fridge. Scoop about 1 to 1.5 tablespoons of the cherry mash mixture and roll it into small balls using your palms. Place these balls on a plate or baking sheet lined with parchment paper.
5. Prepare for Coating:
In a shallow bowl, place your chopped nuts to roll the finished candies in later. This will add a delicious crunch!
6. Melt the Chocolate:
In a separate microwave-safe bowl, melt the chocolate chips in 30-second intervals, stirring until smooth. Be careful not to overheat the chocolate to avoid burning!
7. Dip and Coat:
Using a fork or a dipping tool, take each cherry mash ball and dip it into the melted chocolate, ensuring it is fully coated. After that, immediately roll the chocolate-coated ball in the chopped nuts. Place the coated candies back onto the parchment-lined tray.
8. Set and Enjoy:
Put the tray in the refrigerator for about 30 minutes, or until the chocolate has completely set. Once set, your delightful homemade cherry mash candies are ready to enjoy!
Dig in and enjoy your delicious homemade cherry mash candies!

FAQ for Easy Homemade Cherry Mash Candy
Can I Use Different Types of Chocolate?
Absolutely! While milk chocolate gives a sweet taste, you can also use dark chocolate for a richer flavor or white chocolate for a sweeter treat. Just remember to adjust the melting time, as white chocolate can melt faster.
How Can I Store Leftover Cherry Mash Candies?
Store any leftovers in an airtight container in the refrigerator for up to a week. Keep layers of candy separated with parchment paper to prevent sticking. If you’d like to freeze them, place them on a baking sheet to freeze individually before transferring to a freezer-safe container for up to 3 months.
Can I Make This Recipe Nut-Free?
Yes, you can easily make this candy nut-free! Simply omit the chopped nuts and try rolling the chocolate-coated balls in crushed graham crackers or even coconut flakes for added texture and flavor.
What If My Cherry Mash Mixture Is Too Sticky?
If the mixture feels too sticky to shape, chilling it for a bit longer can help. You can also lightly oil your hands when rolling the balls to make it easier to handle. Just ensure your hands are clean and dry to prevent sticking!