
These Crushed Oreo Red Velvet Cookies are a fun twist on a classic! With the deep red color and rich chocolate flavor, they’re sure to impress anyone. Plus, the Oreo bits make them extra crunchy!
Honestly, who could resist a cookie that looks this good? I love serving these at parties—they vanish in seconds! Just mix, bake, and enjoy the yumminess!
Key Ingredients & Substitutions
Unsalted Butter: Using unsalted butter gives you control over the overall saltiness of your cookies. If you’re in a pinch, you can use margarine or coconut oil, but the flavor might change a little.
Red Food Coloring: This is key for the bright red color! If you want a natural option, use beet juice. Just be aware it may alter the flavor and shade slightly.
All-Purpose Flour: This provides structure to your cookies. If you’re gluten-free, you can swap it with a 1:1 gluten-free flour blend, which works well in cookies.
Cream Cheese: This gives a deliciously tangy filling. If you want a lighter option, try using Greek yogurt, though the taste will differ slightly.
Oreos: These add a crunchy texture and enhance the chocolate flavor. If you need a substitute for dietary reasons, use any chocolate wafer cookies or a gluten-free option.
How Can I Make Sure My Cookies Stay Soft and Chewy?
Keeping your cookies soft and chewy is all about the baking time and technique. Here are some tips to ensure you achieve that perfect texture:
- Don’t overmix the dough. Once you add the dry ingredients, mix just until combined to keep the cookies tender.
- Bake until the edges are set, but the centers look a bit underbaked. They will continue to cook on the baking sheet while cooling.
- Use parchment paper! It prevents sticking and helps with even baking.
- Always let them cool on the baking sheet for a few minutes before transferring to a wire rack. This helps them firm up without drying out.
- Store leftover cookies in an airtight container to keep them soft. A slice of bread in the container can help maintain moisture!
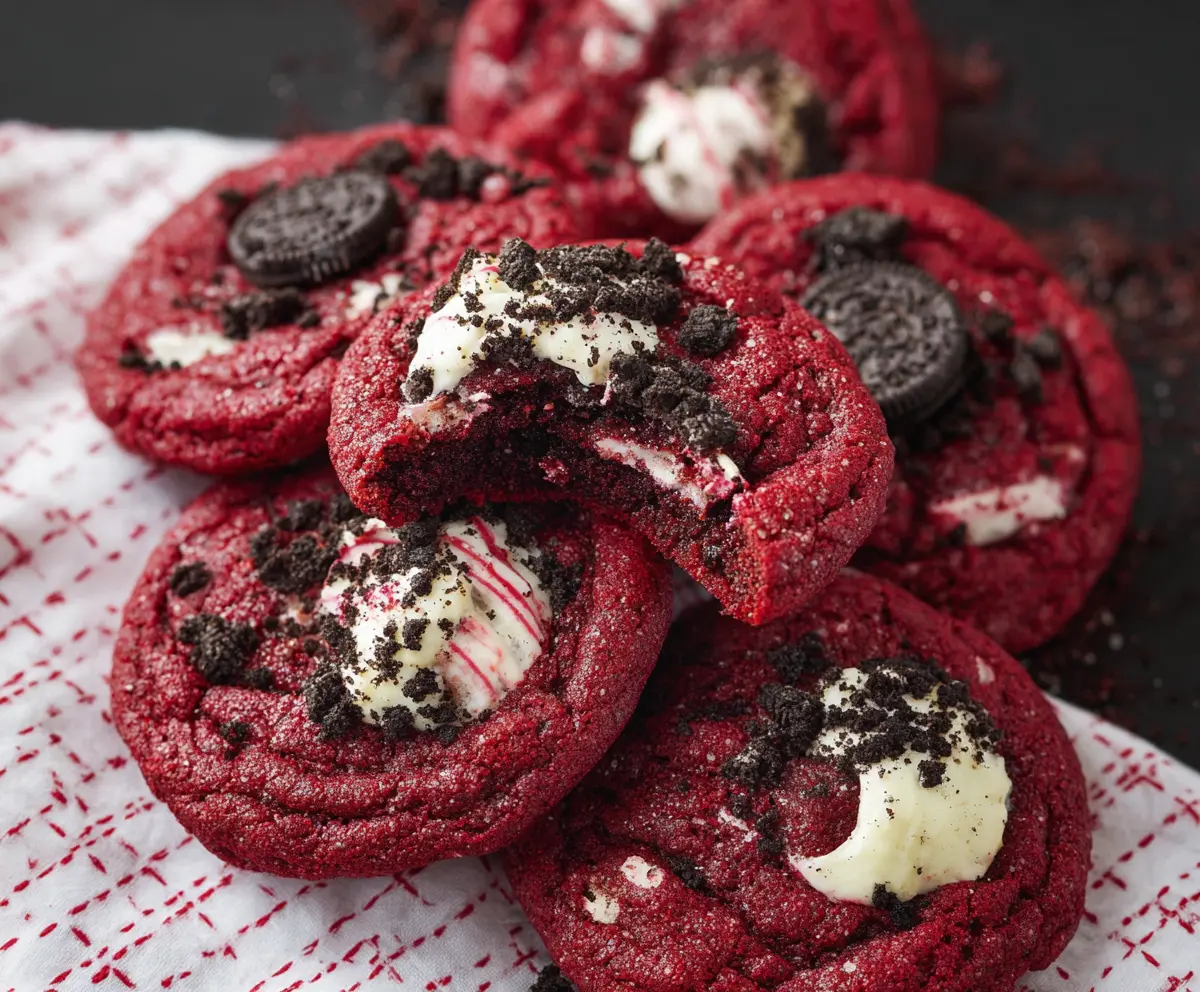
Crushed Oreo Red Velvet Cookies
Ingredients You’ll Need:
- 1/2 cup (1 stick) unsalted butter, softened
- 3/4 cup granulated sugar
- 1 large egg
- 1 tablespoon unsweetened cocoa powder
- 1 tablespoon red food coloring
- 1 teaspoon vanilla extract
- 1 cup all-purpose flour
- 1/4 teaspoon baking soda
- 1/4 teaspoon salt
- 8 Oreo cookies, coarsely crushed
- 6 Oreo cookies, whole (for topping)
- 4 oz cream cheese, softened
- 1/4 cup powdered sugar
- 1/2 teaspoon vanilla extract
- Optional: pink or red sanding sugar or crushed peppermint for garnish
How Much Time Will You Need?
This recipe takes about 15 minutes of prep time and an additional 10 minutes for baking. Don’t forget to let your cookies cool for at least 5 minutes before moving them to a wire rack. In total, you’ll spend about 30 minutes from start to finish making these delightful cookies!
Step-by-Step Instructions:
1. Preheat the Oven:
Start by preheating your oven to 350°F (175°C). Line a baking sheet with parchment paper so your cookies won’t stick.
2. Cream the Butter and Sugar:
In a large mixing bowl, cream together the softened butter and granulated sugar. Use an electric mixer on medium speed until the mixture is light and fluffy—this usually takes about 3 minutes.
3. Add Wet Ingredients:
Beat in the egg, red food coloring, unsweetened cocoa powder, and vanilla extract until well mixed. The batter should be vibrant and smooth!
4. Mix Dry Ingredients:
In a separate bowl, whisk together the all-purpose flour, baking soda, and salt. This helps to evenly distribute the dry ingredients.
5. Combine Wet and Dry Ingredients:
Gradually add the dry mixture to the wet mixture. Stir with a spatula or wooden spoon until just combined. Don’t overmix, or your cookies might be tough!
6. Fold in Crushed Oreos:
Gently fold in the coarsely crushed Oreos into the cookie dough. This adds that delightful crunch and flavor!
7. Make the Cream Cheese Filling:
In a small bowl, combine the softened cream cheese, powdered sugar, and 1/2 teaspoon of vanilla extract. Mix until smooth. This will be your delicious filling!
8. Scoop the Cookies:
Scoop rounded tablespoons of cookie dough onto your prepared baking sheet, placing them about 2 inches apart. Don’t forget to flatten them slightly!
9. Bake Your Cookies:
Bake in the preheated oven for 8-10 minutes. You want the edges to be set while the centers remain soft and chewy.
10. Add the Cream Cheese Filling:
As soon as they come out of the oven, place a dollop of the cream cheese mixture on top of each cookie. Then, gently press half of a whole Oreo cookie into the cream cheese mixture.
11. Optional Garnish:
If you like, sprinkle the tops with crushed Oreos, sanding sugar, or crushed peppermint for a festive touch!
12. Cooling Time:
Let the cookies cool on the baking sheet for about 5 minutes, then transfer them to a wire rack to cool completely.
13. Enjoy!
Serve these cookies at your next gathering or enjoy them as a delightful treat with your family. These rich, festive cookies are sure to please every cookie lover!
Can I Substitute the Cream Cheese Filling?
Absolutely! If you’re looking for a lighter option, you can use Greek yogurt or whipped cream as a substitute. Keep in mind that the flavor will differ slightly, but it will still be delicious!
How Should I Store Leftover Cookies?
Store any leftover cookies in an airtight container at room temperature for up to 3 days. To keep them soft, you can add a slice of bread to the container!
Can I Freeze These Cookies?
Yes, you can freeze the cookie dough before baking. Scoop the dough onto a baking sheet and freeze until solid, then transfer to a freezer bag. When you’re ready to bake, just preheat the oven and bake directly from frozen, adding a couple of extra minutes to the baking time.
Is It Necessary to Use Red Food Coloring?
While it gives the cookies their signature red hue, you can omit it if you prefer. Your cookies will still taste great, but they’ll be more chocolatey in appearance rather than red velvet.