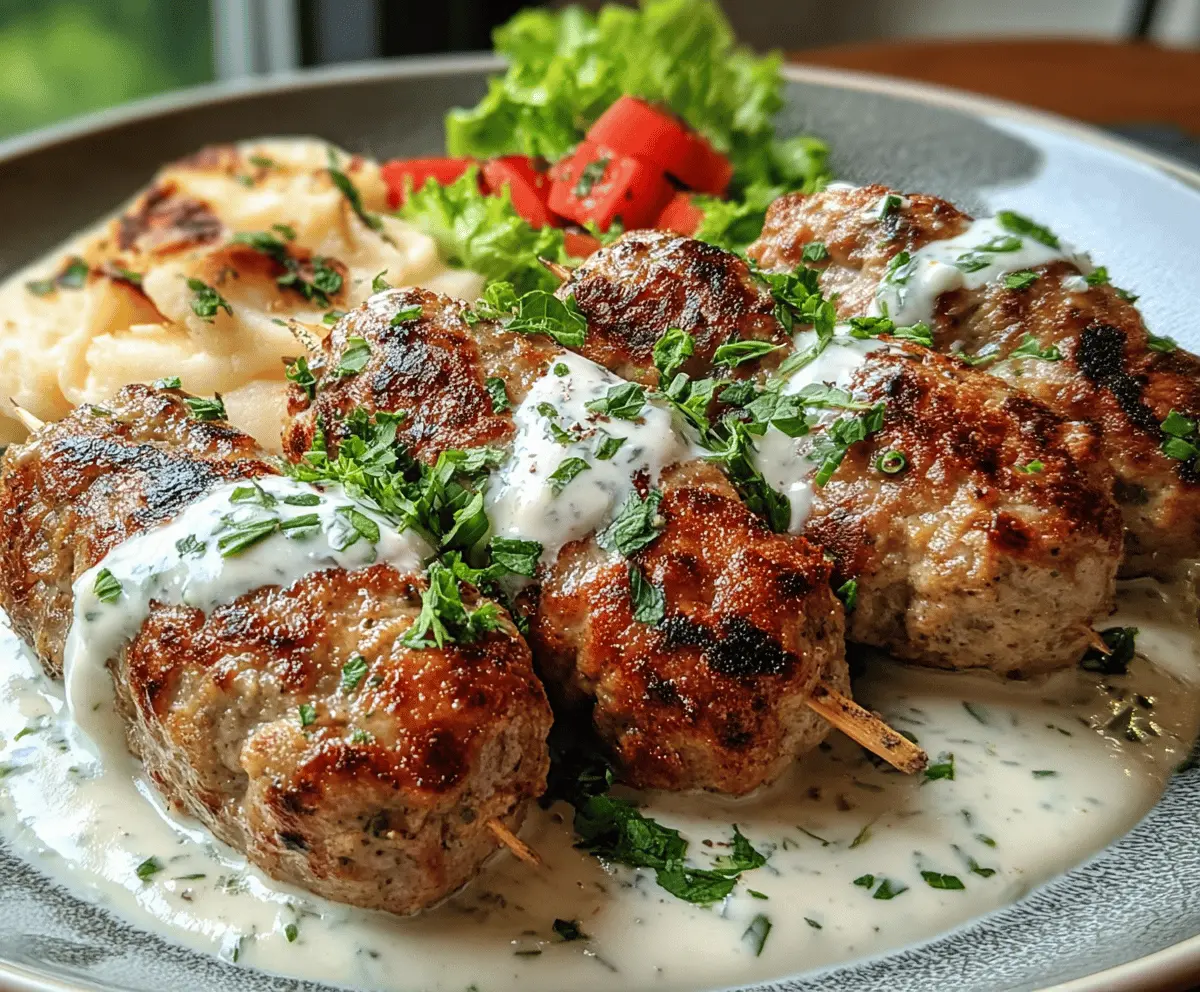
This Creamy Garlic Yogurt Chicken Kofta is a dreamy dish that’s full of flavor! Juicy chicken meatballs are mixed with garlic and spices, then served in a smooth yogurt sauce that’s simply irresistible.
I love how the yogurt makes everything creamy and refreshing! It’s a perfect dish for warm days, and let’s be honest, who doesn’t love a good meatball? Serve it with rice or pita for a tasty meal!
Key Ingredients & Substitutions
Ground Chicken: This is the star of the kofta. If you’re looking for a leaner option, turkey works well too! For a richer flavor, some people even use lamb or beef.
Garlic: Fresh garlic is a must for the best flavor! If you’re in a pinch, garlic powder can be a backup, but it won’t be as pungent.
Onion: Using a small onion enhances the moisture and sweetness of the kofta. If you prefer milder flavor, shallots are a great substitution.
Herbs: Fresh parsley gives a bright taste, but you can replace it with cilantro if you like that flavor. You could even mix in some green onions!
Breadcrumbs: These help bind the kofta. If you’re gluten-free, use gluten-free breadcrumbs or crushed gluten-free crackers.
Greek Yogurt: This provides creaminess. Substitute with regular yogurt or even sour cream if you’re looking for a twist in flavor!
How Do I Shape My Koftas to Ensure They’re Perfectly Cooked?
Shaping koftas can be a bit tricky, but here’s how to do it right!
- First, make sure your hands are damp when you shape the koftas; it prevents the meat from sticking.
- Roll them into uniform balls, about 1 1/2 inches wide. This size helps them cook evenly.
- Don’t overcrowd the skillet; give them space to brown nicely!
Keep an eye on the color; they should be a lovely golden brown. If you’re unsure, a meat thermometer can be used — they’re cooked through at 165°F (75°C).
How Can I Make My Yogurt Sauce Extra Creamy?
To achieve that dreamy creaminess in your sauce, start with high-quality Greek yogurt. Here’s a tip:
- Whisk the yogurt well before adding other ingredients. This creates a smooth base.
- Consider adding a splash of milk or cream if you want it even richer.
- Let the sauce sit for a few minutes after mixing to let the flavors meld. It makes a big difference!
Adding chopped herbs right before serving gives fresh flavor and a pop of color.
Enjoy making these flavorful Chicken Koftas with garlic yogurt sauce!
Creamy Garlic Yogurt Chicken Kofta
Ingredients:
For the Kofta:
- 1 lb (450g) ground chicken
- 3 cloves garlic, minced
- 1 small onion, finely grated or minced
- 1/4 cup fresh parsley, finely chopped
- 1 tsp ground cumin
- 1 tsp ground coriander
- 1/2 tsp ground cinnamon
- 1/2 tsp smoked paprika
- 1/2 tsp salt
- 1/4 tsp black pepper
- 1 egg, beaten
- 1/4 cup breadcrumbs
- 2 tbsp olive oil (for frying)
For the Creamy Garlic Yogurt Sauce:
- 1 1/2 cups plain Greek yogurt
- 3 cloves garlic, minced
- 1 tbsp lemon juice
- 2 tbsp olive oil
- 1/2 tsp salt
- 1/4 tsp black pepper
- 1/4 tsp ground cumin
- 1/4 cup fresh dill or mint, chopped (optional)
Time Needed:
This recipe takes about 20 minutes to prepare and 15 minutes to cook, for a total of approximately 35 minutes from start to finish. It’s a quick and delicious option for lunch or dinner!
Instructions:
1. Prepare the Kofta Mixture:
In a large bowl, combine the ground chicken, minced garlic, grated onion, chopped parsley, ground cumin, ground coriander, ground cinnamon, smoked paprika, salt, black pepper, beaten egg, and breadcrumbs. Mix everything well until all ingredients are evenly combined. Your hands work great for this!
2. Shape the Koftas:
Now it’s time to shape the mixture! Roll the mixture into small meatballs, about 1 1/2 inches in diameter. You should have about 12-15 koftas, depending on size.
3. Cook the Koftas:
Heat the olive oil in a large skillet over medium heat. Once hot, add the koftas in batches, being careful not to overcrowd the skillet. Fry them until they are browned on all sides and cooked through, about 8-10 minutes. Remove them from the skillet and set aside on a plate.
4. Make the Yogurt Sauce:
In a medium bowl, whisk together the Greek yogurt, minced garlic, lemon juice, olive oil, salt, black pepper, and ground cumin until the sauce is smooth and creamy. If you’re using fresh dill or mint, gently fold it into the sauce now for some extra flavor!
5. Serve:
To serve, place the warm koftas on a plate and generously spoon over the creamy garlic yogurt sauce. Garnish with extra herbs if you like. Enjoy your delicious creation!
6. Enjoy with:
These koftas are fantastic served with warm pita bread, alongside some steamed rice, or paired with a fresh salad for a delightful meal!
This recipe yields tender, flavorful chicken kofta perfectly complemented by a tangy creamy garlic yogurt sauce. Enjoy your culinary adventure!

Frequently Asked Questions (FAQ)
Can I Use Ground Turkey Instead of Chicken?
Absolutely! Ground turkey is a great substitute for ground chicken in this recipe. It will still yield delicious koftas, though do keep in mind that turkey can sometimes be a bit leaner, so they may require careful cooking to avoid drying out.
How Do I Store Leftover Kofta and Sauce?
Store any leftover kofta in an airtight container in the fridge for up to 3 days. The yogurt sauce can also be stored separately in the fridge for about the same time. Just remember to reheat the kofta gently before serving. The sauce can be enjoyed cold as a dip too!
Can I Make This Recipe Ahead of Time?
Definitely! You can prepare the kofta mixture and shape the meatballs a day in advance. Store them in the refrigerator until you’re ready to cook. This can save you time and make meal prep a breeze!
What Can I Serve with Chicken Kofta?
Chicken kofta pairs wonderfully with various sides! Popular options include warm pita bread, couscous, or a fresh salad. You can also serve it atop rice or quinoa to create a more filling meal.