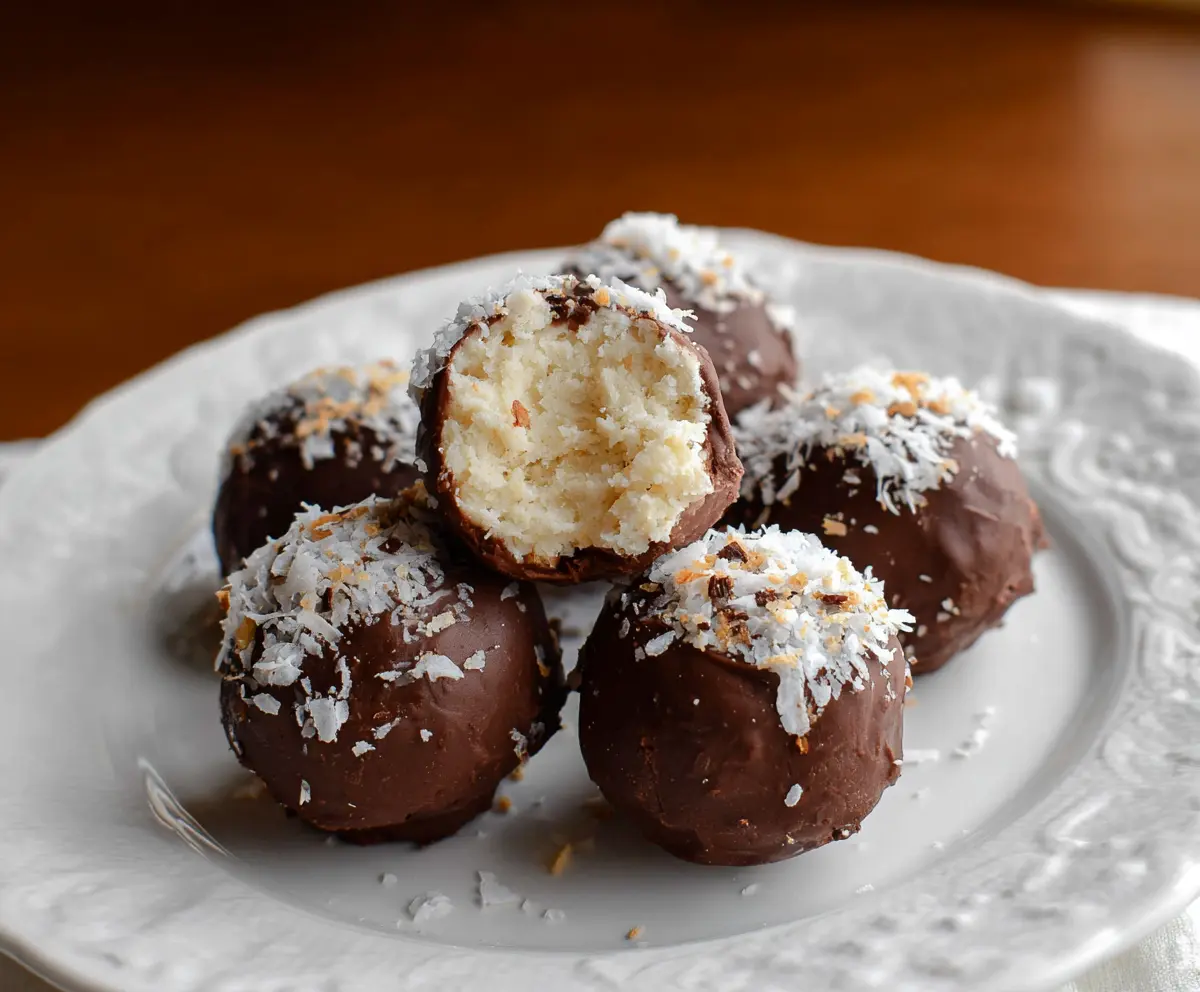
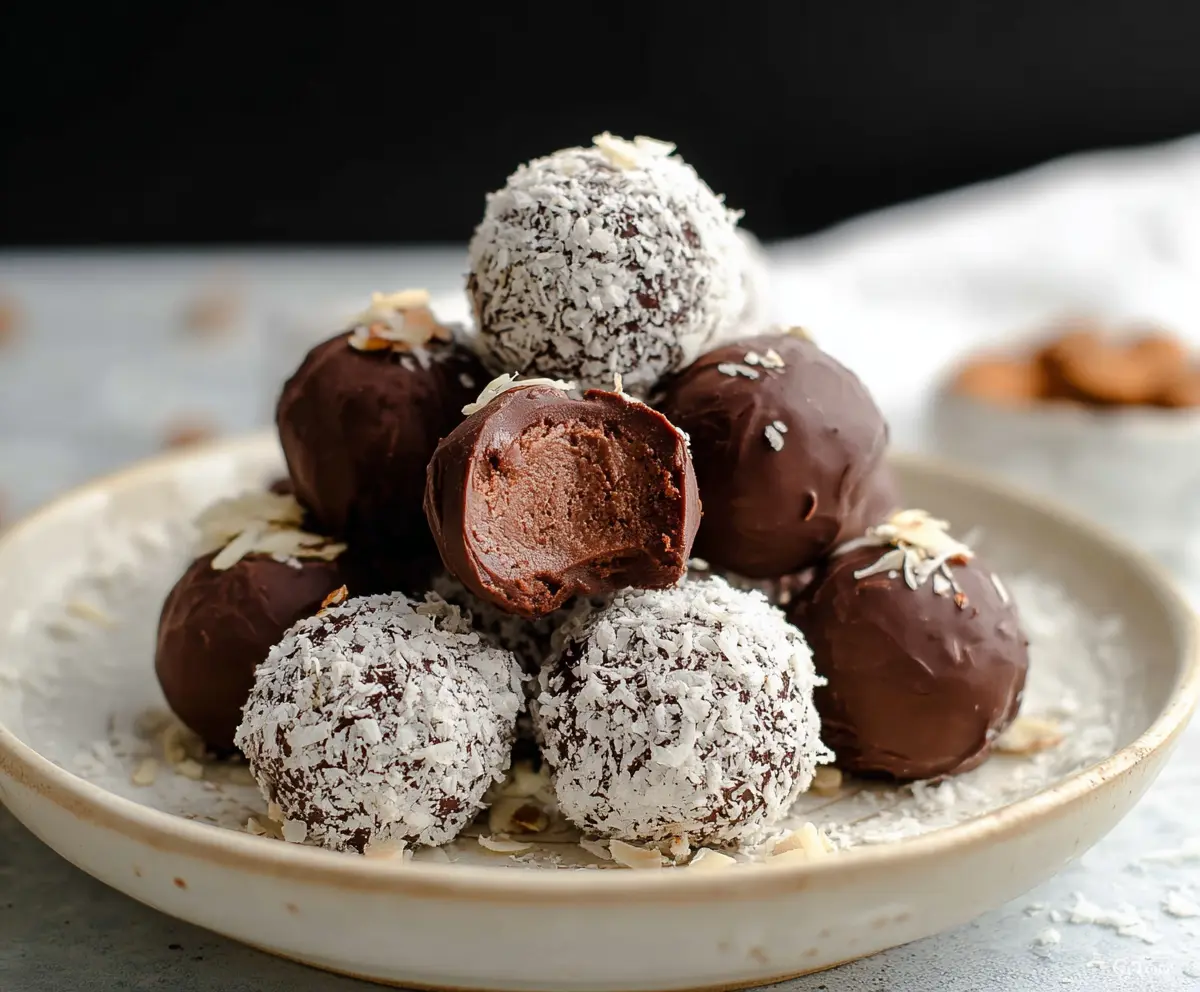
Cottage Cheese Truffles are a fun and tasty treat that are super easy to make! Just mix creamy cottage cheese with a bit of cocoa and your favorite sweetener, then roll into little balls.
These truffles are a unique twist on traditional sweets! They are light and satisfying, making them perfect for a snack or dessert. I love keeping a batch in the fridge for when a chocolate craving hits! 😍
Key Ingredients & Substitutions
Cottage Cheese: This is the star of the truffles! Opt for full-fat or low-fat cottage cheese based on your preference. If you’re dairy-free, you can try using silken tofu as a replacement for a similar texture!
Shredded Coconut: Unsweetened shredded coconut gives a great flavor. If you’re not a fan of coconut, you can use almond meal or crushed nuts for a different twist.
Powdered Sugar: This adds sweetness and helps bind the ingredients. You can substitute with honey or maple syrup, but it may alter the texture slightly.
Chocolate: Dark chocolate adds a rich taste, but milk chocolate or even white chocolate works well too. You can use dairy-free chocolate if needed. I love using good quality chocolate for a deeper flavor!
How Do I Properly Drain Cottage Cheese?
Properly draining the cottage cheese is crucial to avoid a soggy truffle. Here’s how:
- Use a fine mesh strainer or cheesecloth to allow excess liquid to escape.
- Let it sit for at least 30 minutes, or even longer, if needed, until the cottage cheese feels thick and not watery.
- Sometimes, giving it a gentle press with a spatula can help remove more moisture.
Once you have drained the cottage cheese, it will mix better with the other ingredients and help the truffles hold their shape!
What’s the Best Way to Melt Chocolate Without Burning It?
Melt chocolate carefully to avoid burning. Follow these steps:
- Chop the chocolate into small, even pieces for quicker melting.
- Use a microwave-safe bowl, and heat in short bursts (20 seconds), stirring in between. This helps distribute the heat evenly.
- Alternatively, use a double boiler: place chocolate in a bowl over simmering water. Stir until smooth.
Once melted, let it cool slightly before dipping the truffles to prevent the chocolate from melting too much!
How to Make Cottage Cheese Truffles
Ingredients You’ll Need:
For the Truffle Filling:
- 1 cup cottage cheese (well drained)
- 1 cup shredded coconut (plus extra for garnish)
- 3 tbsp powdered sugar (adjust to taste)
- 1 tsp vanilla extract
For the Chocolate Coating:
- 150 g (about 5 oz) dark or milk chocolate, for coating
- 1 tbsp coconut oil (optional, for chocolate coating)
How Much Time Will You Need?
This recipe will take about 30 minutes of active preparation time, but make sure to account for chilling time. You’ll need about 1 hour for the truffles to firm up in the fridge and an additional 30 minutes after coating for the chocolate to set. So in total, plan for about 2 hours, with most of that time just being the chilling portion.
Step-by-Step Instructions:
1. Drain the Cottage Cheese:
Start by placing the cottage cheese in a fine mesh strainer. Let it sit for at least 30 minutes to allow excess moisture to drain. This will help the truffles hold their shape.
2. Mix the Truffle Ingredients:
In a mixing bowl, add the drained cottage cheese, shredded coconut, powdered sugar, and vanilla extract. Mix everything together until the mixture is smooth and well combined. This is where the flavor comes together, so make sure it’s nicely blended!
3. Shape the Truffles:
Using your hands or a small cookie scoop, form the mixture into small round balls, about 1-inch in diameter. Place these on a parchment-lined tray. Once you’ve formed all the balls, pop them in the refrigerator for at least 1 hour to firm up. This helps them hold their shape during coating.
4. Melt the Chocolate:
While the truffle centers are chilling, it’s time to melt the chocolate. In a microwave-safe bowl, place the chocolate and optional coconut oil. Heat it in the microwave in 20-second bursts, stirring in between, until the chocolate is completely smooth and melted. Be careful not to overheat it!
5. Coat the Truffles:
Once the truffles have chilled and firmed up, dip each ball into the melted chocolate using a fork to coat thoroughly. Gently shake off any excess chocolate, then return the coated truffles to the parchment paper. Quickly sprinkle the tops with additional shredded coconut for a beautiful garnish before the chocolate sets.
6. Chill Again:
Place the coated truffles back in the fridge for about 30 minutes, or until the chocolate coating is firm. This step ensures your truffles have that perfect snap of chocolate when you bite into them!
7. Serve & Enjoy:
Once the chocolate has set, your Cottage Cheese Truffles are ready to be enjoyed! Serve them chilled, and watch as everyone loves this unique and delicious treat.
These truffles are not just a sweet indulgence; they are perfect for snacking or as a light dessert after any meal. Enjoy the creamy texture of cottage cheese mixed with the tropical flavor of coconut, all wrapped in rich chocolate. Happy cooking!
Can I Use Low-Fat Cottage Cheese Instead of Regular?
Absolutely! Low-fat cottage cheese will work just fine, though the texture might be slightly less creamy. Just make sure to drain it well to avoid excess moisture.
How Long Can I Store These Truffles?
You can store the truffles in an airtight container in the fridge for up to a week. Just make sure to separate layers with parchment paper to prevent sticking!
Can I Freeze Cottage Cheese Truffles?
Yes, you can freeze them! Place the truffles in a single layer on a baking sheet to freeze individually, then transfer to an airtight container. They can be kept frozen for up to 3 months. Just thaw them in the fridge before serving.
What Can I Substitute for Shredded Coconut?
If you’re not a fan of coconut, you can use crushed nuts like almonds or hazelnuts for a different flavor or almond meal for a fine texture. Just remember to adjust based on allergies or dietary preferences!