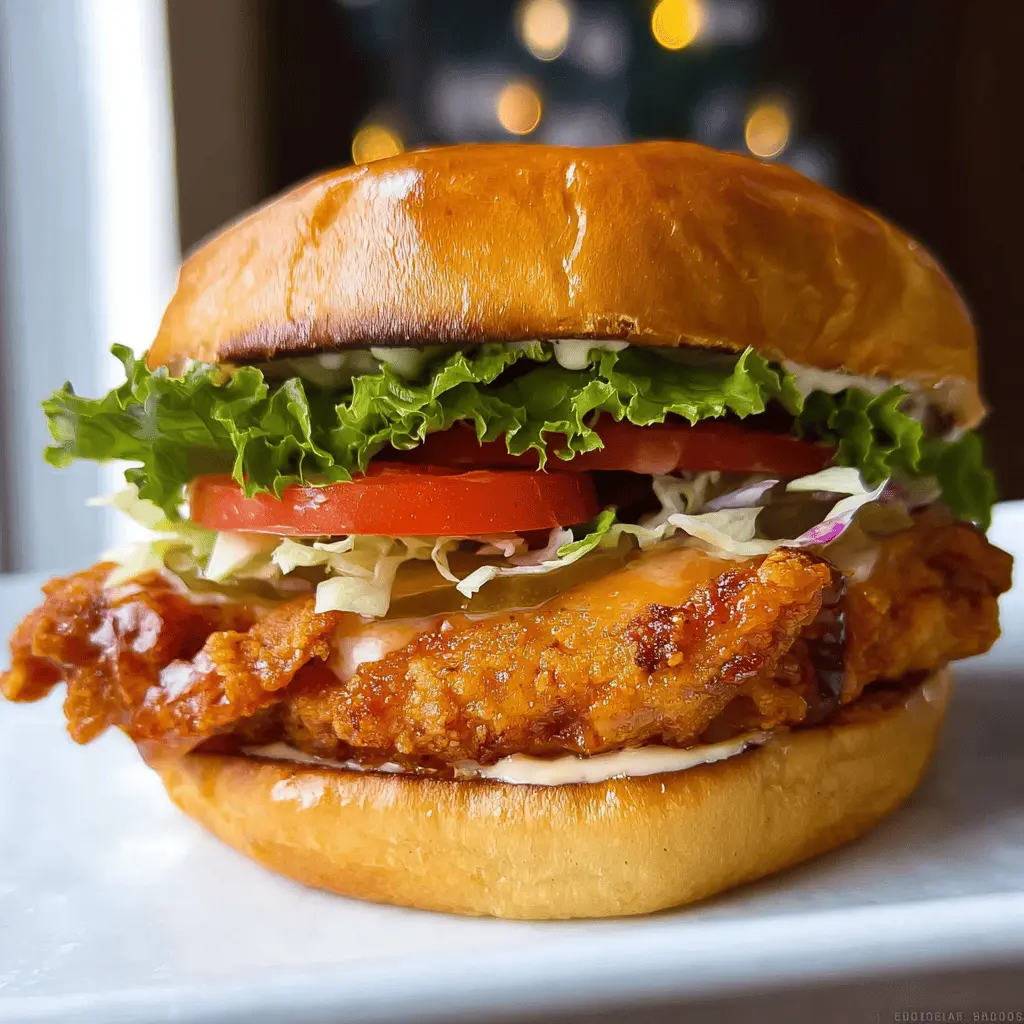
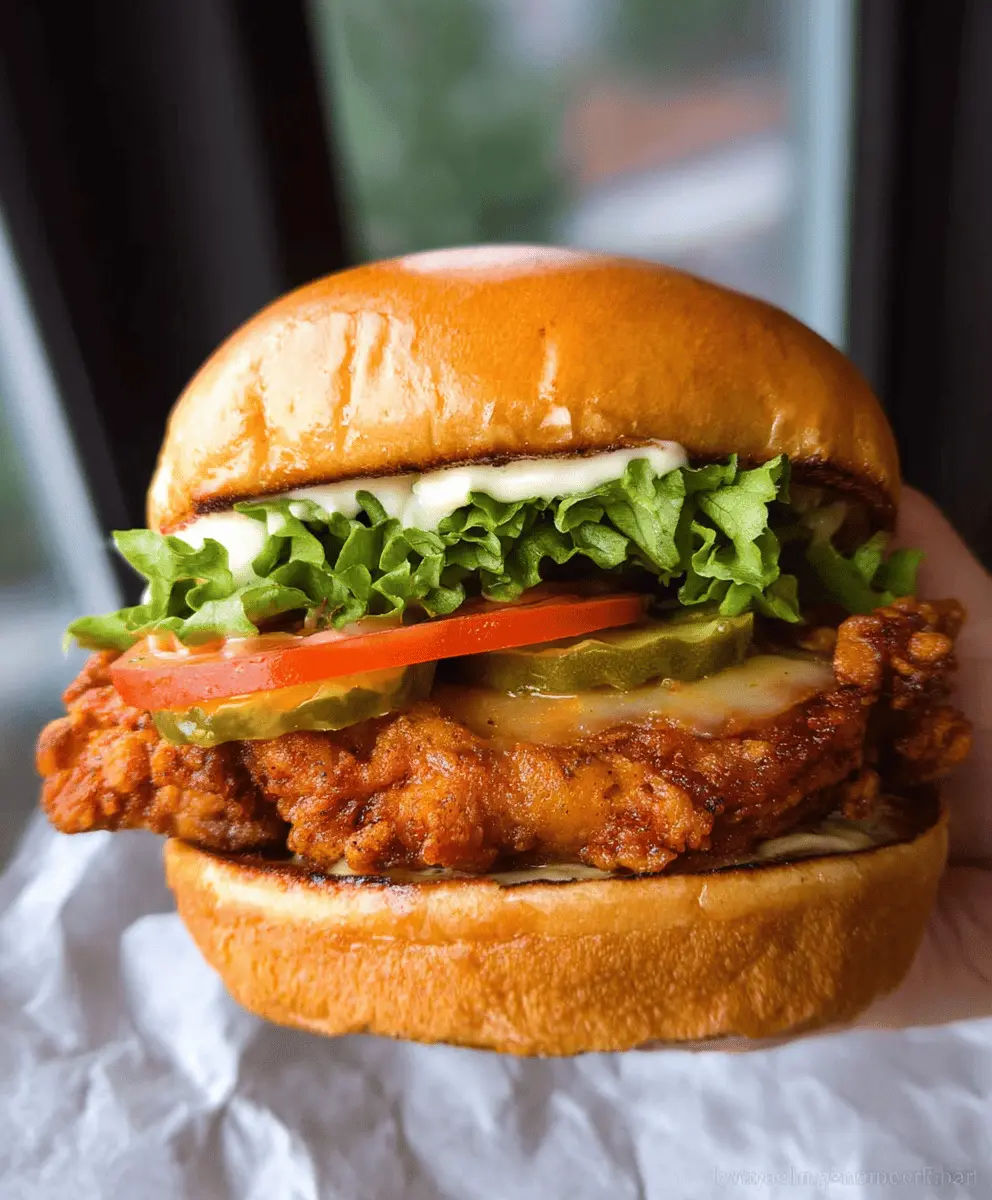
This Easy Crispy Chicken Sandwich features a golden, crunchy chicken patty nestled in a soft bun. It’s a tasty treat that’s simple and quick to whip up!
Honestly, there’s something magical about biting into that crispy chicken! I love adding pickles for an extra zing. Trust me, it takes this sandwich to the next level! 😄
Key Ingredients & Substitutions
Chicken Breasts: Boneless and skinless chicken breasts work great for this recipe. If you’re looking for a lighter option, you can use chicken thighs, which are juicier and more flavorful. They might require a slightly longer cooking time.
Buttermilk: Buttermilk adds moisture and tenderizes the chicken. If you don’t have any, mix 1 cup of milk with 1 tablespoon of vinegar or lemon juice and let it sit for about 10 minutes to create a substitute.
All-Purpose Flour: This is essential for a crispy coating. If you’re gluten-free, consider using a gluten-free flour blend or almond flour for a different flavor and texture.
Spices: I love adding paprika, garlic, and onion powders for flavor. Feel free to tweak the spice levels according to your taste. You can add more cayenne for heat or switch to Italian seasoning for a different flavor profile.
Buns: Brioche buns give a nice buttery flavor. If you want something healthier, try whole wheat buns or even lettuce wraps for a low-carb option!
How Do You Achieve the Perfect Crunchy Coating?
Perfecting the crispy coating is key for a delicious sandwich. Here’s a simple guide to nail it!
- Use cold buttermilk for marinating; it helps the chicken stay tender while frying.
- Dredge the chicken well in the flour mix. Don’t rush; pressing down will help it stick better.
- Fry in hot oil (around 350°F). If the oil isn’t hot enough, the coating will soak in oil and become greasy.
- Allow the cooked chicken to rest on a wire rack after frying. This keeps the coating crispy instead of soggy.
By following these tips, you’ll get that crispy texture everyone loves! Enjoy your cooking!
Easy Crispy Chicken Sandwich
Ingredients You’ll Need:
For the Chicken:
- 2 boneless, skinless chicken breasts (pounded to even thickness)
- 1 cup buttermilk
- 1 large egg
For the Coating:
- 1 cup all-purpose flour
- 1 teaspoon paprika
- 1 teaspoon garlic powder
- 1 teaspoon onion powder
- 1/2 teaspoon cayenne pepper (optional, for a bit of heat)
- 1 teaspoon salt
- 1/2 teaspoon black pepper
For Frying and Assembly:
- Vegetable oil, for frying
- 4 sandwich buns (brioche buns recommended)
- Lettuce leaves
- Tomato slices
- Pickle slices
- Mayonnaise
How Much Time Will You Need?
This recipe takes about 15 minutes to prepare and marinate the chicken, plus 15-20 minutes for cooking and assembling. Don’t forget the 30 minutes to marinate the chicken in buttermilk for juicy and tender goodness! The total time you’ll need, including marination, is approximately 1 hour.
Step-by-Step Instructions:
1. Prepare the Chicken:
Start by pounding the chicken breasts to an even thickness of about 3/4 inch. This helps them cook evenly and stay juicy. You can use a meat mallet or a rolling pin to do this gently.
2. Marinate:
In a medium bowl, whisk together the buttermilk and the egg until combined. Add the chicken breasts to the mixture, making sure they are fully submerged. Cover the bowl and refrigerate for at least 30 minutes, or up to 4 hours for maximum flavor.
3. Prepare the Coating:
In a shallow dish (like a pie plate), mix the all-purpose flour with paprika, garlic powder, onion powder, cayenne pepper, salt, and black pepper. This seasoning blend will give your chicken that amazing crispy flavor!
4. Heat the Oil:
In a large skillet, pour about 1 inch of vegetable oil and heat it over medium-high heat. You want the oil to reach 350°F (175°C). If you don’t have a thermometer, you can test it by dropping a small bit of the flour mixture into the oil; it should sizzle right away.
5. Coat the Chicken:
Take one chicken breast out of the buttermilk mixture, allowing the excess to drip off. Dredge it in the flour mixture, pressing down firmly to make sure it sticks well. Shake off any excess flour before frying.
6. Fry the Chicken:
Carefully place the coated chicken in the hot oil. Fry for about 3-4 minutes on each side, or until golden brown and cooked through. The internal temperature should reach 165°F (74°C). Once cooked, remove the chicken and let it drain on a wire rack or paper towels to keep it crispy.
7. Assemble the Sandwich:
If you like, lightly toast the sandwich buns in a toaster or on a griddle. Spread mayonnaise on both the top and bottom buns. On the bottom bun, layer lettuce leaves, followed by the crispy chicken breast, sliced tomatoes, and pickles. Finish with the top bun to complete your sandwich.
8. Serve Immediately:
Enjoy your juicy and crispy chicken sandwich right away! It’s fantastic served with fries or a salad on the side. Bon appétit!
FAQ for Easy Crispy Chicken Sandwich Recipe
Can I Use Frozen Chicken Breasts for This Recipe?
It’s best to use fresh or thawed chicken breasts for optimal flavor and texture. If you’re using frozen chicken, make sure to completely thaw them in the refrigerator overnight before marinating. Never cook chicken from frozen without thawing first, as it can lead to uneven cooking!
Can I Make This Sandwich Gluten-Free?
Yes, you can! Substitute the all-purpose flour with a gluten-free flour blend or almond flour. Ensure the other ingredients, like the buns, are also gluten-free to keep the entire sandwich compliant!
How Do I Store Leftover Chicken?
Cool any leftovers completely, then store the crispy chicken in an airtight container in the refrigerator for up to 3 days. To keep the coating crisp, avoid stacking the chicken. Reheat in the oven at 350°F (175°C) for about 10-15 minutes for the best texture!
Can I Prep the Chicken Ahead of Time?
Absolutely! You can marinate the chicken in buttermilk and store it in the refrigerator for up to 4 hours or overnight. Just make sure to coat and fry it fresh when you’re ready to eat for that delicious crispy texture!